

Introduction: Simple 3 Button Synthesizer With Arduino Uno and Custom Enclosure


What you will need:
-Arduino Uno 1x
-Jumper Cables
-Push Buttons 3x
-4ohm 3W Speaker 1x
-Solder less Breadboard 1x
Later on you will need:
-Solderable Circuitboard 1x
-Soldering iron 1x
-1/4in thick wood 1x
-Wood glue
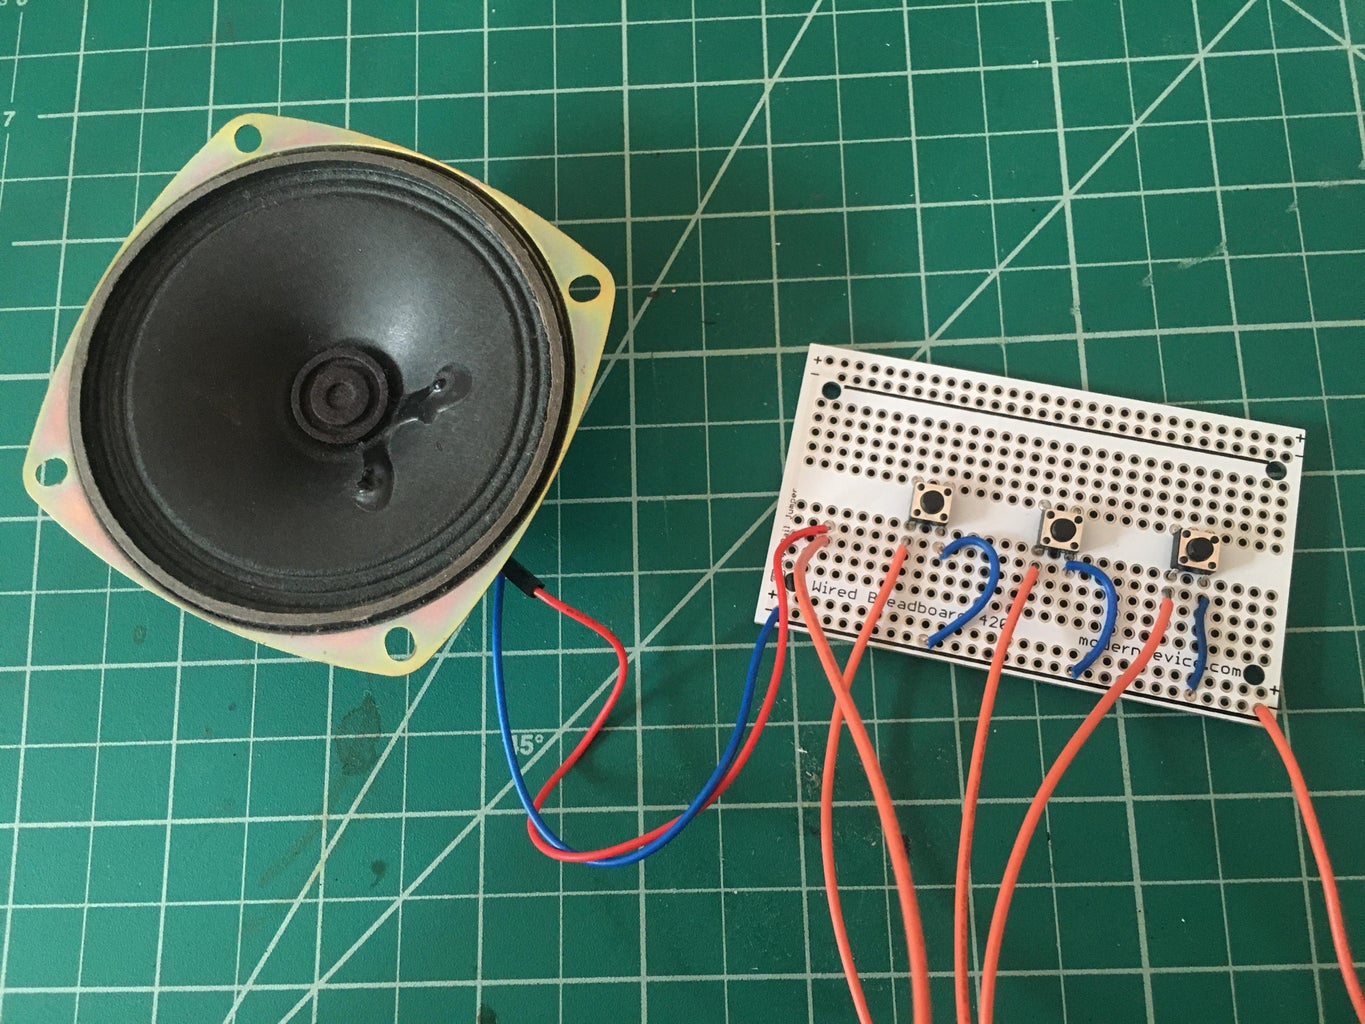
Step 1: Prototyping the Circuit on a Breadboard


The first step will be to make the circuit on a breadboard to make sure that it works and to understand the wiring. Big shoutout to Chip Phonic on Youtube: https://www.youtube.com/watch?v=x07FF-A67Nc. The hardware and software in this project are his design. I highly recommend you guys check out his video because he makes the circuit quite easy to understand.
The circuit is not very complex, all you are doing is connecting the positive side of the buttons to pins 1, 2, and 3 of the Arduino, then connecting the negative sides to the negative rail on the breadboard which then goes to ground on the Arduino. Next the positive wire on the speaker goes to pin 13 on the Arduino and the negative wire connects to the negative rail which then goes to ground.
Next you will upload the code to the Arduino, the code will make the wiring make much more sense. I really would recommend watching Chip Phonic's video as he makes the circuit and code make a lot of sense. I have attached the code below and it is titled button.ino. Just open up the sketch in the Arduino software and upload it to your Arduino.
Once the code is uploaded to the Arduino you should have sound coming through the speaker. You can play with each button's sound by altering the tone values and the delay. You can also continually stack tone elements in order to create arpeggios. Along with this you can add more buttons by just altering the code and adding a buttonFour and so on.
Attachments

Step 2: Soldering the Circuit

Once you have successfully created the circuit on a breadboard you will now want to solder it to make it permanent.
Same principle here just take the circuit you made on the breadboard but solder the connections on a solderable board.
I didn't want the Arduino Uno to be sitting inside the housing with the other components so I made some longer wiring and used heat shrink to give them male ends to insert into the Arduino's pins. (those are the orange wires).
Step 3: Create Some CNC Tool Paths in Rhino for the Enclosure


Open up Rhino and Draw some tool paths with the poly line tool. You could also use Illustrator. In my case I was making a small wooden house. Export the file as a DXF
Bring the DXF into your CNC software and make some tool paths. In my case I was using Carbide Create but fusion 360 would also work. Save the tool paths as Gcode.
I then CNC'd the components but honestly this was a bit excessive, a laser cutter would also work great, or even just printing out the DXF and then cutting the enclosure out with a bandsaw. I intentionally did not make a bottom because I wanted to make the bottom plexiglass. I will attach the DXF below
Attachments
Step 4: CNC the Housing


I was using a piece of 1/4 in birch plywood and a 1/8 in bit. Be careful while using the CNC and always wear proper PPE
After CNCing some light sanding was required but you see where this is going :)
Step 5: Polyurethane and Glueing Together the Enclosure


First I coated each piece of the enclosure with 2 layers of polyurethane waiting about 3 hours in between coats and then letting the second coat dry overnight. Next I used wood glue to attach each piece of the house together clamping the pieces using tape. Leave the tape on for at least an hour or for best results just leave them overnight.
Quick side note: in the DXF I messed up the size of the hole for the speaker which resulted in me enlarging the hole slightly by hand using a jeweler's saw. Due to this the hole for the speaker was no longer a perfect circle. This has since been fixed in the DXF:)
Step 6: Sand the Entire Enclosure and Then Wire Everything


I then sanded the entire enclosure on a disk sander. I was going to add another coat of polyurethane but I actually kind of liked how the sanding looked after. Next wire everything through and put the buttons in place. I initially attached them with duck tape but I HIGHLY recommend NOT doing this. I cannot stress this enough. The duck tape will not be strong enough when you push the buttons down repeatedly. Epoxy the circuit to the inside of the enclosure instead. Next drill some holes for the speaker and screw it on!
Step 7: Cut and Epoxy the Plexiglass to the Bottom


I then cut the plexiglass for the bottom down to the necessary dimensions on a band saw and then glued it in with some five minute epoxy. This is the last step as far as the construction goes. Next you should begin to play to play your instrument!
Step 8: Play Your Instrument


It should now be fully functional and ready to go. Enjoy! :)


