

Introduction: Simple Raspberry Pi Weather Station


This instructable teaches you how to make a simple weather station with your Raspberry Pi. As weather conditions become increasingly difficult across the world, it's a good idea to have a system for easily keeping tabs on the forecasts. This is also a great beginner's project and can be adapted to create a display for just about any type of information and with many different materials.
Things you will do in this project:
- Control LEDs with your Pi
- Access weather data using Python
- Solder fiddly bits of wire
- Some (very) basic woodwork
Supplies
Materials
- Some scrap wood
- Raspberry Pi Zero W
- LEDs (I used eight, but you may want more or less)
- Adhesive labels (optional)
- Wood adhesive
- Hot glue (optional)
- Wire and solder
- 1K (or similar) ohm resistor
- Screws to mount the Pi
Tools
- Soldering iron (and peripherals)
- Dremel (or something else to cut and shape the display board with)
- Drill
Step 1: Craft the Display Board
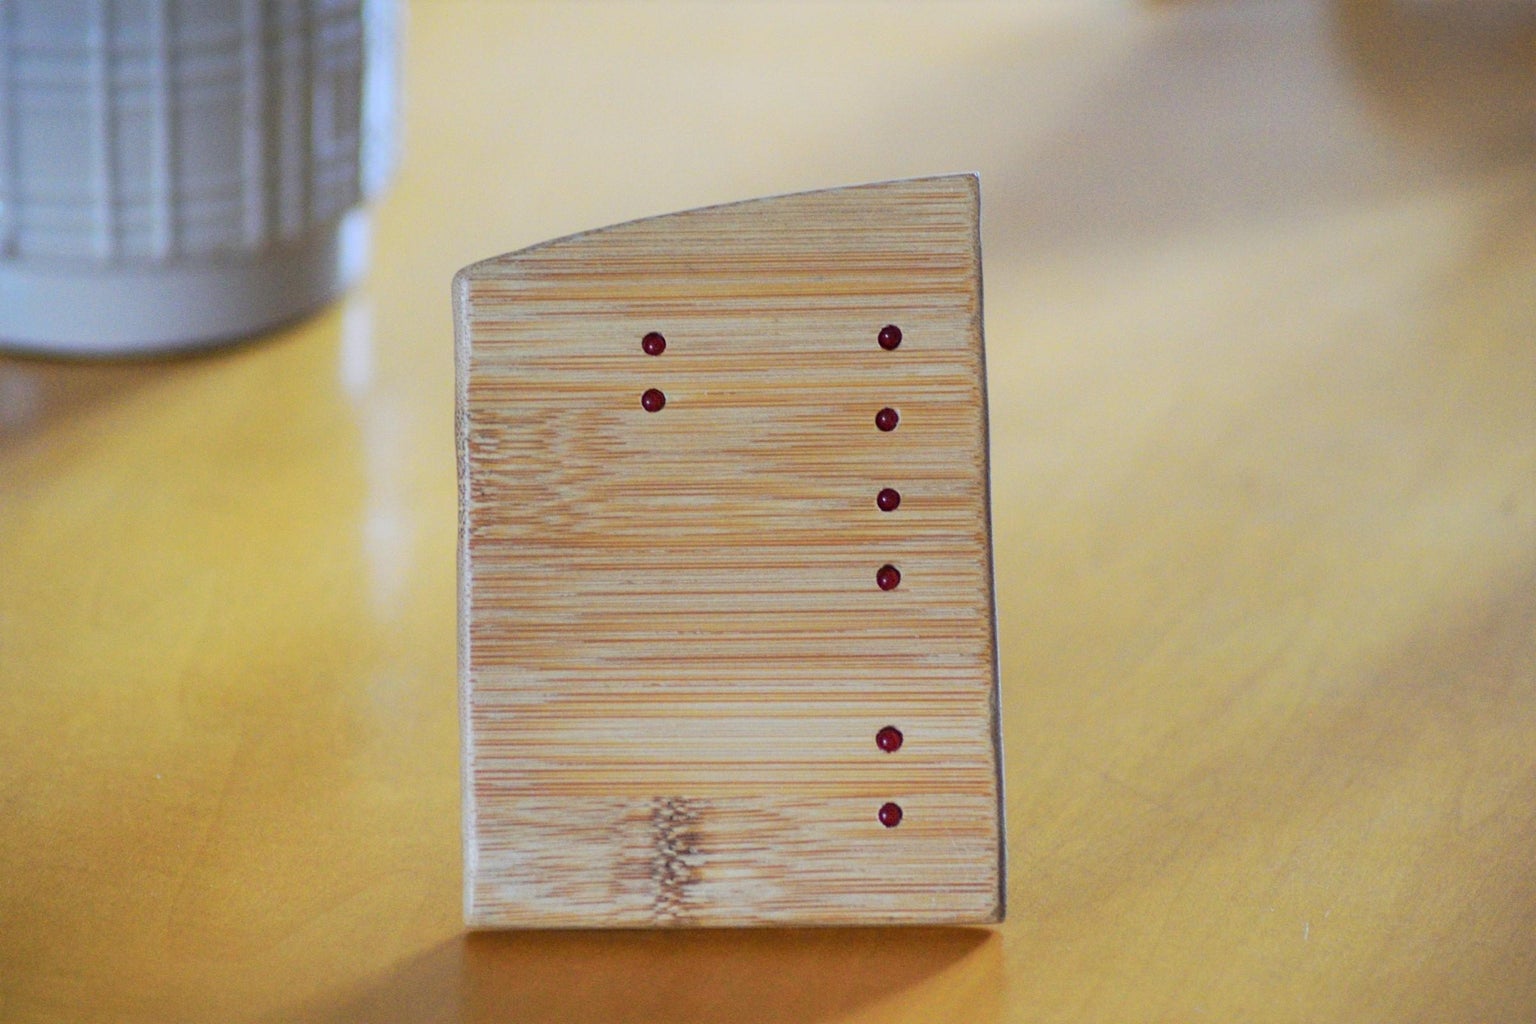

The display board for this project is essentially a small wooden panel with a kickstand and holes drilled to fit 8 LEDs.
I used the remnants of a chopping board that had split in half to create mine.
1. Start by cutting the board to size. It's up to you how big it is, just make sure it's large enough to fit the number of LEDs you need and to mount the Pi.
2. When this is done use a pencil to mark where the LEDs should be, making sure to leave room for the Raspberry Pi and kickstand. Try to leave a good margin around the edge of the board to avoid the risk of the wooden splitting when you start drilling the holes.
3. Now you can drill the holes. Choose a drill bit that matches the diameter of your LEDs. Ideally the LEDs will be held in just using a tight fit, so start of by using a smaller drill bit and then enlarge the holes if necessary. Make sure to test the holes by fitting the LEDs in and then removing them.
4. Once this is done, give everything a good sanding down. You may also wish to curve the edges of the panel to give it a softer look. I did this with my Dremel, but I expect you could just use sandpaper with some patience.
5. Use some more scrap wood to create a kickstand. I used my dremel to shape this, but again some sandpaper and patience should do the trick. Once you've crafted it use some wood glue to fit it into place at the bottom centre of the panel. I used some blu tack to hold it in place and test the position before glueing it on.
6. (Optional) You can now apply some varnish to the board to give it a nicer finish. Applying it is simple - just brush it over lightly, let it dry, and repeat a couple more times.
7. Once it's completely dry, insert the LEDs into the drill holes. It may be useful to be consistent in how you position them to ensure that you get the polarity right when wiring everything together. For instance, I fitted them so that all of the positive legs (the longer ones) came out at the top. If your LEDs don't fit completely snuggly you can use a bit of hot glue to keep them in place.
8. Now you can also mount the Pi. We'll be removing it to do the soldering, but it's good at this point to know exactly where it will sit. I used some screws that came with a case and screwed them directly into the board.
Step 2: Wire the LEDs to the Raspberry Pi


To make it compact and neat, I've soldered wires directly to the Pi's GPIOs. If you have a header, however, you can use jumper cables. In any case, here's how to wire everything together.
1. Connect all of the negative (short) legs of the LEDs to a single 1K ohm resistor. Connect the resistor to any one of the Raspberry Pi's ground pins.
2. Connect the positive (long) legs of the LEDs to the GPIO pins indicated in the image above. You do not need to use these pins specifically, but you will need to edit the code I'll provide if you wish to use different pins. If you're soldering, I recommend soldering lengths of wires to the GPIO pins first, then attaching the Pi to the display board and cutting the wires to size.
3. Once you've done this you can neaten it up by cutting off any excess wire from the LEDs.
Step 3: Load the Code

Now you're ready to upload the code onto the Pi! The code runs using a Python wrapper for the Open Weather Map. You'll need to make a few tweaks to get it running, so follow the instructions below and look through the comments in the code.
1. Download the attached file onto your Raspberry Pi
2. Install the PyOWM library onto the Pi by entering the following command into the terminal:
sudo pip3 install pyowm
3. Visit the Open Weather Map website, create an account, and subscribe for a One Call API (the free version includes everything you need). The API will generate a key that will be used in the Python script to access the data from Open Weather Map.
4. Edit the Python code to include the API key you generated and the lattitude and longitude for your location. You may also want to edit some of the other variables, like the temperatures that will trigger specific LEDs.
5. Run the code and hopefully your LEDs will start blinking!
Attachments

Step 4: Label the LEDs

The final step is to create labels that show the viewer what each of the LEDs mean. I wanted the display board to be adaptable for different purposes so I've used transparent stickers, but you could write labels or draw icons directly onto the display board.
Step 5: Enjoy Being Appropriately Dressed for All Weather!

You're done! Put it somewhere easily visible and get into the habit of checking it before you leave the house.
Here are some ideas for how you could develop this project further:
- Edit the code to display other types of information, like schedule reminders, to-do lists, indoor environmental conditions, web notifications, basically any information with a limited number of variables.
- Add a button that cycles between different displays
- Use a whiteboard or cork board instead of a wooden panel to make it even easier to rewrite the labels
- Integrate it into a old piece of furniture such as a cupboard door or bedside table
Add a speaker or buzzer for audio alerts
Thanks for viewing this project, let me know how you get on!

Participated in the
First Time Author Contest


