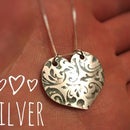
Introduction: Turn Clay Into Silver Earrings!!!
So I've recently been dabbling in the art of PMC sculpting and after the couple months of jewelry related contests I have decided to create my very first instructables tutorial.
A little back story to wet your whistle;)
PMC was created by Japanese scientist back in the 1990s. The goal was to fuse a pliable organic binder with precious metal particles such as bronze, silver, gold etc. The finished product was a clay like form that had the same working properties of ceramic clay. After the clay fully dries in the desired shape, it is then fired at the required temperature. During the firing stage the organic binder burns away and sinters the particles into solid metal.
Step 1: Gather Your Materials Fooz
pardon my choice of words. Just a list of stuff that i used to create my earrings
PMC3
Ziploc Bag
X-acto knife
cardstock
600 grit sand paper
filing tool
butane torch
empty Altoids tin
Convection Oven
timer
4 gift cards
coconut oil
tongs
silver jump rings
Cardboard box
silver earring hooks
fire brick
Rolling Pin
Silhouette Cameo
My Macbook
Step 2: Cameo Used Cut and Its Super Effective
Now is the time to cut out the shape that your going to use as your template. Since it was my friend's birthday I decided to make her a pair of Texas earrings since shes from Austin. So I booted up my sister's Silhouette Cameo, which is an automated cutting machine. Found a Texas vector and opened it in my Silhouette Studio program. After a bit of tweeking I had my sister's Silhouette Cameo cut a piece of cardstock in the shape of Texas. Now when you fire the PMC3 it shrinks about 12-14% so make sure the size of cardstock template will compensate for this.
Optional: You don't really need a Silhouette Cameo for this project. Just scale and print the desired shape on cardstock. Then use a pair of scissors to cut it out.
Step 3: Cut and Dry
Once you have your Texas template, its time to roll some clay out. Begin by laying out a Ziploc bag and lightly coating the Ziploc and your hands with coconut oil. PMC tends to dry rather quick so make sure your ready to move quickly. Pull a piece of clay out and roll it into a ball. Using your fingers flatten the clay a bit. This will make rolling it out a bit easier. Take your 4 gift cards and stack them 2 by 2 next to the clay. The cards are used to measure the thickness of the rolled out clay. Now fold the other half of the Ziploc over the clay. Take your rolling pin and very carefully roll over the cards. Make sure that the clay spreads out evenly so that you can fit your template on it.
At this point, take your X-acto knife and begin cutting around the template. Try to keep the blade vertically straight to avoid misshaped edges. Then carefully peel the excess clay of and store it properly. The template should peel off quite easy as well. Grab your empty Altoids tin and lay it on top your clay piece. Carefully grab the Ziploc, clay and Altoids tin and flip it over. If done correctly the clay piece will stick to the tin slightly and you'll be free to proceed to drying the clay. While one piece is drying on the side, I repeat the entire process again to form an identical piece.
I guess you don't really need a convection oven for this project as the clay can air dry. But it will drastically cut your drying time from 24hrs to 1-2hrs. So preheat your oven temp to 200 degrees fahrenheit and pop your clay in the oven for like 2hrs. To check if your clay is completely dry place it on a mirror for 30 seconds while its hot. If there is condensation after the clay is removed then its not dry.
Step 4: Sanding and Carving
Once your clay is dry it'll be time for some sanding. Simply grab one of your pieces and lay it flat on the sanding block. Then slowly begin sliding it against the sanding block in a circular motion. Make sure you evenly sand it or else you'll end up with different thicknesses across your piece. After you've leveled it out a bit proceed to sanding the edges of the piece. I like to use a hand file and move in fluid motions towards one direction. Be careful as the piece could snap under too much pressure. Always remember to collect all the particles you sand off and save it for future projects. Finally smooth out the piece with some 600 grit sand paper.
Since my friend is from Austin I decided to carve a little heart out to mark its location. I took my X-acto knife a drilled out two holes next to each other. Then carefully cut a V connecting the 2 holes to make a heart. Take your time with this part of the project as it is very easy to ruin your piece. After I had repeated the process on the second piece, I drilled out a hole at the top corner for the earring hook. Make sure you drill the hole big enough to compensate for the shrinkage rate.
Step 5: Fire That Baby Up!!!
Its time to fire the pmc clay. Place one of your pieces on the fire brick and make sure your butane torch is full. Get a timer ready and set it to 10min. Grab a bowl of water and set it on the side for quenching the piece after its fired. Just to be safe please make sure your in a well ventilated area to avoid any fume build up. I put some cardboard under the fire brick for safety and then turn the lights down. Turn your torch on and begin firing the piece. I like to torch it in a circular motion to make sure the piece is evenly fired. After a few seconds the piece will catch on fire, don't be alarmed as this is just the organic binder burning away.
Once the fire has subsided start your timer. The pmc should be kept above a certain temperature the whole time. You'll want to keep the color around a peach to cherry hue. At one point the clay might begin to curl a bit, just turn the flame away from the piece for a few seconds. Make sure to keep the constant circular motion and temperature till the timer goes off. After the 10min timer carefully pick up the piece with some tongs and drop it into the bowl of water. I leave it in there for a bit while I clean up my work station. When you pull out the piece you'll notice its kind of a chalky color and of course the shrinkage is apparent.
Step 6: Finishing Up
The project is almost over, next is to polish your silver pieces. First thing is to remove the layer of chalk off so take one of your pieces and lay it on the sanding block. While putting some pressure, begin sanding it side to side. You'll begin to see some luster after a bit of sanding. Continue to sand until both pieces are nice and shiny. At this point i just slapped on some silver jump rings and earring hooks and called it a day. If you look closely you can see come imperfections in the silver. This is a result of over firing the pmc and is the reason why its so important to keep the silver at the right temp the entire time. Now you could polish the pieces to a mirror shine but like how they looked as is. My friend ended up loving the earrings and I enjoyed making them so much I made another pair the same day.
Step 7: Big Thanks
Just wanted to say thanks to everyone who has contributed their knowledge to the community here. Everyone has been so inspiring. Please let me know if there are any ways to improve my tutorials as I hope to continue posting new projects. Don't forget to vote on your favorite instuctables:)

Runner Up in the
Earring Challenge

Participated in the
Crafting 101

Participated in the
Mind for Design


