

Introduction: The Mad King's Clock Tower


Don't know how many Guild Wars 2 fans are out there, this is for those that play GW2.
More for those that get really frustrated around October during the Shadow of the Mad King festival, where we have that challenging Jump Puzzle called: The Mad King's Clock Tower.
This is a model I have made of it on my 3D printer. About 850mm Tall.
The main structure is printed using PLA.
The actual puzzle parts I have drawn but not done yet, these are small parts I think would be best printed with a resin printer, which I do not have. Also I need to work out some way of supporting them.
I have took some liberties with some detail as it is to be printable using FDM (Fused Deposition Modelling).
I have done inside the bell room.
Supplies

A 3D Printer is required to print the parts.
I have used PLA.
Attachments
 Start_Tower.stl
- Gates.stl
- Bridge_Bottom.stl
- Bridge_Top.stl
- Clock_Tower_A.stl
- Clock_Tower_B.stl
- Clock_Tower_C.stl
- Hole_Backing_A.stl
- Hole_Backing_B.stl
- Hole_Backing_C.stl
- Bellfry.stl
- Spire_Print.stl
- Spire.stl
- Bell.stl
- Bell_Support.stl
- Diagonal_Brace.stl
- Frame_A.stl
- Frame_B.stl
- Frame_Bx.stl
- Frame_C.stl
- Frame_Cx.stl
- Horizontal_Brace.stl


Step 1: Print the Parts


What can I say: "Print the parts".
Most of the Parts are printed the right way up, some need printing upside down, what ever the way I thought it best I do Images of the way I printed the Parts.
- Nothing should need supports.
- The Spire: Spire_Print.stl has supports drawn in, which will need carful removal when finished.
- I have done one without supports Spire_Print.stl if you want to do support yourself.
- Normally I print parts with a wall thickness of 1.6mm (4 nozzle widths)
- Because these are just ornaments and to save some time printing, I reduced the wall thickness to 0.8mm (2 nozzle widths)
Step 2: A Few Days Later

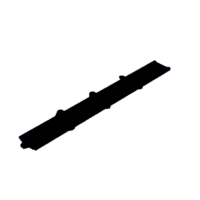
At each end of the bridge and on the sides of the towers are holes.
- These holes are for placing magnets or dowels.
- 3mm diameter by 6mm long magnets can be placed inside these holes to hold the bridge in place.
- Or 3mm diameter by 12mm long dowels can be used.
The reason I have made the Bridge in two pieces:
- It made it easier to print.
- I have put channels inside to lay cables for LED's. To do at a later date.
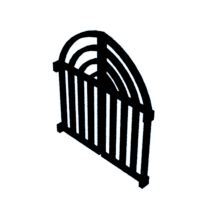
Step 3: Gate

The Gate needs gluing in place.
Step 4: Clock Tower B

Clock Tower Part B has two holes, these are filled with Parts:
- Hole_Backing_A.stl
- Hole_Backing_B.stl
The lower hole filled with "Hole_Backing_A"
Both parts should just push firmly in place.
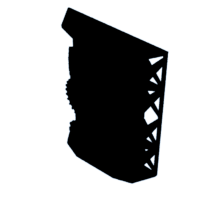
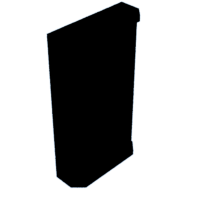
Step 5: Clock Tower C

Clock Tower Part C has one hole filled with:
- Hole_Backing_C.stl
This part should just push firmly in place.
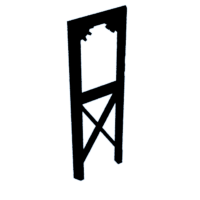
Step 6: Belfry

Inside the Belfry I have put some detail.
Inside the Belfry requires parts:
- Bellfry
- Bell_Support
- Bell
- Diagonal_Brace
- Frame_A
- Frame_B
- Frame_Bx
- Frame_C
- Frame_Cx
- Horizontal_Brace
The picture shows how they fit.
There are small ledges for the Bell_Support to fit on/in.
- I would fit this first.
The frames should push into the holes in the floor.
- I would make up/glue all the framework first, before fitting.
The bell will require glue.
- I fit this last.
I used some strong tweezers to aid fitting these part.
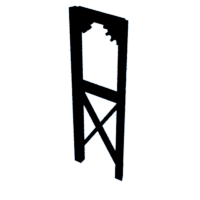
Step 7: Fitting the Belfry

The Belfry should just drop in the top of Clock_Tower_C.
- It is a very odd shape and has to be aligned correctly for it to fit.
The Belfry also acts as a location holder for the Spire when fitted.
Don't glue the Belfry or the Spire so you can still lift them apart to show the internals.
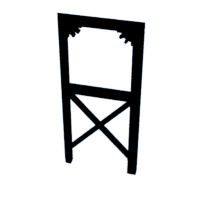
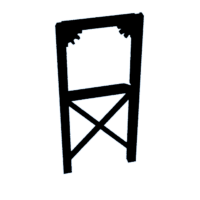
Step 8: Layout

This is just to show all together.
Step 9: The Puzzle


I have not made the Puzzle yet.
- I have drawn them, well one of them, there is actual two in the game, You go so far on one, then jump down to the second, at the time you jump, the first disappears. Make the puzzle longer.
- Still thinking of what to make the parts out of.
- Still thinking how I would make them rotate about the tower.

Participated in the
Fandom Contest


