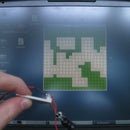
Introduction: TiltKey- Write by Tilting
- Flat is the letter a.
- 45 degrees forward is the letter b.
- 180 forward is c.
- 45 to the right is i.
- Shake for space.
- Flat is enter. (Shift for space)
- 45 degrees forward is the up arrow. (Shift for w)
- 180 forward is 0. (Shift for ")")
- 45 to the right is left arrow. (Shift for a)
- Shake for backspace.
When I first started working on this project, I had faith in it being more efficient than a regular keyboard. People tried to bring me down, saying that it would never be useful. They were 100% correct. The TiltKey may sound like a revolutionary new invention, but it is incredibly inefficient and useless. It often takes longer than 45 seconds to find the letter you want to write. That does not mean that all my hard work went to waste, or that you should not try this project. It was incredibly fun to make, it's sort of fun to use, and is just a very cool thing to have, even though it may not be practical.
I tried to make a video of it, but it did not come out very good. This video is evidence that you need two hands to operate a TiltKey:
Step 1: Acquire Supplies
Here's what you need to build your very own TiltKey:
1 Arduino Leonardo
1 16x2 LCD
1 MMA7361 Triple Axis Accelerometer
1 10k Potentiometer
3 12mm Buttons
3 10k Resistors
1 Breadboard
Wire
A Box
Once you obtain these supplies you can begin.
Step 2: Wire Accelerometer
First you must wire the accelerometer. As you do this you must keep in mind that the accelerometer runs on 3.3 volts. If you try to hook it up to 5 volts, your face will melt off and your eyes will explode.
With that in mind, here are the connections you need to make:
VCC to 3.3v.
GND to ground.
ZOUT to analog pin 2 on the Arduino.
YOUT to analog pin 1 on the Arduino.
XOUT to analog pin 0 on the Arduino.
SLP to 3.3v.
Diagram courtesy of Fritzing.
Step 3: Wire LCD
Now it's time to wire up your LCD. The diagram should be able to show how to wire it up, or you could read this tutorial from adafruit. Remember to wire the LCD on a separate breadboard.
Diagram courtesy of Fritzing.
Step 4: Wire First Button
You are now ready to wire the first button. You must first solder two wires to two of the contacts on your button. Then, follow the diagram to wire it up. This button is the press button. If you want to wire it without the diagram, keep in mind that you are pulling pin 2 low.
Diagram courtesy of Fritzing.
Step 5: Put Stuff in a Box
You have now gotten far enough to transfer your work into a box. Simply open it up and put all your electronics in it. Cut a 3x8cm rectangular hole for the LCD and 1x0.3cm hole for the button. Push the button through the hole you made to have it on top of your box, and secure the LCD the the "ceiling" of your box, so it can be seen through the window you cut. Make sure to also cut a hole in the side for the USB cable to fit through.
Step 6: Add Next Two Buttons
These buttons should be added the same way you did with the first. The shift button is wired to pin 3 of the Arduino. The change character set button is wired to pin 4 of the Arduino.
Diagram courtesy of Fritzing.
Step 7: Lable Buttons
With a permanent marker label the buttons. Look at the diagram on the last step to help you.
Step 8: Code
Here's the code you need to upload to your TiltKey:
Step 9: Celebrate!
You can now use your TiltKey! You can plug it in to any computer and you'll be able to write with it. Simply tilt it so the LCD displays the letter you want to write, and press the "press" button. Hold "shift" for uppercase, and press "change character set" to change to number and letters.
If you have any questions, comments, or angry rants, feel free to post them in the comments section below, and I will get back to you.
Have fun and happy tilting!


