

Introduction: Using Arduino Uno


- hello, friends in this instructables i will show u the basic but intersting use of my new arduino uno r3.
- let us know something important about the board.
Arduino is an open source hardware and software project first introduced in 2005 based on 8-bit Atmel AVR, aiming to provide an accessible way for novices and professionals to create devices that interact with their environment using sensors and actuators. Common examples of such devices intended for beginner hobbyists include simple robots,thermostats, and motion detectors.
The project is based on microcontroller board designs, which use inputs and outputs in the same way an ordinary computer does. Inputs capture information from the user or the environment while outputs do something with the information that has been captured. An input could be digital or analog, and could come form the environment or a user. Outputs can control and turn on and off devices such as motors or other computers. These systems provide sets of digital and analog input/output (I/O) pins that can interface to various expansion boards (termed shields) and other circuits. The boards feature serial communication interfaces, including Universal Serial Bus (USB) on some models, for loading programs from personal computers. For programming the microcontrollers, the Arduino project provides an integrated development environment (IDE) based on a programming language named Processing, which also supports the languages C and C++. The Arduino language is very similar to C, but provides several libraries for ease of use.
i'll show u how to controll on board led (on pin 13) OR led light. let us bebegin :
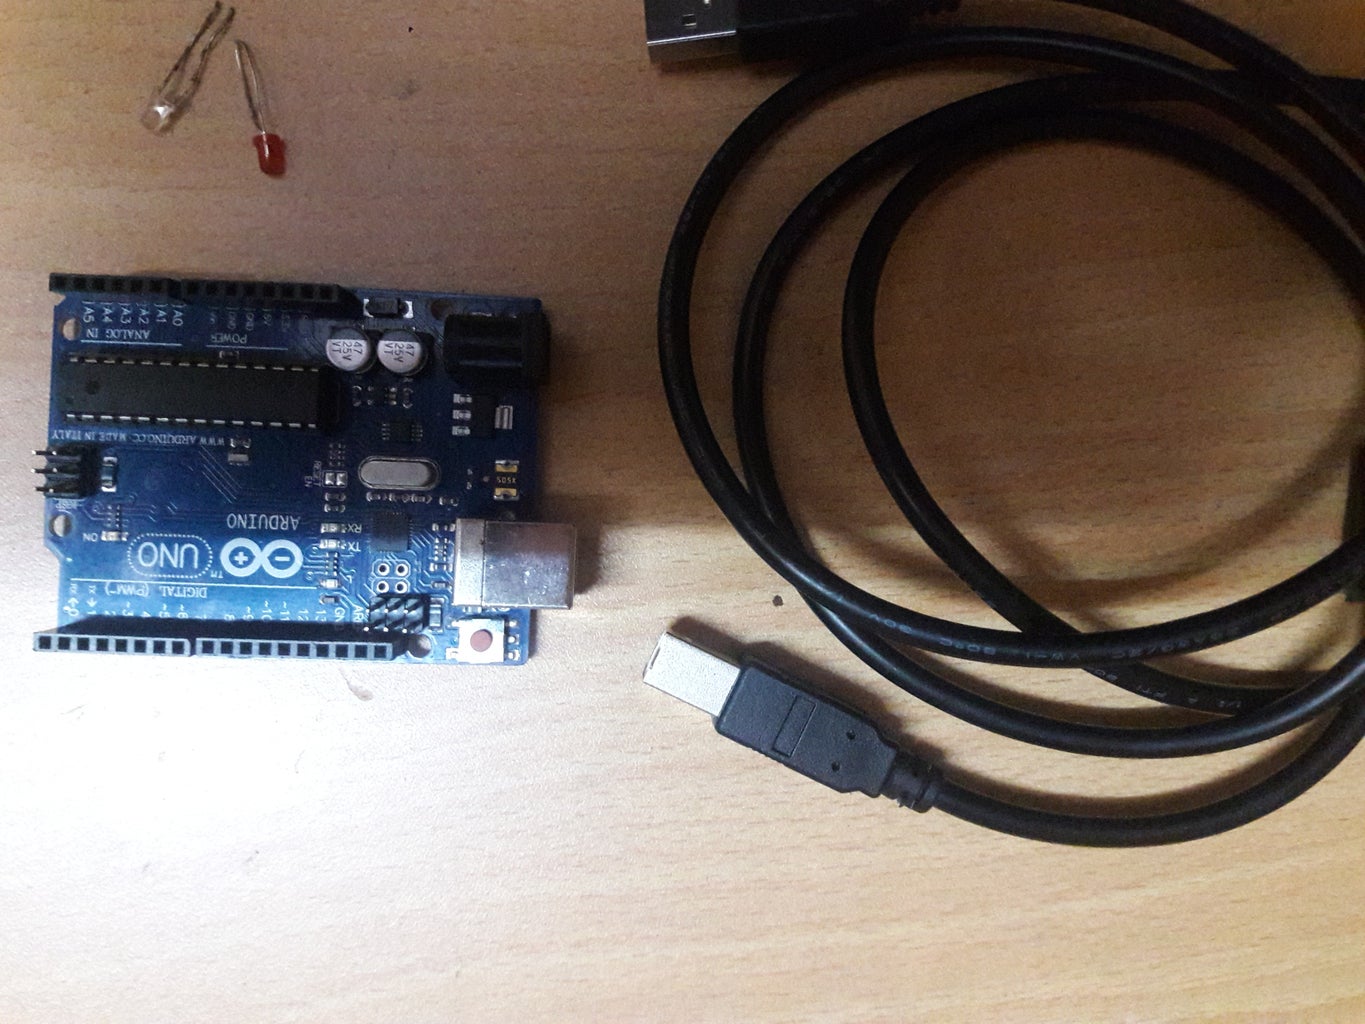
Step 1) material required
friends as this is the basic so we dont need many things.
1.arduino uno ( u can use any )
2. A USB cable (for programing)
3. led light (optional because the board having its own led on pin 13)
4.patience (of cource that is very important)
thats it
Step 2) connections and programing the board
now we'll connect the board to our pc to programme it
1.connect the led to the arduino by connecting ground pin of led to gnd pin on the board AND possitive pin of led light on pin 13 of arduino
2. now connect arduino with pc by using usb cable
STEP 3) ARDUINO IDE
for programming v have to download arduino ide software from arduino.cc
u can download the software using the link given below
https://www.arduino.cc/en/Main/Software
Step 4) programming the board
now we will upload the code
1.unzip the downloaded file of arduino ide
2. connect the board via usb
3.open the examples from file menu and then open > 01 blink
4. now uload the code
and enjoy.
and don't forget to vote for me.
troubleshooting problems :
if u have any problem in uploading the code than please remind me
u can also use this code to programme the board
encoded by mayank
/*

<p>Blink   Turns on an LED on for one second, then off for one second, repeatedly.<br>  Most Arduinos have an on-board LED you can control. On the Uno and   Leonardo, it is attached to digital pin 13. If you're unsure what   pin the on-board LED is connected to on your Arduino model, check   the documentation athttp://www.arduino.cc
  This example code is in the public domain.
  modified 8 May 2014   by Scott Fitzgerald  *
/ the setup function runs once when you press reset or power the board void setup() {   // initialize digital pin 13 as an output.   pinMode(13, OUTPUT); }
// the loop function runs over and over again forever void loop() {   digitalWrite(13, HIGH);   // turn the LED on (HIGH is the voltage level)   delay(1000);              // wait for a second   digitalWrite(13, LOW);    // turn the LED off by making the voltage LOW   delay(1000);              // wait for a second }</p>
Participated in the
Make it Glow Contest 2016

Participated in the
Arduino Contest 2016


