

Introduction: 15 Minute Bamboo Easel


Here's an easel you can make from bamboo for virtually free! I built this in about 15 or 20 minutes, give or take.
It's a full-sized easel, and is surprisingly stable!
Step 1: Materials & Tools


- Bamboo (2 pieces that are roughly equal in diameter, 1 piece for the third leg, and at least one more piece for a support)
- short metal rod -- This is the 'hinge' (I pulled mine out of a broken fax machine, but anything will do)
- 2 screws
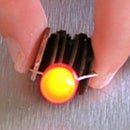
- String or hemp
- saw
- drill
- file
Step 2: Cut & Drill
Cuts:
- Cut the bamboo so you have 2 pieces of equal length and roughly equal diameters.
- Cut the third leg to a proportional length. You don't want the support to be too short or too long, or it will fall over.
- Cut the cross-support so it will extend a few inches on either side of where you will be attaching it.
- cut two small "filler" pieces for the top. I would wait until after you do everything else though
- You will also want to trim the top of the third leg, but only after you drill the hole in it.
- There's a top "joint" where you will drill 3 holes. Drill a hole halfway through each leg where the joint will be. Don't drill all the way through. Be sure you drill at the same place on both pieces. Do not make these too big, or it will be harder to make this work. These should be BARELY bigger than your rod.
- Drill all the way through the third leg
- Drill all the way through the cross-support, on either end of it
- In the same place on the legs drill a hole to screw into
Step 3: Assemble

Now it comes together real fast.
Fit the metal rod (or whatever you used) into one of the legs, and then slide on one of the filler pieces. A quick not about the fillers: it may be useful to file the end of these to better fit against the legs or back support (but not both, or it won't work).
Now, slide on the third leg, second filler piece, and pop on the other side-leg.
Fit a screw into each side of the cross-support and screw it into the holes on the legs. If you measured right, this should work just fine. If you fudged on it (like me) you may have to drill a couple set of holes. A level may also prove helpful.
NOTE: you want to leave about an inch of screw on each side to prop your art-board on.
You now have an easel that should stand up on its own! But don't skip the next step.
Step 4: Reinforce

Don't skip this step...
Take your hemp or string and wrap the top joint tightly. if you do it right it will give it a "spring" and it will be much steadier.
I also wrapped the two joints on the cross support, but this was mostly to make it look nice.
A piece of string from one screw, around the back, attached to the other screw, is also very helpful with stability.
Step 5: Fin!

That should be it! Enjoy your new easel, and revel in the fact that you just made something useful and it cost you zero dollars.


