

Introduction: 2D Pocket Toolpaths


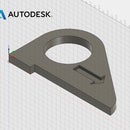
In CAM, the next step after Setup is Toolpath. 2D Pocket is a roughing toolpath that creates toolpaths parallel to selected geometry. This is a simple way to rough and finish areas that are bounded by a contour, with a flat bottom.
1) In the ribbon, choose 2D>2D Pocket.
The browser that opens, with 2D Pocket at the top, is the way that you will control all the settings for this toolpath. Hover your mouse over the tabs to see their names: Tool, Geometry, Heights, Passes, and Linking. It's a good practice to navigate the tabs from left to right, like reading a book. In your current tab, the Tool tab, you will choose your cutting tool and specify the speeds and feeds for that tool.
2) In the browser, click Select next to Tool.
3) If needed, expand the left side of the window by clicking the "Show Library Tree" icon in the top left corner.
4) Make sure all the Samples libraries are de-selected, except for Inch--Aluminum.
5) Choose the 1/4" flat Endmill from the Samples/Inch--Aluminum library, and click OK.
6) Change Spindle Speed to 12,000 rpm, and Cutting Feedrate to 75 in/min.
Because you are choosing this endmill from a Sample library, you cannot be sure that the default speeds and feeds are correct. For your own projects, refer to the Shopbot feeds and speeds chart to ensure that your spindle speed and feed rate are correct for your particular endmill and material.
Step 1:


Step 2: Geometry and Passes Tabs
7) Click on the Geometry tab--the next tab next to Tool.
In this tab, you will choose which geometry to machine within the current toolpath.
Refrain from pressing "OK" between tabs, because that will generate the toolpath. If you accidentally do, find the toolpath on the left under Setup 1 in the CAM Feature Tree, right click, and choose Edit to go back to the browser.
8) You are being prompted to make a selection. Carefully click on the bottom contour of the arrow--not the face. It's generally more accurate to choose contours than faces.
The arrow will fill in a dark blue color. This means that this is the area to be machined, which is what you want.
9) Click on the Passes tab.
In this tab, you will control how the tool behaves during each pass.
10) Change Maximum Stepover to 0.125.
For machining wood or plastic, follow the Stepover and Stepdown Rule: The stepover and stepdown should never exceed 50% of the tool diameter.
In this case, the tool diameter is 0.25", so the maximum stepover is 0.125".
11) Check the box next to "Multiple Depths" to activate it.
This means that the tool will not attempt to machine in a single pass, but rather step down multiple times.
12) Change Maximum Roughing Stepdown to the correct amount.
You should know this from the Stepover and Stepdown rule--check screenshot for answer.
13) Uncheck Stock to Leave.
Because Pocket is usually used as a roughing operation, the software will default to leaving a thin "skin" of stock behind that will be removed with the finishing pass. Because you are roughing and finishing with the same operation, you will not leave any stock behind.
Step 3:


Step 4: Linking Tab
14) Click the Linking tab.
This tab controls the behavior of the tool when it is not cutting.
15) Change the Ramp type to Zig-Zag.
The purpose of Ramps is to slowly descend the cutting tool along the Z-axis, because endmills are much better at cutting radially (laterally) than axially (plunging). Ramps put less stress on tools and give them a longer life.
Helix is the default ramp style and works well in theory. In practice, however, you should avoid Helical ramps when using the Shopbot, because the results are not always consistent.
16) Click OK to generate the toolpath.
A quick guide to the colors of the toolpath:
Blue = The toolpath itself. The tool moves at the cutting feedrate.
Yellow = Positioning moves. The tool moves at rapid or high speed.
Red = Ramp (helix, zigzag, etc).
Green = Lead in/lead out. This is how the tool moves right before or after each cutting move, for a better surface finish.
Step 5:


Step 6: Simulate!
After Setup and Toolpath, the next step is Simulate.
After you create any toolpath, you'll want to simulate it to ensure that it's not colliding, that it moves efficiently, and that it's doing what you expect. Pay attention to where and how the tool enters your material, and how much material the tool is removing at any given time.
17) Click Setup 1 in the CAM Feature Tree.
18) In the ribbon, click Simulate.
19) In the Simulate browser, change Toolpath mode to Tail.
This will remove some of the visual clutter from the screen.
20) Check Stock to make the stock visible.
You can check the box next to Transparent as well--I tend to toggle it on and off, depending on what I'm doing.
21) Press Play.
The slider underneath the Play/Pause controls allows you to speed up and slow down the simulation. Below that is a thin timeline. You can click at any point in the timeline to go to that point. If you hover your mouse over the timeline, it will display the name of the toolpath, the tool number, and estimated machining time.
22) Click Close to exit the simulation.
Step 7:


