

Introduction: 3-fingered Arduino Robot Hand

Intro
In this instructable I will explain the basics of building your own robot hand, controlled by an arduino.
The hand uses a glove, outfitted with flex sensors that will capture your hand movements. The hand movements will be translated by the arduino and sent to the robot hand, which will then move in the same way you just moved your hand.
What you'll need...
...to make it work:
an arduino:I used this one:
http://www.ebay.com/itm/USB-Nano-V3-0-ATmega328-16...
a small breadboard:
http://www.ebay.com/itm/1PCS-Solderless-Breadboard...
...for the glove:
1 well-fitting glove
3 20k Ohm resistors
3 long flex sensors
1 small solder board (15x3 would work but i recommend getting 20x6)
Jumpwires of various lengths
...for the hand:
3 servos with 180 degree turning
some strong wiring (I recommend fishing wire)
either a load of lego technic, which is what I used, or you could use a five-fingered 3d printed hand from inmoov, which is an open-source download (you'll have to add some extra fingers to the coding, which is pretty easy): http://inmoov.fr/hand-and-forarm/
...for assembly:
soldering equipment
needle and thread
some tape for cable management
OPTIONAL: If you want to be able to stick the arduino in your backpack/pocket and walk around when picking stuff up: get about 14 metres of thin electrical cable (3m red, 3m black, 8m white).
When you've got everything ready, let's get started!
Step 1: Step 1: Building Your Hand

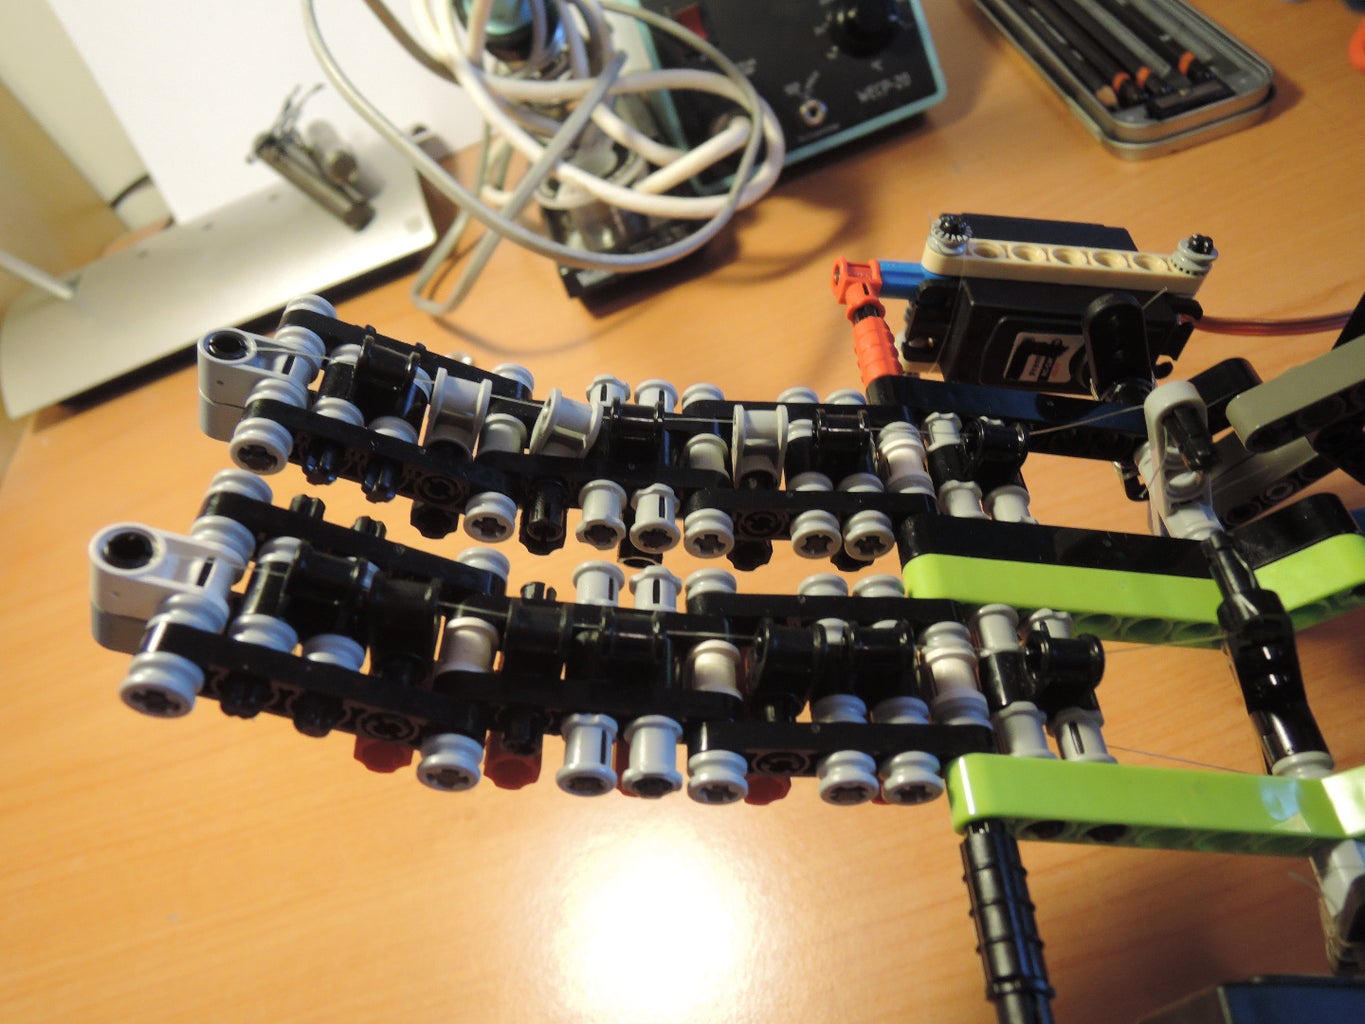


I am currently working on a more detailed instruction on building the Lego-hand, but in the meantime I'll share my thoughts and discoveries whilst designing and building my own hand from scratch.
If you're going the 5-finger 3D-print way, this guy has a great tutorial on building that:
https://www.instructables.com/id/Voice-Controlled-P...
Essentials:
In order to make your hand as lifelike as possible, make sure your front fingers have three joints, just like a human hand.
Make sure your fingers only flex one way by blocking the joints from the top side.
Make sure your fingers won't fold in half when flexing; add some thickness to the inside of the fingers to stop them from bending in unnaturally sharp angles.
Quite obvious, but if you want to actually grab something, make sure the thumb is facing the other way.
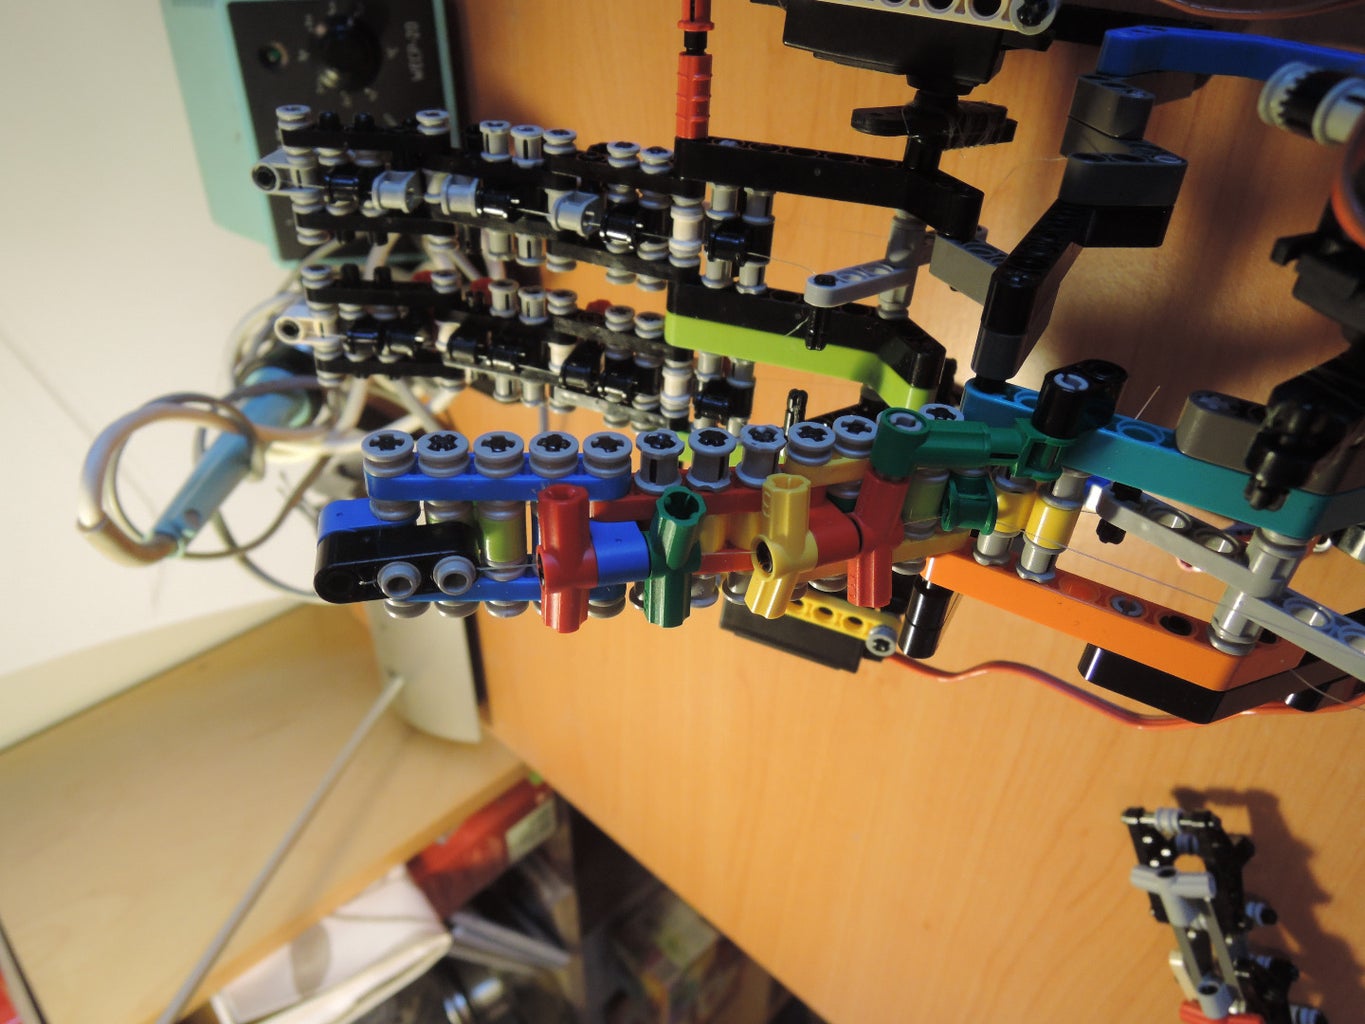
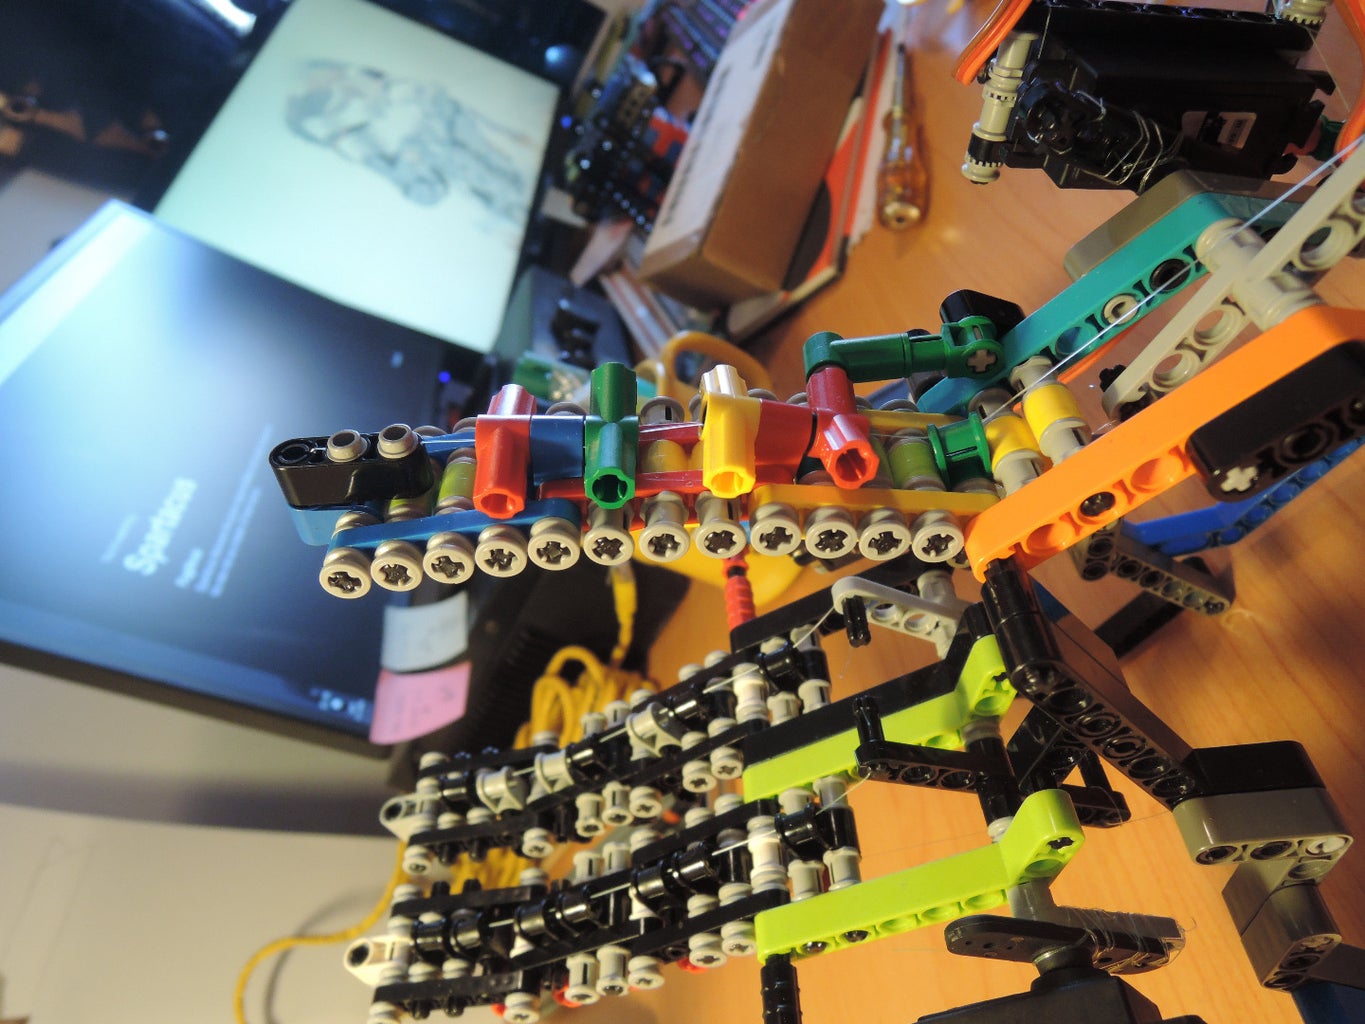
Make sure you have room to place the servos. The servo arm should be attached to the first joint of the finger, able to turn. The fingers move using two strings each; one running over the top and the other on the inside of the finger. The servo turns an arm which either pulls the one or the other string, depending on the direction of the servo rotation
I've taken extra care to put cable leads on my fingers, which also function as the joint blockers I mentioned earlier.
Wiring the hand is probably the 'hardest' part of making the hand, because it takes a lot of tweaking and cramping to get the wires to the right tension on both sides.
I also attached a lego stand to my hand so I could test and edit the hand more comfortably.
I've put the wiring online here for reference when building with cables in mind:
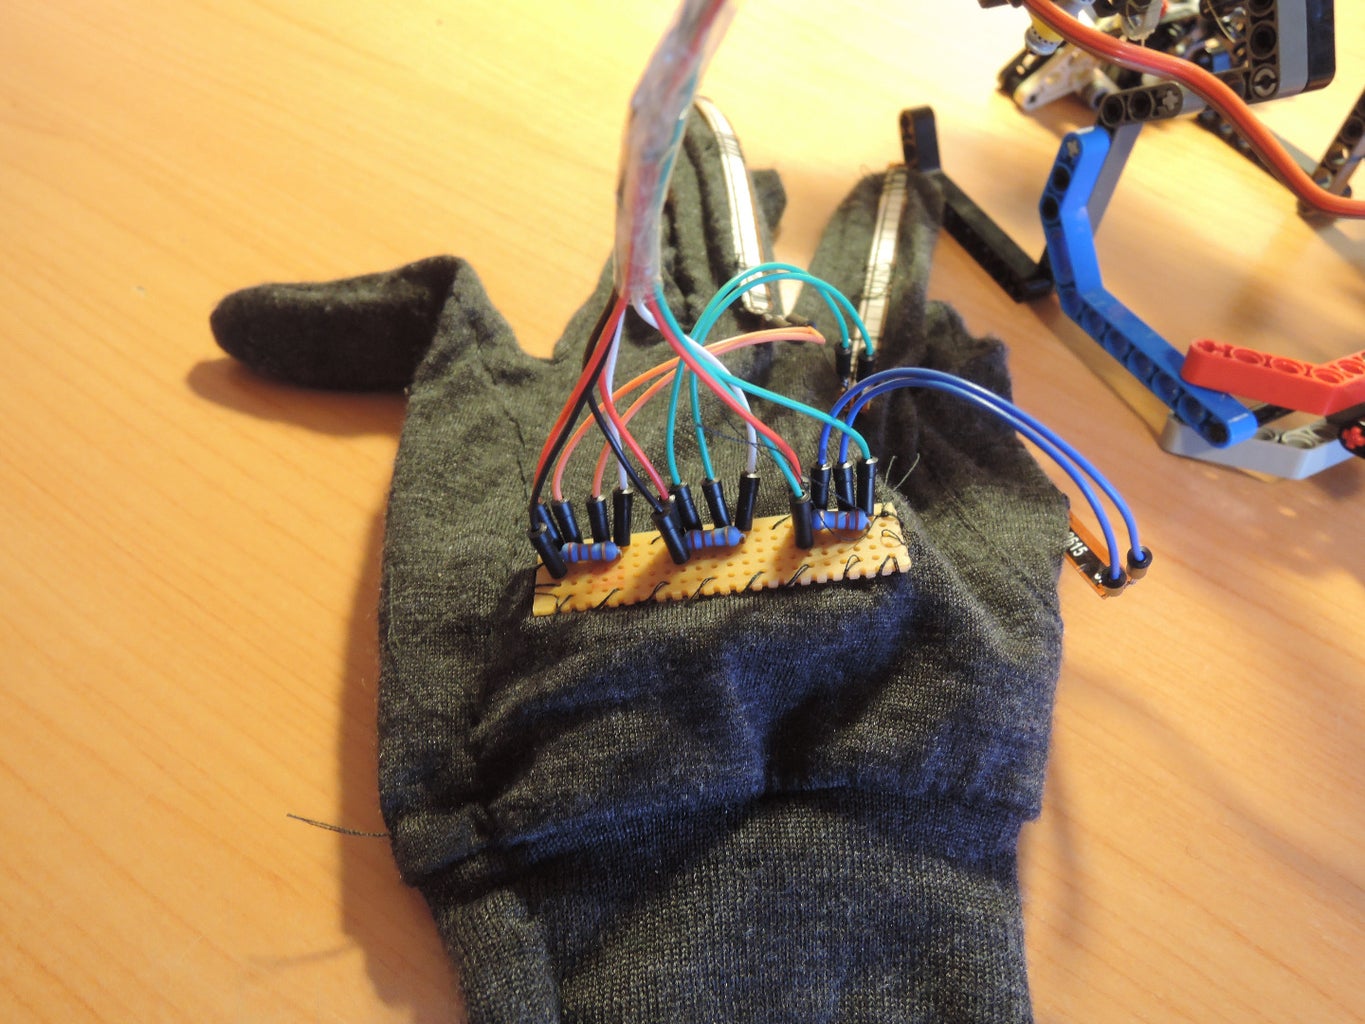
Step 2: Step 2: Making the Glove


I've put up the full wiring right here:
https://123d.circuits.io/circuits/1477535-arduino-...
First off, solder everything except the flex sensors onto the solder board. The sensors need to go on the fingers, so first attach some wire to give yourself some more maneuverability.
Once your board is complete, make a small hole at the top of each of the sensors. These holes will be used to attach them to the tip of the gloves' fingers.
sowing the sensors:
First, put on the glove and use something to mark where your own finger joints are. For optimal sensor precision, this is where you'll want to sow the sensor to the glove. Once you've marked the fingers, use needle and thread to first firmly attach the tip of the sensor to the tip of the finger. then, sow AROUND the sensor at the joints you just marked. Make sure you don't actually pierce the sensor, because they have to be able to move around a little. Also make sure you don't accidentally sow the fingers shut.
Once your sensors are attached, you can use some of the unused holes in the solder board to attach it to the glove, again just using needle and thread.
Step 3: Step 3: Code


After uploading the code you're all done! as a finishing touch you could coat some of the inside of the fingers with a rubber tape or something similar to increase grip.
I've attached the code in an arduino file as well, but here's the code:
//Include the servo library #include
#include <Servo.h>
//Define the servos Servo finger1, finger2, finger3;
//set the values for your pins
int servoPin1 = 5;
int servoPin2 = 7;
int servoPin3 = 9;
int flexPin1 = A0;
int flexPin2 = A1;
int flexPin3 = A2;
void setup()
{
//Attach servo to pin
finger1.attach(servoPin1);
finger2.attach(servoPin2);
finger3.attach(servoPin3);
//set servo to output
pinMode(servoPin1, OUTPUT);
pinMode(servoPin2, OUTPUT);
pinMode(servoPin3, OUTPUT);
//set flex to input
pinMode(flexPin1, INPUT);
pinMode(flexPin2, INPUT);
pinMode(flexPin3, INPUT);
}
void loop()
{
//Analog input variables
int flex1 = analogRead(flexPin1);
int flex2 = analogRead(flexPin2);
int flex3 = analogRead(flexPin3);
//set servo pos to flex-proportional, limit value of servo positions
int pos1 = map(flex1, 350, 700, 120, 30);
pos1 = constrain(pos1, 1, 180);
int pos2 = map(flex2, 350, 700, 120, 30);
pos2 = constrain(pos2, 180, 1);
int pos3 = map(flex3, 350, 700, 120, 30);
pos3 = constrain(pos3, 1, 180);
//move servo to position
finger1.write(pos1);
finger2.write(pos2);
finger3.write(pos3);
}


