

Introduction: 3D Drawings in Autodesk Sketchbook Pro 6


Hey Everybody,
Happy Halloween!
Well, it's been awhile since I've made a instructable.
I seen the Autodesk Sketchbook Pro contest and thought I would enter my Halloween drawing.
I did WIN my version 5 of Autodesk Sketchbook Pro on Instructables.
I've been drawing 3D drawings for awhile now.
I do have a instructable on 3D chalk drawings too.
I did that instructable in 2009.
Much of what we are doing here is the same as my "How to do 3D Anamorphic Artwork and Sidewalk, Street, and Driveway Art" instructable.
You might want to take a look at that instructable first, so you get the basic idea.
It is basically the same technique.
But, instead of chalk we are using Autodesk Sketchbook Pro 6.
Here is where it is located:
How to do 3D Anamorphic Artwork and Sidewalk, Street, and Driveway Art
I am not going to get in heavy detail on my drawing techniques/style, as I believe everyone has there own style of drawing.
I mostly want to get, how I got the 3D effect.
That way, everyone can do a 3D drawing in their own style on Autodesk Sketchbook Pro 6.
In this instructable you should have some knowledge of Autodesk Sketchbook Pro 6 and Coreldraw X3.
I do all my drawings with my Wacom Intuos 3.
(see picture above)
This is a lengthy instructable, but well worth the effort!
There is a demo of Autodesk Sketchbook Pro located here:
Autodesk Sketchbook Pro 6
Note: This instructable is a work in progress. If you see anything wrong, please let me know.
If you happen to use my technique please give me some credit for it, and pass it along to your
friends!
If you like my instructable, please take a second and vote for me!![]()
Ok, let's get onto the instructable!
Step 1: Gathering the Artwork


Ok, let's get started..
The first thing I like to do, is figure out what would make a good 3D drawing, when the paper is folded 90 degrees.
The best thing, I found out is, when the paper is folded, make the 90 degree fold the back wall.
It makes for the best 3D drawings.
For the 3D effect, anyways.
Adding the shadow, really adds to the realism.
For the Halloween contest, I thought a witches broom and hat.
What more than a wall with the witches cape and and on strike sign.
So, I searched google for some design ideas.
I found a broom, hat, coat and the strike sign.
I figure I can just freehand the rest of the drawing.
Once we figure what we want, lets move on to the next step.
Step 2: Arranging the Artwork

So, now we want to arrange our items.
I use Coreldraw X3, but any vector program would work!
You could do all of this step, in Autodesk Sketchbook Pro 6.
The best thing to do, is to take a picture of the folded paper blank.
It is best to use a tripod.
Make sure it is at the correct angle you want.
The picture you take here, will be the same spot your camera will be in, for the final picture.
Once you have a photo of the blank paper, you want to import that picture into Coreldraw or Autodesk Sketchbook Pro 6.
Then make a vector tracing or drawing of the folded paper. (see above).
Then we can take our clipart and arrange it on the vectors or drawing of the folded paper.
You want to make sure none of the 3D items go off the page.
Once we have them arranged the way we want them, you export that into a .jpg.
That will be the .jpg that we bring into Sketchbook Pro and draw off that artwork.
Which we will do in the next step!
If you are working in Autodesk Sketchbook Pro, you can omit exporting it into a .jpg, and just go onto the next step.
Step 3: Sketching/Tracing the Artwork for the Mockup


On this step we are going to draw the objects that we want 3D.
Start a new drawing in Sketchbook Pro 6.
I just used a regular pencil.
You will want to import the photo from step 2.
I put the photos on separate layers and just traced them out.
You don't have to be perfect.
As, what we are drawing is a kinda mock up of what we want.
Make sure and add the shadows lines.
We will use them for reference in our final drawing.
This will not be the final drawing.
I did attach a video link of me doing the drawing.
Drawing the mock up
Once I sketch it out, then I draw a hard dark line around the objects.
The bold line will make it easier to trace.
As, when we import this drawing in Coreldraw, we will be cutting it and stretching the drawing. (adding perspective)
now onto the next step...

Step 4: Adding Perspective to the Drawing


Ok, now comes the fun/tricky part!
I do have a video link below that might make it easier to understand.
Adding Perspective Video
The technique is almost the exact same process as my other instructable as mentioned in Step 1.
You might want to look at that instructable, to get a good idea of how to add perspective.
Here is the link to my 3D chalk drawing instructable:
How to do 3D Anamorphic Artwork and Sidewalk, Street, and Driveway Art
Ok, first we will import our drawing we did in step 3.
I use Coreldraw X3, but I'm sure any vector program would work!
Then we use our vector drawing of the paper we did in step 2.
You could have the vector paper drawing on its own layer.
If you drew your paper outline in Autodesk Sketchbook Pro, then import that
drawing into Coreldraw X3, and trace out a vector of the paper outline.
Then we import our drawing we did in step 3 into the Vector program,
We want to convert the drawing to vectors. As, Coreldraw will not intersect bitmaps.
Once converted to vectors, then we can slice or intersect the vectors to cut them.
You will want to group the vectors, separate from the paper layer.
We want to slice the vector with the paper layers.
Kinda like a cookie cutter.
We would select the top paper (90 degree fold) and slice/cookie cut the vector.
We would do the same for the bottom paper.
Once we have the vectors sliced, you should have 2 sets of vectors.
You will want to group each set of vectors.
The top page vectors group and the bottom page vectors group.
Now, we have to take our vector groups and stretch them by adding perspective in Coreldraw X3.
Our top page vector group will stretch to the top page of our paper.
Our bottom page vector group will stretch to the bottom page of our paper.
Make sure that the vectors line up.
Once we have the vectors stretched, we will export this as a .jpg and this will be our layout/trace for
our drawing in Autodesk Sketchbook Pro 6.
Once exported, now is a good time to print out the .jpg and take a test picture.
Just to make sure everything lines up.
Now we can start drawing our 3D picture.
Onto the next step..
Step 5: Drawing the Final Picture


Now, we get to draw the final picture.
I do have a video of me drawing some of the picture.
As, I did not want to bore you with the lengthy video.
Here is where the video is located:
Drawing the final picture
I usually start by tracing out the .jpg we imported.
Then just start coloring in the 3D stuff.
Adding layers as I go.
Layers in Autodesk Sketchbook Pro are a god send.
You can do a lot with layers.
Practice using layers!
The orange backgound, is on its own layer.
The floor, is on its own layer.
The floor is a clipart I got off google.
I believe, I just googled wooden floor.
I believe I had about 12 layers in this drawing.
When you draw the back wall, you can just draw that regular with no perspective, as when
we take the final picture, the camera will add the perspective to our final picture.
Kind of hard to understand, but once you do a few of them, you should be able to figure it out.
Print out copies as you go, to test photo for alignment, 3D effect, colors, etc.
Step 6: Testing the 3D Artwork


Once we have our sketch drawn, we want to take some test pictures.
I take many pictures through out the process.
Sometimes as many as 20 to 30 test pictures.
A tripod works best!
Here are a few test pictures I've taken through out my drawing process.
I do make changes as needed. (I moved the strike on sign)
You will have to align the drawing in the view finder of the camera.
Sometimes if you are off a little bit, it can make your drawing not 3D.
You want to make sure all your straight lines are straight and not crooked, to get the best 3D effect.
Step 7: The Final Drawing Ready to Be Folded and Photographed

Ok, here is my final drawing.
You can save it to your hard drive and print it out yourself.
Make sure and fold exactly in the fold line. (which we don't print)
If you fold even a 1/16" off, the 3D effect will be off.
I will print it out on some hard card stock and take a exacto razor knife and barely score on the fold line.
Sometimes when you fold your picture, you will see the fold in it, when you take your final picture.
I will go into a editing program and edit out the fold line, so you do not see it, in the final picture.
I usually use the clone tool.
I only edit the 3D stuff and leave the other part of the line that is shown.
It will give it a better 3D effect.
Good luck, and post pictures of what you come up with.
I, and many others, would love to see what you come up with!
I hope you enjoyed my instructable! ![]()
Patches earned from Instructables.com
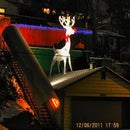
Step 8: Other Examples Done in Sketchbook Pro


Here are some other examples that I have done.
They were all done in Autodesk Sketchbook Pro.
I really like the ladder one!
It really works best, when you make the 90 degree fold as your back wall.
The shadow is what really perceives our mind.
You will notice the cube drawings.
It is the same drawing, just the photo was taken at a different angle.
Step 9: Tri Fold


Well, I figured if it could be done on one fold.
How about a tri fold.
These are just tests, that I have done.
Still needs refining.
Stay tuned!
Or, better yet, anyone out there, up for the challenge?
Thanks, everyone!

Second Prize in the
Halloween Draw & Paint It Contest with Sketchbook


