

Introduction: Saint Patrick's Day- 3D Printed Shamrock Pendant


Saint Patrick's Day is almost here !! select and 3D Print your design of the Shamrock Pendant before you head out for the day.
You have 3 designs to select from, 2 simplistic designs and one slightly complex one where you can add a LED with a coin cell battery, to add that wow factor!! when your out an about in the night.
If your wondering what Shamrock refers here is a brief description from wiki
The shamrock refers to the young sprigs of clover or trefoil. It is known as a symbol of Ireland, with St. Patrick having used it as a metaphor for the Christian Trinity, according to legend. The name shamrock is derived from Irish seamróg, which is the diminutive version of the Irish word for clover (seamair) meaning simply "little clover" or "young clover"
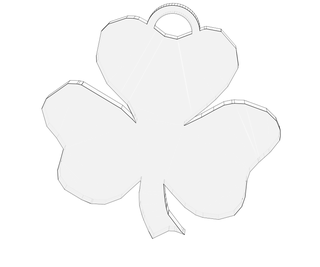
Step 1: 3D Print the Simple Pendant


Download the 3D printing software that your printer supports, in my case I am using the Printrbot Simple Metal which use Repetier-Host as a software to
- Slice the STL files attached,which basically means cutting the part into various layers
- And send commands to the 3D printer while printing.
In my case I am using the following filaments HATCHBOX 1.75mm Green PLA
Download the STL file attached
- slicing should take about a 3-4 seconds
- and printing should take about 8- 10 mins.
Attachments
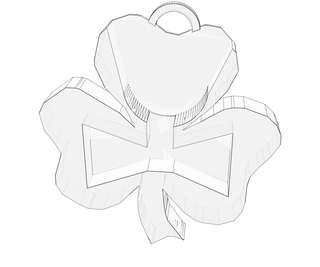
Step 2: 3D Printing the Hollow Pendant


Download the STL file attached
- Slicing should take about a 6-7 seconds
- Printing should take about 6-10 mins, based on the STL file you have selected.
Attached are two STL file one a smaller size and another slightly larger.


Step 3: LED Pendant - 3D Print the Part


3D print the 3 STL files attached
The base and the hollow Shamrock part should be printed in Green PLA ,and the flat Shamrock leaf should be printed in Transparent PLA.
Shamrock_LEDBaseHolder.stl file and Shamrock_hollow_large.stl
- Slicing should take about a 19-22 seconds
- Printing should take about 40-45 mins, this should be printed in Green PLA
Now load up the Shamrock_Transparent.stl file
- Slicing should take about a 5-7 seconds
- Printing should take about 5-8 mins, this should be printed using Transparent PLA
In addition to 3D printed parts you will need
- super glue to stick the parts together
- coin cell battery CR2032
- and a LED


Step 4: LED Pendant - Super Glue the Parts


Before superglue'ing all the part together ensure that the LED and battery goes through the base and the transparent 3D printed part.
Super glue the 3 printed parts as shown in picture above
For glue I am using E6000, but you can use normal super glue.
Step 5: LED Pendant - Using the LED and Coin Cell Battery


Test the LED , connect the long end of the LED to the +ve end of the battery CR2302(you should see a + sign on one side of the battery) and the shorter end to the -ve end of the battery.
Now drop the battery and LED into the 3D printed part as shown in the second picture above.Shake the 3D part to check if the LED turns off , if it does use electrical tape to secure the LED to the coin cell battery before dropping it again into the pendant.
Congratulation your done , have a great and safe Saint Patrick's Day !

Participated in the
Necklace Challenge


