

Introduction: Obstacle Avoiding Robot Using Arduino (4 Wheels)
Welcome to the tutorial for the Obstacle Avoiding Robot Car using Arduino, Ultrasonic sensor and L298N Motor Driver.
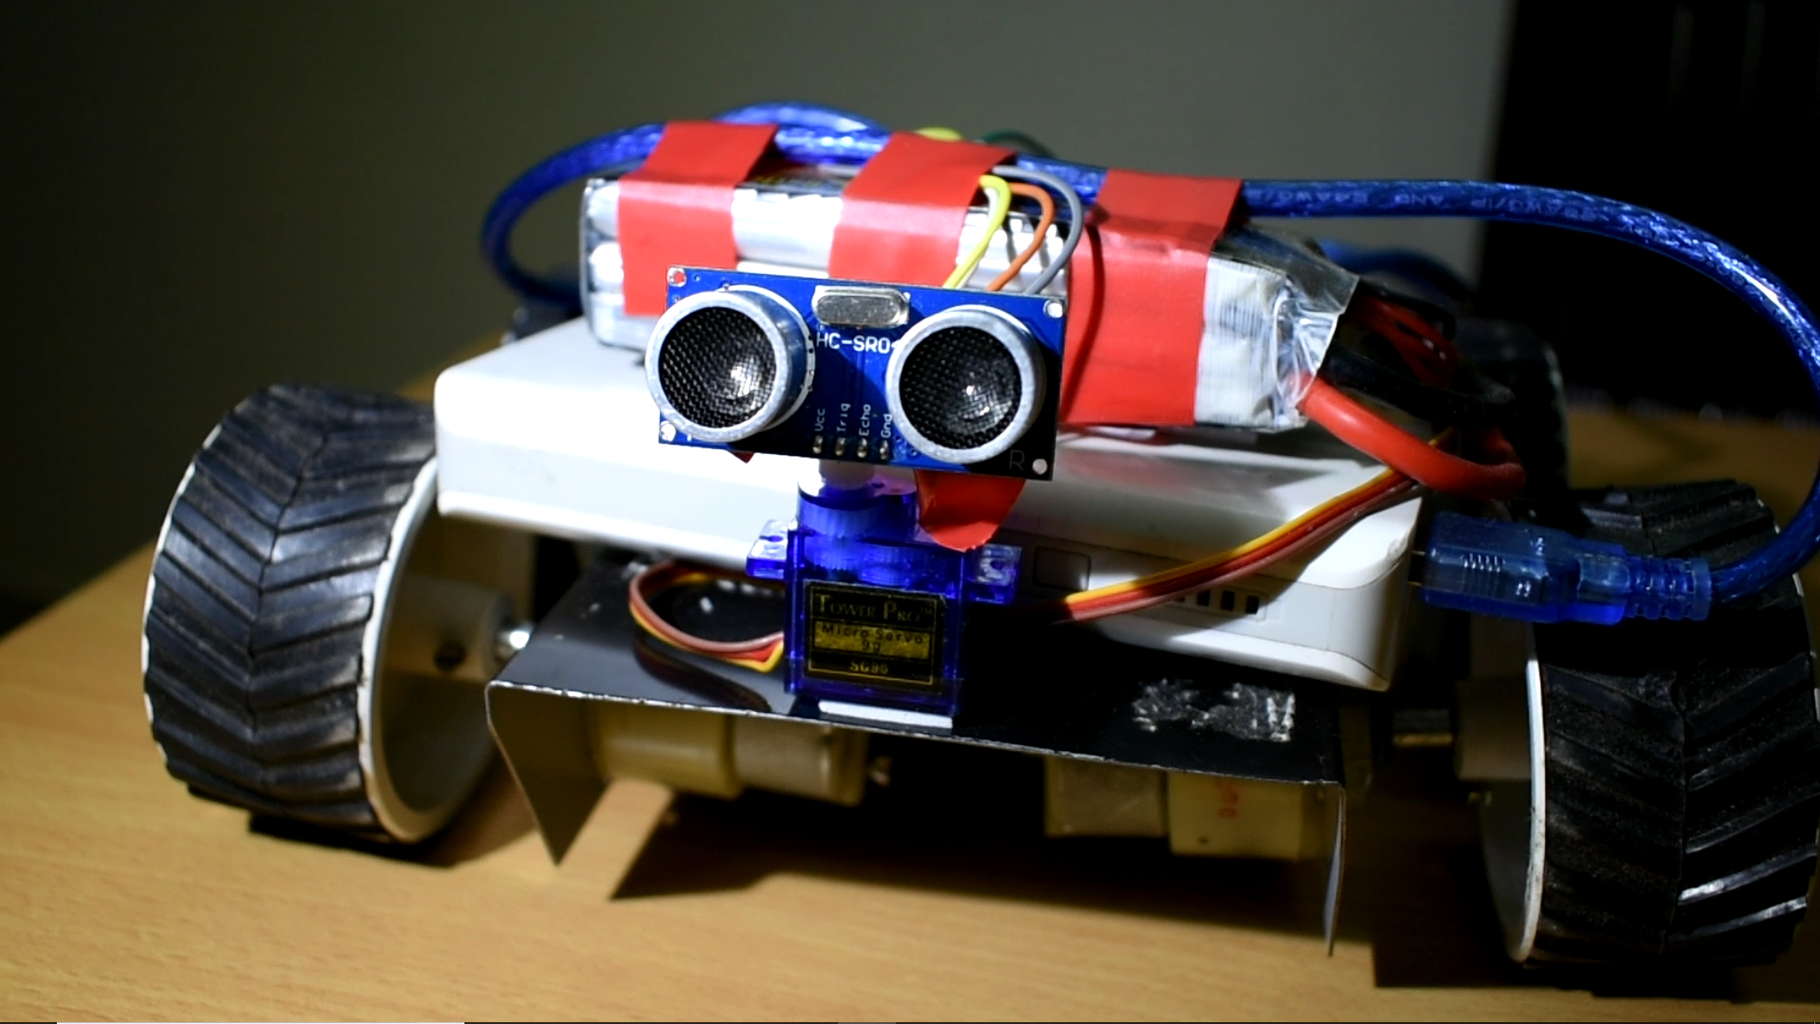
In case you haven’t watched the YouTube video, I highly recommend that you do, as it will give you a better idea of how the robot might look after it’s done and why you might need a robot like this.
Step 1: Components Required:


Chassis: https://amzn.to/2UKzjQI
Motors: https://amzn.to/2TiySwJ (buy 4)
Wheels: https://amzn.to/2S9a8ts
Arduino Uno: https://amzn.to/2TfOSzq
L298N Motor Driver: https://amzn.to/2UorLTl
Breadboard: https://amzn.to/2WM4vRg
Switch: https://amzn.to/2TjsJjQ
Power Bank: https://amzn.to/2Urt9VD
12V Li-Po Battery: https://amzn.to/2RQwzEp
Li-Po battery charger: https://amzn.to/2DGgR63
Micro Servo Motor: https://amzn.to/2UkZBbX
Ultrasonic Sensor: https://amzn.to/2UnFz0x
Double sided tape: https://amzn.to/2Sa3pQ4
Electrical Tape: https://amzn.to/2UoDWQk
Wires: https://amzn.to/2BaSeNb
Soldering Iron set: https://amzn.to/2WQwnDM
Step 2: Circuit Diagram:

CIRCUIT DIAGRAM CORRECTION: THE POWER SUPPLY FROM THE LI-PO BATTERY IS WRONG IN THE PICTURE. THE RED WIRE (POSITIVE) GOES TO THE 12V TERMINAL IN THE MOTOR DRIVER AND THE BLACK ONE (NEGATIVE) GOES TO THE GROUND TERMINAL OF THE DRIVER.
The same connections will apply for 5V motors. Just change the 12V Li-Po battery for standard 9V batteries. You can buy it from any electrical shop. Anyway here’s a link: https://amzn.to/2HFov4F
If you only want to use 2 motors, then the same connections will apply. Just add a fly wheel at the front center and connect the motors from the motor driver. Just don’t short the two side motors, since there aren’t any. Here’s a link for the fly wheel: https://amzn.to/2UoPtin
If any side motors are rotating in the opposite direction, just reverse those motor connection terminals in the L298 Motor Driver. Check the video to see how I arranged all the boards and circuits. You can do your’s like that or however else you like.
Step 3: Programming
In order to use the ultrasonic sensor and calculate the distance between the sensor and a potential object, we will need a particular arduino library file. You can download that here. Just go ahead and download the latest version. Once downloaded, open the RAR file. Click on the NewPing folder and click extract to. Next you have to extract it to your library folder in the arduino file directory. For me, that was “C:\Program Files (x86)\Arduino\libraries“.
Now that you have the necessary libraries (the libraries for the other components are built into the arduino IDE), you can download this arduino file. If the link doesn’t work just copy the below code and paste into the arduino IDE sketch: (read the “//” comments for better clarification).
<p>#include           //Servo motor library. This is standard library<br>#include         //Ultrasonic sensor function library. You must install this library</p><p>//our L298N control pins
const int LeftMotorForward = 7;
const int LeftMotorBackward = 6;
const int RightMotorForward = 4;
const int RightMotorBackward = 5;</p><p>//sensor pins
#define trig_pin A1 //analog input 1
#define echo_pin A2 //analog input 2</p><p>#define maximum_distance 200
boolean goesForward = false;
int distance = 100;</p><p>NewPing sonar(trig_pin, echo_pin, maximum_distance); //sensor function
Servo servo_motor; //our servo name</p><p>void setup(){</p><p>  pinMode(RightMotorForward, OUTPUT);
  pinMode(LeftMotorForward, OUTPUT);
  pinMode(LeftMotorBackward, OUTPUT);
  pinMode(RightMotorBackward, OUTPUT);

  servo_motor.attach(10); //our servo pin</p><p>  servo_motor.write(115);
  delay(2000);
  distance = readPing();
  delay(100);
  distance = readPing();
  delay(100);
  distance = readPing();
  delay(100);
  distance = readPing();
  delay(100);
}</p><p>void loop(){</p><p>  int distanceRight = 0;
  int distanceLeft = 0;
  delay(50);</p><p>  if (distance <= 20){
    moveStop();
    delay(300);
    moveBackward();
    delay(400);
    moveStop();
    delay(300);
    distanceRight = lookRight();
    delay(300);
    distanceLeft = lookLeft();
    delay(300);</p><p>    if (distance >= distanceLeft){
      turnRight();
      moveStop();
    }
    else{
      turnLeft();
      moveStop();
    }
  }
  else{
    moveForward();
  }
    distance = readPing();
}</p><p>int lookRight(){
  servo_motor.write(50);
  delay(500);
  int distance = readPing();
  delay(100);
  servo_motor.write(115);
  return distance;
}</p><p>int lookLeft(){
  servo_motor.write(170);
  delay(500);
  int distance = readPing();
  delay(100);
  servo_motor.write(115);
  return distance;
  delay(100);
}</p><p>int readPing(){
  delay(70);
  int cm = sonar.ping_cm();
  if (cm==0){
    cm=250;
  }
  return cm;
}</p><p>void moveStop(){

  digitalWrite(RightMotorForward, LOW);
  digitalWrite(LeftMotorForward, LOW);
  digitalWrite(RightMotorBackward, LOW);
  digitalWrite(LeftMotorBackward, LOW);
}</p><p>void moveForward(){</p><p>  if(!goesForward){</p><p>    goesForward=true;

    digitalWrite(LeftMotorForward, HIGH);
    digitalWrite(RightMotorForward, HIGH);

    digitalWrite(LeftMotorBackward, LOW);
    digitalWrite(RightMotorBackward, LOW);
  }
}</p><p>void moveBackward(){</p><p>  goesForward=false;</p><p>  digitalWrite(LeftMotorBackward, HIGH);
  digitalWrite(RightMotorBackward, HIGH);

  digitalWrite(LeftMotorForward, LOW);
  digitalWrite(RightMotorForward, LOW);

}</p><p>void turnRight(){</p><p>  digitalWrite(LeftMotorForward, HIGH);
  digitalWrite(RightMotorBackward, HIGH);

  digitalWrite(LeftMotorBackward, LOW);
  digitalWrite(RightMotorForward, LOW);

  delay(500);

  digitalWrite(LeftMotorForward, HIGH);
  digitalWrite(RightMotorForward, HIGH);

  digitalWrite(LeftMotorBackward, LOW);
  digitalWrite(RightMotorBackward, LOW);


}</p><p>void turnLeft(){</p><p>  digitalWrite(LeftMotorBackward, HIGH);
  digitalWrite(RightMotorForward, HIGH);

  digitalWrite(LeftMotorForward, LOW);
  digitalWrite(RightMotorBackward, LOW);</p><p>  delay(500);

  digitalWrite(LeftMotorForward, HIGH);
  digitalWrite(RightMotorForward, HIGH);

  digitalWrite(LeftMotorBackward, LOW);
  digitalWrite(RightMotorBackward, LOW);
}</p>
Step 4: Done!

Now just compile and upload the code to the Arduino.
It should work perfectly. But if it doesn’t, just comment down here and I’ll clarify it as soon as possible. Please consider subscribing to MY YOUTUBE CHANNEL, I worked really hard on this project (building the robot, programming, video, website tutorial, custom parts links, etc). I have a lot more blogs like this and other fascinating topics on THIS WEBSITE, so please stick around and check a few of them out. Please do follow if you like them.
Thank You.

Participated in the
Arduino Contest 2019


