

Introduction: Accessing Arduino Over Internet


This instructable is just another attempt to connect your arduino to internet. There are so many similar instructables which tell you how to do the same, this one is little more detailed version, which I thought might help beginners like me. So let's jump into the making without wasting any time.
There are actually two ways in which we could connect our arduino to the internet (as far as I know).
1) Making our arduino as a web server, using which we can send commands and control the things that are connected to the arduino. Also, you can store and access files remotely.
2) Making our arduino as a client and send the data collected by the arduino to a server which is hosted over the internet. Where you can store and analyse relatively large data.
I'll be dealing with the 1st part in this instructable. and the 2nd part will be dealt in another one. Now that you've got an idea as of what this instructable consists, lets get started.
Step 1: Things You Need:
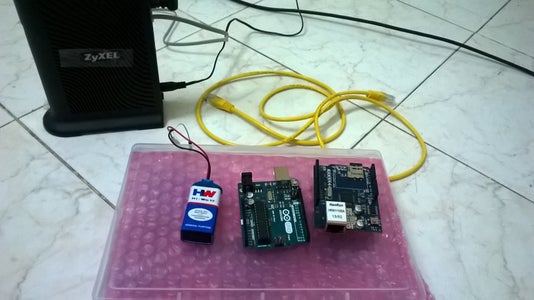
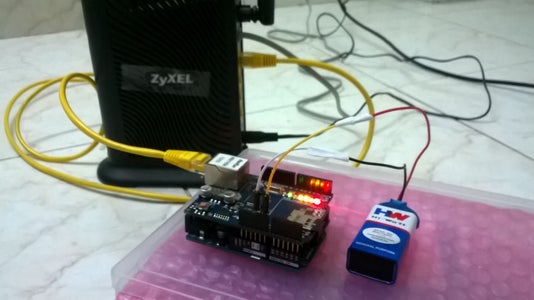
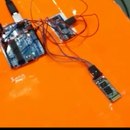
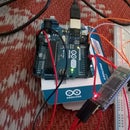
- Arduino Board ( I am using Uno ).
- Arduino Ethernet Shield ( Check for the compatiblity with the arduino board)
- External power source (9-12v).
- Router ( Could be from any manufacturer).
- RJ45 cable.
Step 2: Getting Started...( Little Bit of Theory )
Every device that is connected to the internet must have an address, using which it is identified over a network, so that data packets can be transferred/received to the specific device. Now we have two types of addresses for every device.
1) MAC address --> This is unique for every device.
2) IP address --> This may be either static(doesn't change) or dynamic(changes frequently).
We won't be dealing with MAC's here, so if you are interested search the net.
Whenever you connect your arduino to your local network (which will be dealt in the coming steps) it is automatically assigned an IP address by your home router using DHCP. Now your router plays a major part here as it acts as the interface between your arduino and the internet.
Every router has two IP addresses
1) External IP--> This is used when interacting with the Outside network ( eg: Internet)
2) Local IP --> This is used when interacting with private/local network (eg: Devices connected to your router)
So your arduino gets a local IP. Hence whenever you want to communicate/send a message to your arduino over the internet. You access your home router ans send the message to it which in-turn redirects the message to your arduino.
If you want to know the detailed working of the router and its mechanisms, search for the following terms and try to understand them.
DHCP(Dynamic Host Configuration Protocol)
NAT(Network address translator)
Dynamic/Static IP
Step 3: Understaing the Code :)
I have attached a sample code (.ino file) which would be used as a reference during explanation. I won't be explaining each and every line of the code, if you have any doubts please post it in the comments section. Okay, lets start then.
We begin with including the header files that are necessary for the program to execute.
Header files
Ethernet.h --> This library consists of the functions that take cares of handling the client connections, connecting to servers and getting/sending requests, and a lot of other stuff.
SPI.h --> This is an important header file, this defines how your arduino controls the ethernet shield. and the SD card slot present on it. SPI is a communication protocol. Please refer to the documentation provided by the arduino website for more details. SPI Documentation.
Ethernet Library Functions
mac -- Generally if you have a genuine or original version of the latest EthernetShield, it should have a MAC address printed on its back. But if you have a cloned version of it then it is mandatory that you assign a user defined MAC for it, this works with the original version of EthernetShield.
You could do the same with the IP address also, but i wouldn't recommend so, because when your arduino with a predefined IP and tries to connect to your router it may fail to do so, if the router has already assigned some other device with the same IP Let the DHCP handle the IP address assignment.
EthernetServer -- It creates a server that listens for incoming connections on the specified port. In the given example I have assigned a port number 12345. You can use any port number you might want, but make sure that no other service is currently running on that port.
EthernetServer.begin() ---It tries to establish connection with the router using the user defined MAC address. Although it takes other argumets depending upon the situation. Please check the link Ethernet.begin
Serial.begin() --- This opens a serial port on the arduino with a specified baud rate. It is useful for debugging your code, in case of errors.
Client Handling Mechanism
All the initialization needs to be done only once, hence it goes into the setup() block. Whereas the server needs to check for clients waiting to connect every once in a while hence that part of the code goes into a loop() block.
Check out these links given below to understand the working of the code.
Our server checks for a client connection every 2 seconds, and if a client tries to connect then it receives its request prints on to the serial terminal and responds back with an HTML Page.

Step 4: Connecting Your Arduino to Your Home Router
Now you flash/upload the program into the arduino using the IDE, and unplug the arduino from your PC/Laptop. Now attach the Ethernet Shield on to the top of your arduino board. Then plugin one end of the RJ45 cable to the shield and the other end to the arduino. If you want to see the messages being sent on the serial port of your arduino make sure that your laptop/pc are situated near the router, so that you could connect the whole setup to you laptop/pc. Check out the pics if you have any doubts.
Step 5: Cofiguring Your Router

Now we'll go to the part where we configure the router so that we can connect our arduino to the router to access local network and beyond.
The first step is to login into your router, for this you need to find the local IP of your router.
1) open command prompt (cmd) inside windows. Type the following command. "ipconfig"
2) Now try to find the "Default Gateway" attribute, the value beside that is the Local IP of your router. Generally router takes the first address inside the local network and assigns the consecuitve addresses to the devices connected to it. (eg: 192.168.4.1).
3) After this step, open your browser and type the routers IP address inside the URL bar.
4) you could see a login page of your router.
5) Type the password. If you don't know your password, try the default one's which you can easily find on the internet.( I am using a Zyxel Router, Default Password is : admin)
6) Even if the default password doesn't work, try to reset your router, but be aware that, resetting your router might make your router erase the configuration done by your ISP (Internet Service Provider) and mess up your whole network.(I messed up my network).
Step 6: Reserve Your IP Address

Go to LAN Settings in your router page and try to reserve your IP address of your arduino that is currently connected, you can identify it using the MAC address we've previously defined. Reserving an IP address will be different for different routers. Search the internet for references. Reserving an IP address will be helpful in port forwarding, since you would require your server to have a constant IP address.
Step 7: Port Forwarding Your Router

In this step we would forward the port present on the router to the port on which our arduino is listening. Now try to create a user defined service name. Assign the start port with any port number ranging fro 0 - 65000, but make sure that you are not forwarding a port which has been assigned already to a service like 80, 8080, 443, avoid such numbers. For the End port you would require to give the same port on which you've started your server(12345 in my example). Why do we need Port Forwarding ?
When a request from a client ( Web Browser ) to a server is sent, the request packet consists of Destination IP, Port number on which the request is served. Generally this port would be 80 which is reserved to HTTP requests. Now we are creating a server based out of our arduino, which is constantly listening to a port on the router inside from our local network. Now when we want to communicate with our arduino from outside of our local network(internet), then we send a http request to our router on the port which has been forwarded , so that router can redirect the http message to the arduino which is listening to that port inside our local network.
Step 8: Disable the Firewall

Disable your firewall so that you could send requests to the ports other than the reserved ones. Once you are done with your work don't forget to enable your firewall again.
Step 9: Almost There...

Now try to access your arduino from local network, using the address shown in the URL bar.`
http://"Your Reserved IP":"Port"
If everything works fine, then you are almost there from accessing your arduino over internet. If not please read through the steps carefully once again and check that all the connections are fine.
Step 10: Acessing Your Arduino From Outside Your Local Network

Now if you want to test wether this is working outside your local network. You could do it in two ways
1) Try to access arduino from outside your local network(friends network).
2) Try to access arduino through internet from your PC / Laptop.
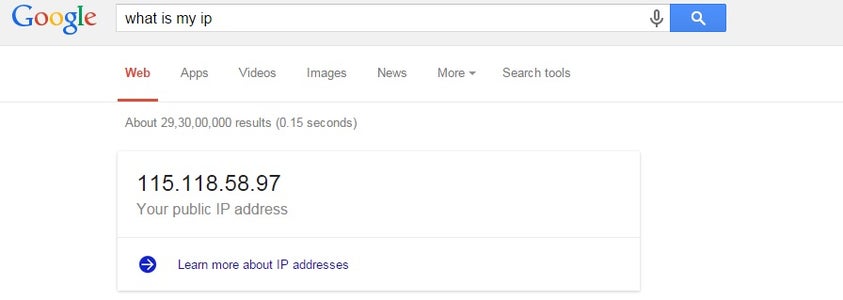
In both the steps the common thing to do is, find out your router's Global/External IP . You find your Global IP by typing "What is my IP" in google.
Now if you are accessing outside from your local network then type
http://"Global IP":"Port". It should work. If you are getting an error then check wether your port is open or not. I have attached a screenshot a website which helps you to find which ports on your roter are open. If your port is closed then either your firewall is enabled or you've not connected your arduino properly to the router.
But if you are trying to access using step 2, check the next step
Step 11:


So, this is for step 2 guys,
You guys need to enable ip nat loop back. To do this you need to connect to your router using telnet.
open cmd and type
telnet {Default Gateway}
eg: telnet 192.168.3.1
and type the command shown in the screenshot.
Now try to access it as shown in the previous step. If you've got problem in connecting check out the cue's that I have given in the previous step.
If you've succeeded then try to attach few things to our arduino like sensors, motors and try to control or gather data from them. Welcome to the IOT guys. Hope this instructable helped you.
Happy Hacking :)

Participated in the
Automation Contest


