

Introduction: Amplifier Dock


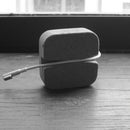

Amplifier Dock uses the hemispherical shape of an ordinary dinnerware bowl to amplify an iPhone’s built-in speaker, allowing iPhone users to listen to music or other streaming media aloud at a lower than normal set volume, thereby conserving battery life.
Amplifier Dock by Timothy Wikander from timothy wikander on Vimeo.
Step 1: Project Requirements
Materials
(1) 3/8" thick piece of Hardwood (or Plywood) at least 2 1/2" W x 10" L
(1) Bowl at least 6 1/4" DIA and 2 1/2" height (use larger diameter for iPhone 6 and above)
(2) #10 x 3/4" flat head screws
(2) #10 t-nuts or threaded inserts
(1) small piece (at least 3" square) of 1/8" thick wool felt, or other compressible material
Tools and Supplies
Planer or Table Saw (if using hardwood)
Jigsaw (if using plywood)
Miter saw or Pull saw
Belt/disc sander or Hand file
Drill press or Corded Drill
Drill bits and Countersink bit
Mallet or Hammer (for installing t-nuts or threaded inserts)
Tape measure and Square
220 and 400~600 grit Sandpapers
X-acto knife or Fabric shears
Awl or Hole punch
Craft glue
Step 2: Plane Wood to 3/8" Thickness

The wood portion of the dock is comprised of three parts, all of which are the same thickness. Planing dimensional sized lumber can be achieved with a planer or table saw. If you don't have access to these tools, you can find small panels of 3/8" plywood at most big box home improvement stores.
Step 3: Cut to 2.31" Width (for IPhone 4/5)

Next, use the table saw to cut your 3/8" piece of wood to a 2.31" width (width of iPhone 4/5). Adjust accordingly for newer models. If you're using plywood for your build, you can complete this step with a Jigsaw.
Pro tip: Keep a consistent feed rate while cutting to prevent burn marks.
Step 4: Cross Cut Into Separate Components


Use a table saw, miter saw, or hand saw to cut your 3/8" x 2.31" piece of wood into the three separate lengths:
A) 6.00"
B) 2.31"
C) 1.00"
See cut sheet for remainder of measurements.
Attachments

Step 5: Prep Base for Threaded Inserts


For t-nuts, you'll want to create a shallow pocket in the base of the dock to account for the depth of the flange. In hindsight, t-nuts were a bit overkill and could have caused the wood to split.
Pro tip: tapping inserts or even press-fit/screw to expand inserts will work just as well and are easier to install.
Step 6: Drill Thru

For t-nuts, you'll need to drill a hole (on-center with the pocket) to allow clearance for the barrel.
Step 7: Drill and Countersink


Rather than drilling through the remaining components individually, you can simply sandwich the pieces together with some masking tape and drilling them at the same time. Countersinking the top component isn't necessary, but makes for a cleaner aesthetic.
Step 8: Insert Threaded Inserts


Use a hammer or dead blow hammer to install the t-nuts or press-fit threaded inserts. For tapping inserts, use the corresponding driver.
Step 9:
Step 10: Round the Corners


It's coming together now! Use a disc sander, belt sander, or hand file to round the corners to a .35" radius (iPhone 4/5).
Step 11: Hand Sand

220 and 400 ~ 600 grit sandpapers should do the trick here.
Step 12: Compressible Spacer (Crucial!)

A thin, compressible spacer is what allows Amplifier Dock's flat wooden components to magically hold onto the lip of a round bowl. Use an X-acto knife or pair of Fabric shears to cut out a rounded 2.3" square from 1/8" thick wool felt or a similar compressible material.
Step 13: Glue to Cap


Use craft glue to attach your rounded wool felt square to the bottom of the cap.
Step 14: Poke


Using the pre-drilled holes as a guide, poke holes through the wool felt to allow the screws to pass through.
Step 15: Assemble

Place the bowl inside the wood components and tighten down on the screws until you have a snug fit. You're done! I hope you enjoyed! Feel free to share your Amplifier Dock experience in the comments below.
Cheers!
Amplifier Dock by Timothy Wikander from timothy wikander on Vimeo.


