

Introduction: Applying an Authentic Arts and Crafts Finish to Quartersawn Oak


Many times, the building of whatever we make takes precedent, and the finish becomes an afterthought. I have found though, that this can make a great project rather boring, or a good project much better. (Still can't make silk out of a sow's ear!) In this Instructable, I'm going to show you how to get an authentic Arts and Crafts finish on Quartersawn White Oak. Back in the day, the furniture makers used ammonia to "fume" the oak, and the tannins in the wood turned it a different color. This gives inconsistent results, can be dangerous, and not everyone has access to the high percentage ammonia you need to do it. If you've taken the time to build something great, take a little more time, and make it awesome!
Step 1: Sand, Sand, Then Sand Some More....

Most woodworkers I know don't really like to sand. I can understand that, as it is time consuming, and the results aren't instantaneous, like cutting something, or assembling something. That being said, it is one of the most overlooked part (I think) of the woodworking process. Scratches or machine marks in the wood take away from the grain, can gather finish, and dull a project you might want to look glossy. So, sand. For the most part, you can start with 80 or 100 grit, and then go to 150, and for this project, stop with 180 at this point. If any scratches aren't going away, step down a grit, and start again. I've never seen a scratch that hasn't gone away due to sanding. I've gone through veneer before, but at least the scratch was gone! As you can see here, I've got a mitered frame made of quartersawn white oak, which has been sanded to 180 grit. Take your time, it will pay great dividends later!
Step 2: Getting Wet

Now it's time to wet down your piece of wood, using distilled water. (Oh yeah, make sure all the dust is gone first!) The reason for this is the fact that we're going to use a water based stain on the wood, which would raise the grain, ruining all your hard work sanding! By raising the grain before we stain it, we can prevent that from happening. Use distilled water so nothing interacts with the stain, or other finishes we'll be using.
Step 3: Wetting the Wood

At this point, you're ready to start wetting down the wood. You don't want to soak it. As a matter of fact, when I was doing this piece, by the time I worked my way around the frame, the part I started with was mostly dry. I don't know if you can tell in the picture, but the grain is already starting to look better.
Step 4: What Do You Know? Time to Sand Again!


Once your piece of wood is totally dry (I normally give it an hour or so, but only if I've lightly wet it down. If I accidentally soak it, I usually wait until the next day just to be on the safe side.) it's time to sand, this time with the 220 grit paper. When sanding, you just want to give it the once-over, to smooth out the raised grain, otherwise you risk going past that part, and raising the grain again. Don't worry, I've never had this happen to me, but it is a possibility. Just sand your piece smooth, and you'll be fine.
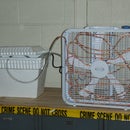
Step 5: Blow!


Now that the sanding is all done, it's time to get rid of the sawdust. Oak happens to be a pretty open grain wood, so wiping it off with a rag just won't cut it. If you have access to an air compressor, bust it out. I crank mine all the way up to 80 psi, and blow the heck out of it (with hearing protection on!) and that still can leave some dust! Do the best you can though, it can be a tricky part of the process.
Step 6: Time to Dye


At this point, you've probably realized that this is not the same project. Never fear! It's the same wood, with the same finishing process, except for this time, I had my camera in the shop with me!
I prefer to use a water-based dye, as from what I've read, the stain actually penetrates the wood, as opposed to sitting on the top layer. As I don't always know where my creations are going to be, I like to them to be as sun-fast as possible. Keep in mind though, anything you put by a window is going to lighten over time.
The product I like to use is called Trans-Tint, and although it looks expensive at 16 dollars for a two ounce bottle, that makes half a gallon of stain. And, when mixing it, you want to mix it with distilled water, for reasons mentioned earlier. I use a well-rinsed quart sized milk bottle to mix the stain. Please realize that I'm not naming the products to endorse them, rather to let you know what I used, in case you want to replicate it. That being said, I've had excellent results with all the products I've used.
Step 7: No Glove, No Love


This isn't a necessary part, but after staining your hands once, you realize that it's a little easier to just wear gloves. I'm partial to the blue nitrile gloves, that don't have any powder, as that way I know I'm not contaminating my work surface. Get a clean, cotton rag, and soak it down with some stain. Then, just rub it into the wood. Make sure to even it all out, not leaving any areas looking wet. At this point, the directions say to let it dry for at least two hours. I play it safe, and wait for a day. Probably overkill, but I'd rather be safe than sorry.
As you can see in my picture, the stain, once dried, looks much lighter than you might expect. You can see the drips on the paper towels I laid down, and that is much darker than the wood. You can recoat after the two hours, but I've never done it, and it comes out dark enough for me. Later on, when we accent the grain, it's nice to have a lighter color anyway, for contrast, and that will really make the ray flakes "pop".
Step 8: Seal It Up!

This step is more prevention than anything, although it does help the layered look of the finish, which adds to the overall beauty in the end. By sealing up the stain with poly, you prevent the next step from messing with the aforementioned stain.
I basically get some satin wipe on polyurethane (When I first started, I wanted everything to be glossy, as I thought that was a mark of good craftsmanship. Nothing wrong with gloss, but there's a time and place for it.) Make sure you shake your product well, as most satin or flat coatings have an agent that makes them satin or flat, which can settle out to the bottom.
Flood the area your working on, and then use a clean paper towel to make sure it's rubbed out pretty well. If you can see any shine in the light, it means you have to go over it. It's not a hard step, but will make sure you have a great looking project in the end.
This product says it takes 2-3 hours to dry, but due to the pores in the wood, I tend to wait a little longer. After about six hours or so, I lightly go over the areas I've sealed it with #0000 steel wool. This is just to take off any dust nibs, or air bubbles that might have gotten trapped. When you're done with that, use either compressed air or a tack rag to take off any steel wool or finish you might have taken off.
As you can see, the grain really isn't standing out yet, but that's what the next step is for!
Step 9: Gellin'


For this step, we're going to use a gel stain, and a stiff bristled brush. Oh, and gloves again, because you don't want your fingers all brown at the end.
One of the reasons I like gel stain is because it doesn't really move around on you, like liquid stain can, and therefore, it can be a little easier to control. And, we want to get it into all the nooks and crannys that are the grain. That's where the brush comes in.
Apply a liberal amount of stain to an area, rubbing it in in a circular motion. Then, with the brush, make sure that the stain gets into all the parts that rubbing missed. The brush is great for corners, and other hard to reach areas. Once you have it covered, wipe it off with a clean rag. If it looks shiny, make sure you wipe it down.
As you can see in the second photo, the grain has really started to "pop" and differentiate it from the ray flakes. This is the true hallmark of an arts and crafts finish.
Now, because alot of this stain ended up in valleys of grain, I usually leave my project to dry overnight. Even though the can might say different, and it contains drying agents, I don't trust it. I'd rather take my time, and make sure there's no problems, instead of rushing it, and making a mistake.
Step 10: Seal It Up!

Once again, we're going to use the poly. Shake it up real well, and then put a light coat on it. I don't think I can stress light coats enough. I haven't run into many situations that require a heavy coat of anything. Just remember, the thinner the coat, the faster it dries. That means less time to get air bubbles, dust nibs, or any other problems. Any shiny parts? Rub it out with a rag. Because this is a mirror, and is going to hang on a wall, it won't be seeing a lot of handling, so I'm just going to put two coats on. If I were making a piece of furniture, and this was the table top, I might go all the way up to four coats. Once again, using steel wool in between coats.
When it dries, you're finished! You now have an authentic arts and crafts finish that looks as good as any of the commercial furniture factories turn out. Like I said before, you spent all this time making something, so why not make the finish just as good? If anyone uses this on their creations, please post pictures, as I love to see what other people are doing. So good luck, and remember to work safe!

Participated in the
Print & Dye Contest


