

Introduction: Arduino Baby Monitor With Java Viewer


Build an Arduino-based multi-sensor unit to observe conditions in a room. This unit can sense humidity, temperature, motion, and sound.
Attached is a java based viewer that receives serial data from the arduino.
Step 1: Behavior
Behavior:
The system measures each sensor and takes appropriate action
- Temperature: Three leds illuminated based on if the current temperatures is above, below, or about a preset desired temperature.
- Humidity: same as Temperature.
- Motion: When motion is detected the series of six leds illuminate while motion is being detected.
- Sound: Sends event notification to Java receiver Communication with java program
- Arduino sends sensor data via serial communication to the Java program. The Java program calculates elapsed time and displays data via a JFrame-base GUI.
Step 2: Materials


Materials:
- Arduino uno
- DHT11 Humidity/Temperature sensor
- Sound Sensor Module
- HC-SR501 PIR Motion Sensor
- (6) 220Ohm resistors
- (6) leds (any color)
- At least 25 wires
- Computer with 64-bit Java JDK installed
- Arduino IDE with USB cable
Step 3: Connect Leds

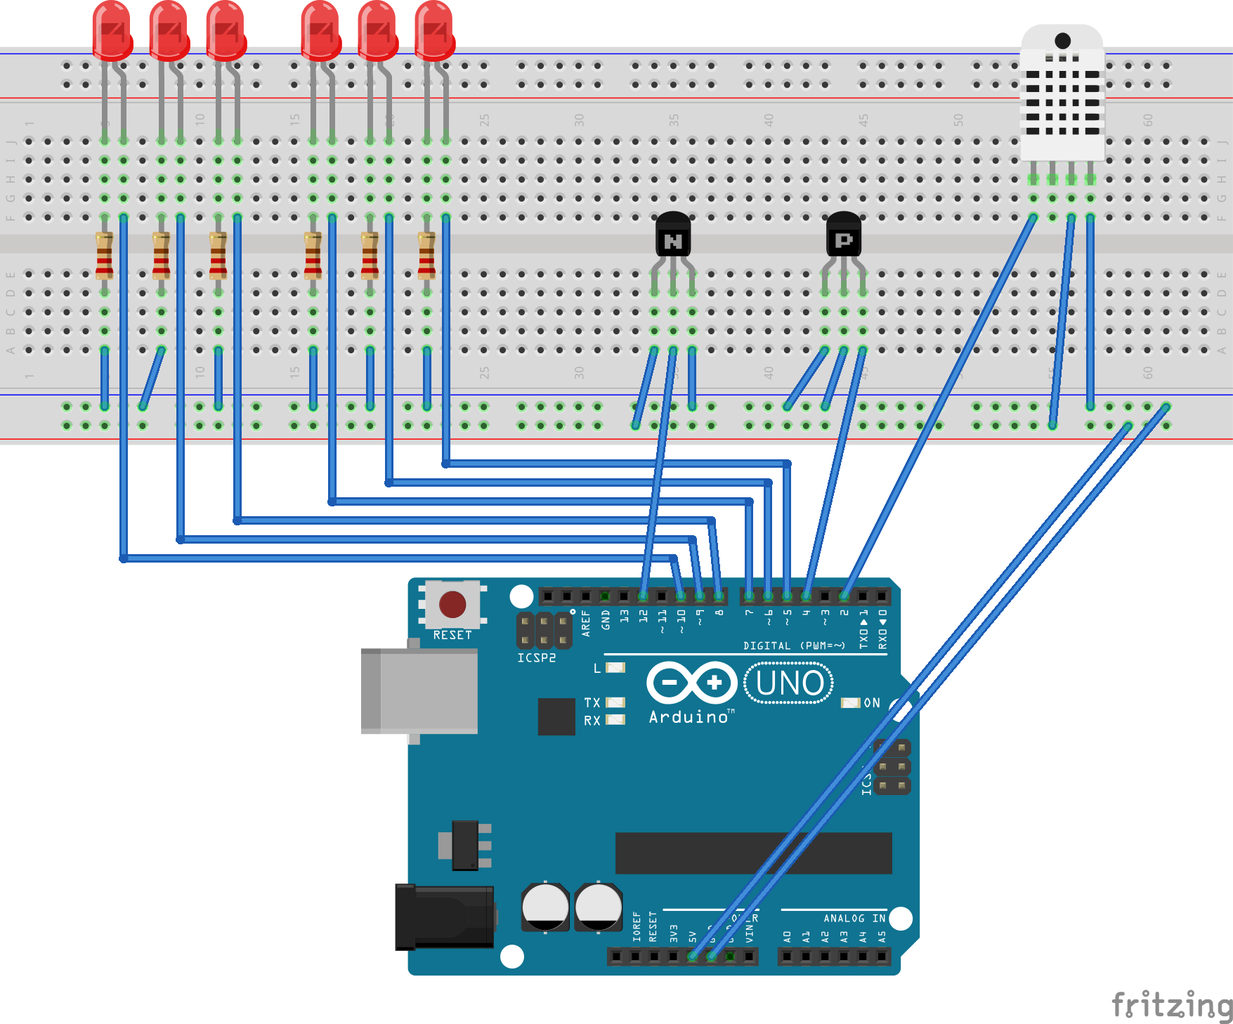
Connect 6 Leds to ports 5 through 10 on the Arduino.
Step 4: Connect Humidity/Temperature Sensor

Connects the humidity/temperature sensor to pin 2 on the arduino.
Step 5: Connect Motion Sensor

Connect motion sensor to pin 12 on arduino. (Transistor(N) substituted for motion sensor in picture, same wiring)
Step 6: Connect Sound Sensor

Connect the sound sensor to pin 4 on the arduino. (Transistor(P) substituted for sound sensor in picture, same wiring)
Step 7: Connect Power and Ground

Connect the +5V pin on the arduino to the + rail on the breadboard.
Connect the GND pin on the arduino to the - rail on the breadboard.
Step 8: Coding
Step 1:
Load ArduinoHex.ino to the arduino
Step 2:
- Using Eclipse Programming Software, create a project with the two .dll files in its root directory.
- Load the RXTXcomm.jar file
Go to Project > Properties > Java Build Path > Add External JARs
- Load ArduinoHex.java, ArduinoHexDriver.java, and ComPortTest.java to src folder in Project
Step 3: Use either Arduino IDE or ComPortTest to find which COM port is being used by arduino
Step 4: Make sure all other serial terminals to arduino are closed.
Step 5: Run ArduinoHexDriver
Sources:
ComPortTest.java and java-end serial receiving:
Kinath Ripasinghe


