

Introduction: Arduino - Fade a Row of LEDs With Pulse Width Modulation


In this project, we will create a Knight Rider-like experience by lining up a row of LEDs and fading them left and right with a potentiometer. For this project, you will need:
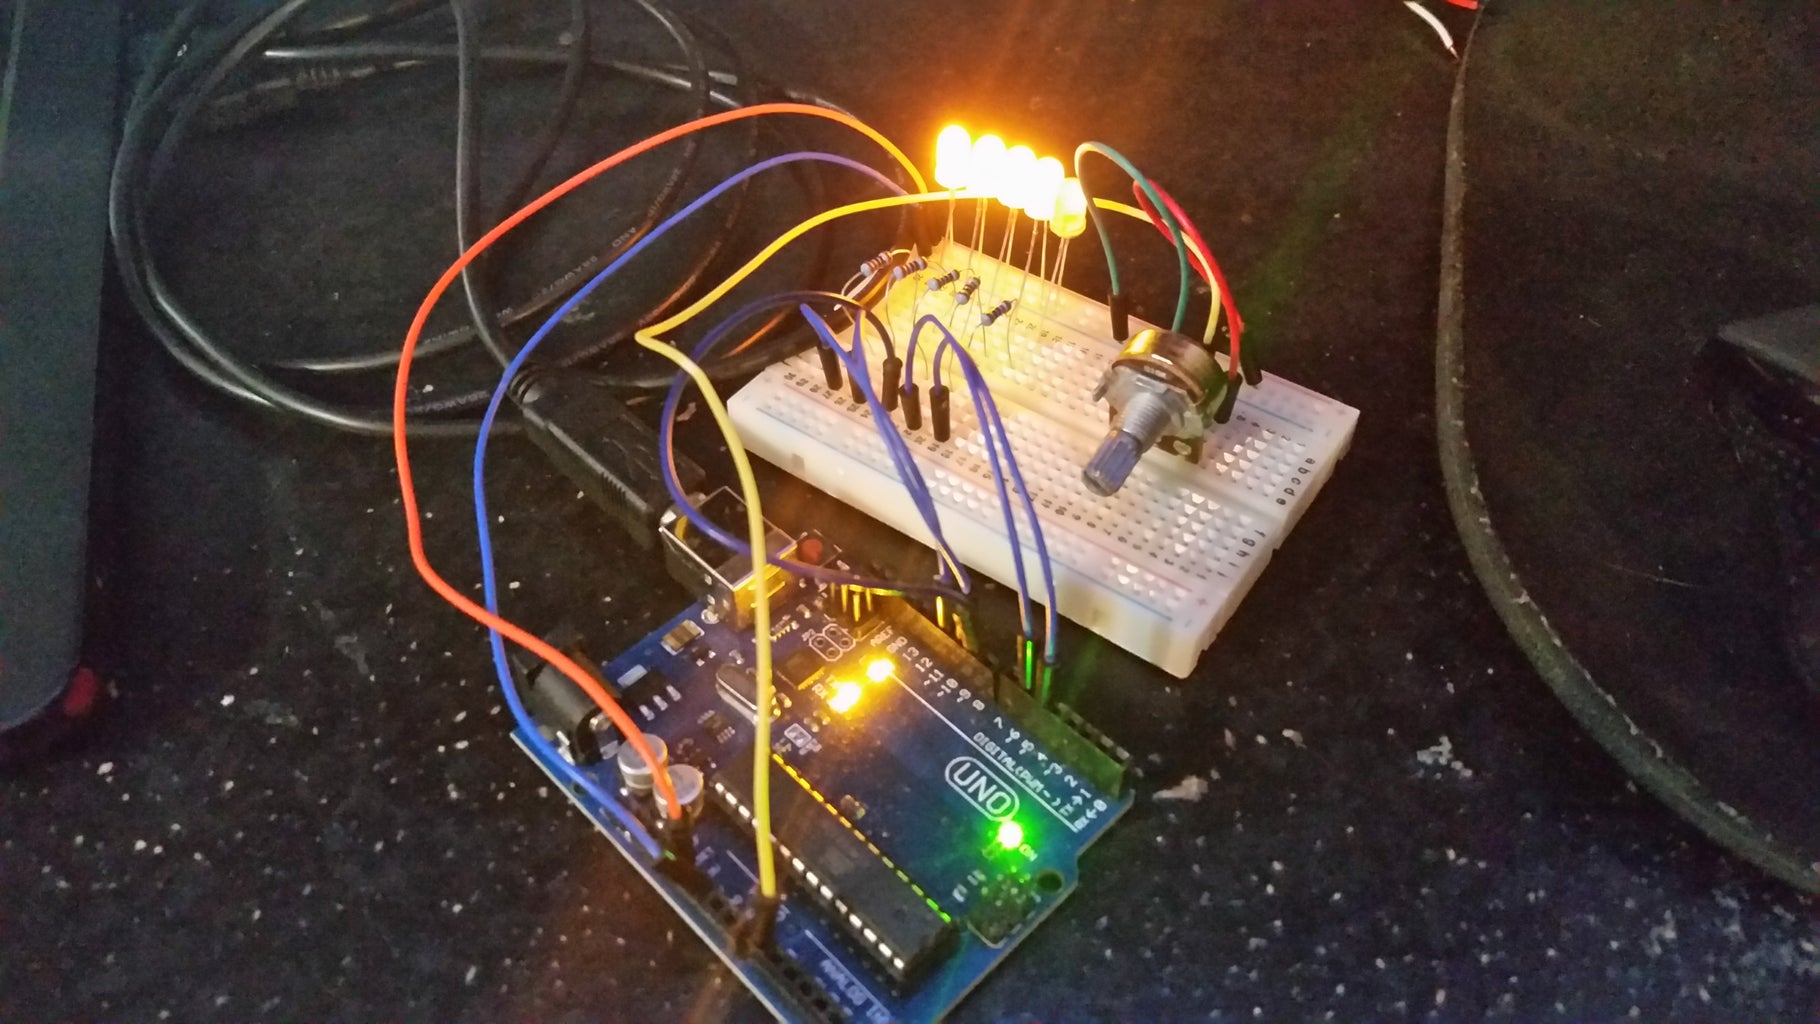
5 x LEDs
5 x 220-Ohm resistors
1 x Potentiometer
1 x Breadboard
1 x Arudino Uno or similar micro-controller
Let's get started!
Step 1: Set Up the LEDs and Potentiometer

First, we will set up the breadboard with the LEDs.
The pins used are:
LEDs: pins 5, 6, 9, 10, and 11
Potentiometer: Pin A0 (analog)
VCC (5 volts)
Ground
I used five LEDs, but you can adapt it to any number of LEDs (depending on the number of pins marked with a "~" you have available). Simply line up the LEDs with the short side placed in the ground rail on your breadboard, and each positive prong (the longer one) hooked up to a 220-ohm resistor. The other side of each resistor leads back to a pin on the Arduino.
Note that the pins used in this project are marked with a tilde (~) character. This represents the pins which are capable of pulse width modulation. This is when the board emulates analog output by changing the amount of time during the duty cycle the LEDs are kept on. An LED has a charge that pulses through it a certain number of times every second to make it light up. Basically, the brighter the LED is needed, the longer the LED is kept on for each one of the pulses needed to light it up.
After the LEDs are hooked up, it is time to connect the potentiometer. The middle pin controls the resistance applied to the energy flowing through it. This hooks to an analog input pin, and will control which pin should be considered the brightest pin during each iteration of the loop in the code (discussed next).
Step 2: The Code
Let's take a look at the code:
int LEDs[] = {5, 6, 9, 10, 11};
int maxFadeDistance = 3;        // Don't turn on LEDs more than 3 pins away
int maxB = 255;                 // Brightness range for LED is 0 - 255
int brightnesses[] = {          // To expand the fade across more pins, divide by
    maxB,                       //     a larger number and add more divisions:
    (int)(maxB - ((float) 1 / 3 * maxB)),
    (int)(maxB - ((float) 2 / 3 * maxB)),
    0
  };
Fist, pay attention to the arrays here. There are 5 LED pins and 3 levels of brightness. It might be confusing at first, but this allows us to control all of the LED pins and brightnesses just by indexing them and using their relative position to manipulate them. I tried to arrange the values to resemble fractions so that we can see better what is going on. The first value represents 0 in the array, and it also represents a distance of 0 from the pin which is considered to be the brightest. If we calculate a pin to be 3 pins away, we will have a brightness of 0. Similarly, for each pin we are away from the 0 pin, the brightness decreases by 1/3rd. This will create a shifting effect when we turn the potentiometer.
int potentiometer = A0;         // Potentiometer pin
int potValue = 0;               // Value to be mapped from potentiometer

void setup()
{
  Serial.begin( 9600 );         // Debugging

  for( int i = 0; i < (sizeof( LEDs ) / sizeof( int ) ); i++)
  {
    if( LEDs[i] )                // Check if not null
      pinMode( LEDs[i], INPUT ); // Explicitly set up each pin as input

  } // for

  pinMode( potentiometer, INPUT );

} // setup

void loop()
{
  potValue = analogRead( potentiometer );
  Serial.println( (String) potValue );
  turnOn( potValue );

} // loop
Here we have a fairly basic setup method and loop method. The thing about working with LEDs in an array is that we can use loops to get things done, like setup the pins without rewriting tons of code!
void turnOn( int potValue )     // pin
{
  int pinOn = 0;
  int pinDistance = 0;
  for( int i = 0; i < ( sizeof( LEDs ) / sizeof( int ) ); i++)
  {
    // Map the potentiometer value to a range of 0 - size of array.
    pinOn = map( potValue, 0, 1023, ( sizeof( LEDs ) / sizeof( int ) ) - 1, 0 );
    // Now we need to get the brightness of this LED in relation
    //    to the one that is on.
    pinDistance = pinOn - i;
    if( pinDistance < 0 )                 // If negative, map to positive distance away
      pinDistance = -pinDistance;
    if( pinDistance > maxFadeDistance )   // Always turn off LED's > than X steps away
      pinDistance = maxFadeDistance;
    analogWrite( LEDs[i], brightnesses[pinDistance] );  // Use pwm to set brightness

  } // for

} // turnOn
The turnOn() method is what makes it all happen. Here, we set the pinDistance to 0. This represents how many positions in the array each pin is. We then map the values of the potentiometer to a value between 0 and the number of LEDs we have. This indicates which one should be the brightest.
Since we're using indexes to loop through the array, we can calculate the distance away by taking the LED index which is the brightest, and subtracting the index of the current pin. This gives us a distance from the brightest. That distance can turn out to be positive or negative. If it's negative, just convert it to a positive distance, and you have the relative distance in the array away from the brightest one!
I hope this helps you gain some perspective when working with distances in arrays, and putting them to good use.


