

Introduction: Arduino - Getting to Know LEDs


Hello, this is KNEXnCoding here with another tutorial aimed at beginners on getting to know how to use LEDs, buttons and potentiometers. Let's get right into it.
Parts:
- 1 LED
- 1 Pushbutton
- 1 Potentiometer
- 1 10k OHM Resistor
- 1 220k OHM Resistor
- About 7 Jumper Wires
If you don't have any of these items, I would suggest getting them in the future because they can be very useful.
Step 1: Simple Button


Let's start with the basics. All this does is turn the LED on when the button is pressed. No code needed. Connect the parts as shown. Remember that the longer LED leg is the positive end.
Step 2: LED With Potentiometer
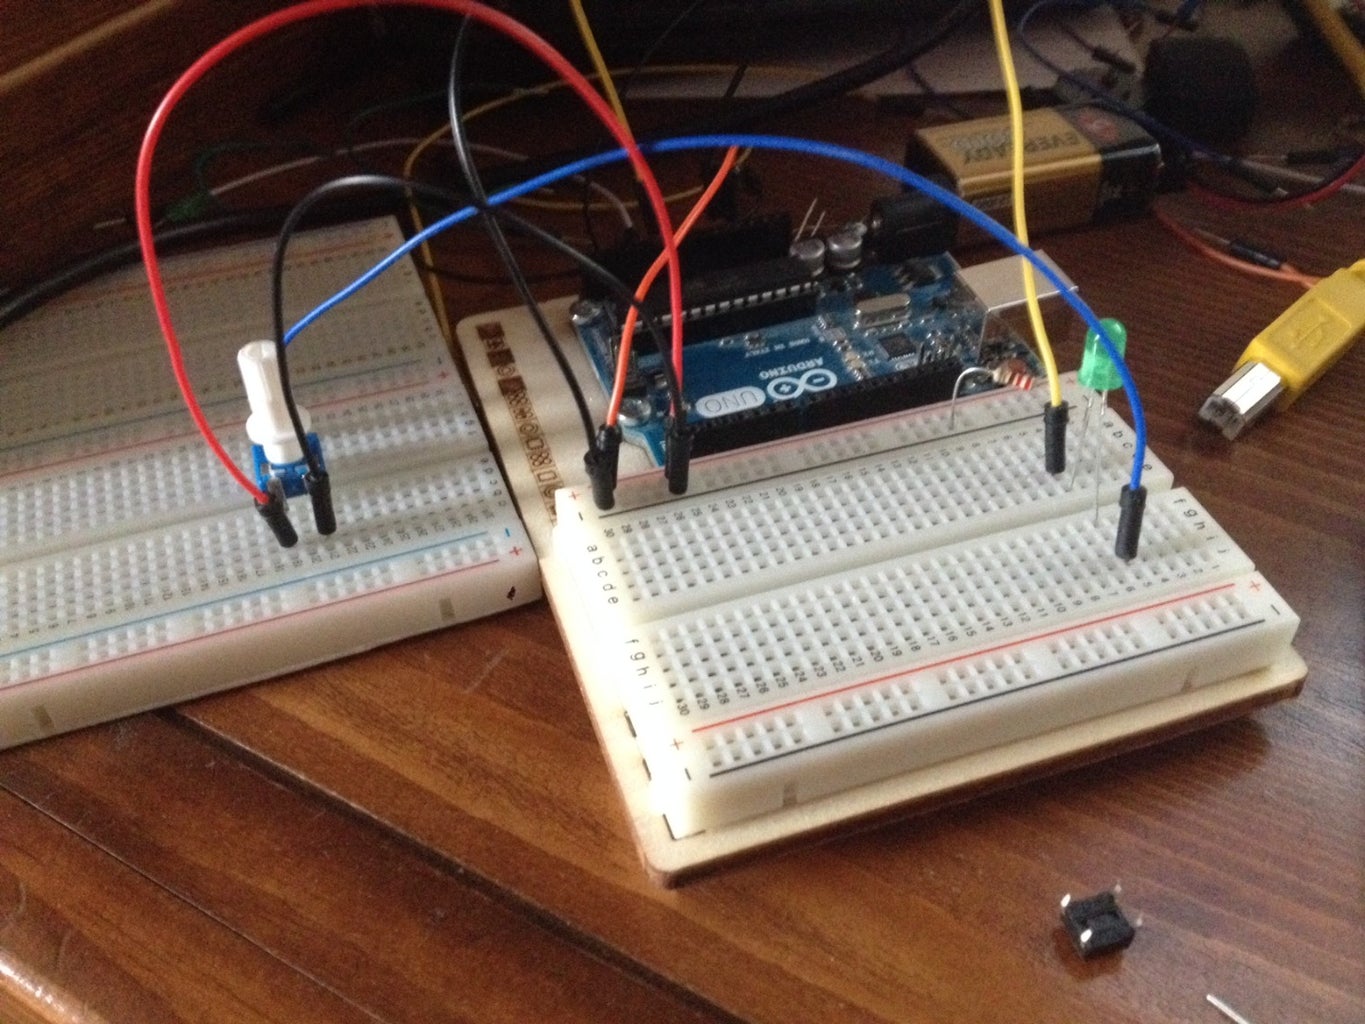
In this project, you will use a potentiometer to control the brightness of an LED. The potentiometer is connected to power and ground(as shown), and then to the positive end of the LED. The LED is also connected to ground with a 220 OHM resistor, as well as Analog Pin A0. The potentiometer controls how much electricity passes through the circuit. The less electricity, the dimmer the LED.
There is also simple code in this project, just so you can see the the values of the potentiometer on a serial monitor.
int potPin = A0; // Tell Uno that potentiometer is connected to Analog Pin A0
int potValue = 0; // Declare variable "potValue"void setup() { Serial.begin(9600); // Start Serial Monitor }
void loop() {
potValue = analogRead(potPin); // Read value of potentiometer
Serial.print("potValue: "); // Print "potValue: " in serial monitor Serial.println(potValue); // Print the pot value in serial monitor
}
Step 3: Turn an LED on and Off and Blink With Button and Code

Now, this project may seem similar to the first one but it isn't. Instead of directly connecting the button to the LED, you use code to turn it on and off. Set up the circuit as shown and read the notes in the code for information on how it works.
const int buttonPin = 2; // Tell Arduino that button is pin 2
const int ledPin = 8; // Tell Arduino that LED is pin 8int buttonState = 0; // Button variable(whether it is on or off)
void setup() {
pinMode(ledPin, OUTPUT); // Declare LED as output pinMode(buttonPin, INPUT); // Declare button as input }
void loop(){
buttonState = digitalRead(buttonPin); // Tell arduino to read state of button
if (buttonState == HIGH) { // If the button is on... digitalWrite(ledPin, HIGH); // Turn the LED on } else { // If it isn't... // turn LED off: digitalWrite(ledPin, LOW); // Turn it off } }
Now, let's make the LED blink on and off when the button is pressed.
const int ledPin = 8; // Tell Arduino that button is pin 2
const int buttonPin = 2; // Tell Arduino that LED is pin 8// Initialize button, LEDs, timer, etc...
int ledState = LOW; int buttonState = 0; long previousMillis = 0;
long interval = 1000;
void setup() {
pinMode(ledPin, OUTPUT); // Declare LED an output pinMode(buttonPin, INPUT); //Decalare button an input }
void loop() {
buttonState = digitalRead(buttonPin); // Read if button is on or off if(buttonState == HIGH) { // If button is on...
// Timer: unsigned long currentMillis = millis();
if(currentMillis - previousMillis > interval) {
previousMillis = currentMillis;
// Decide whether LED should be on or off
if (ledState == LOW) ledState = HIGH; else ledState = LOW;
digitalWrite(ledPin, ledState); // Turn LED on or off } }
else { // If button isn't on...
digitalWrite(ledPin, LOW); // Turn LED off
}
}
Step 4: Blink LED on and Off and Use Potentiometer to Dim the LED

Now, attach the potentiometer to the LED like before, but don't connect it to the Serial Monitor. Use the same code as before.
const int ledPin = 8; // Tell Arduino that button is pin 2
const int buttonPin = 2; // Tell Arduino that LED is pin 8// Initialize button, LEDs, timer, etc...
int ledState = LOW; int buttonState = 0; long previousMillis = 0;
long interval = 1000;
void setup() {
pinMode(ledPin, OUTPUT); // Declare LED an output pinMode(buttonPin, INPUT); //Decalare button an input }
void loop() {
buttonState = digitalRead(buttonPin); // Read if button is on or off if(buttonState == HIGH) { // If button is on...
// Timer: unsigned long currentMillis = millis();
if(currentMillis - previousMillis > interval) {
previousMillis = currentMillis;
// Decide whether LED should be on or off
if (ledState == LOW) ledState = HIGH; else ledState = LOW;
digitalWrite(ledPin, ledState); // Turn LED on or off } }
else { // If button isn't on...
digitalWrite(ledPin, LOW); // Turn LED off
}
}


