

Introduction: Arduino Guide Dog


Ok the title is a bit exaggerated :) . This project was started with much loftier expectations but I soon worked out that the idea I wanted to develop would require much greater programming skills that I currently have. I do however hope that this will spark your interest and you will have a go at building it.
As it stands the device will allow you walk with your eyes closed towards a wall and be warned in plenty of time to stop before you bump into it. The distance can be altered in the sketch and the tone of the buzzer can also be set to the users liking.
I included a TFT display to show the distance since its not really about replacing a guide dog, but is an educational experiment for those of us that like tinkering.
It would be great to be able to use the actual returned audio to indicate whether the obstacle was a bush with hazy returned signal or a solid object or a fence etc with distance also being spoken. That would require quite sophisticated audio processing and much more than a simple buzzer as an output, but its food for thought.
I searched for a project like this but was unable to find one, so I've used code from other sketches that performed similar tasks and worked it all into my final result. Next the parts -->
Step 1: The Main Parts Reqd


The project I built I used an Arduino Uno, Piezo buzzer, HC-SR04 Ultrasonic unit, KMR 1.8 TFT display.
The only part that may prove a little difficult to get would be the display, but there are alternatives, using an alternative display would mean altering the sketch to use the appropriate libraries for that display and possibly different pins. The display I used was purchased from This EBay seller an alternative one is here
all the other parts are easily obtainable. The ebay seller stated that the information for the display was available from their Dropbox site, that is not true and they have failed to send me simple usage instructions. Hopefully you will find this as enough information to use the display and in future the SD card connections if you wand to build a card reader and slide show unit :)
Step 2: Assembly
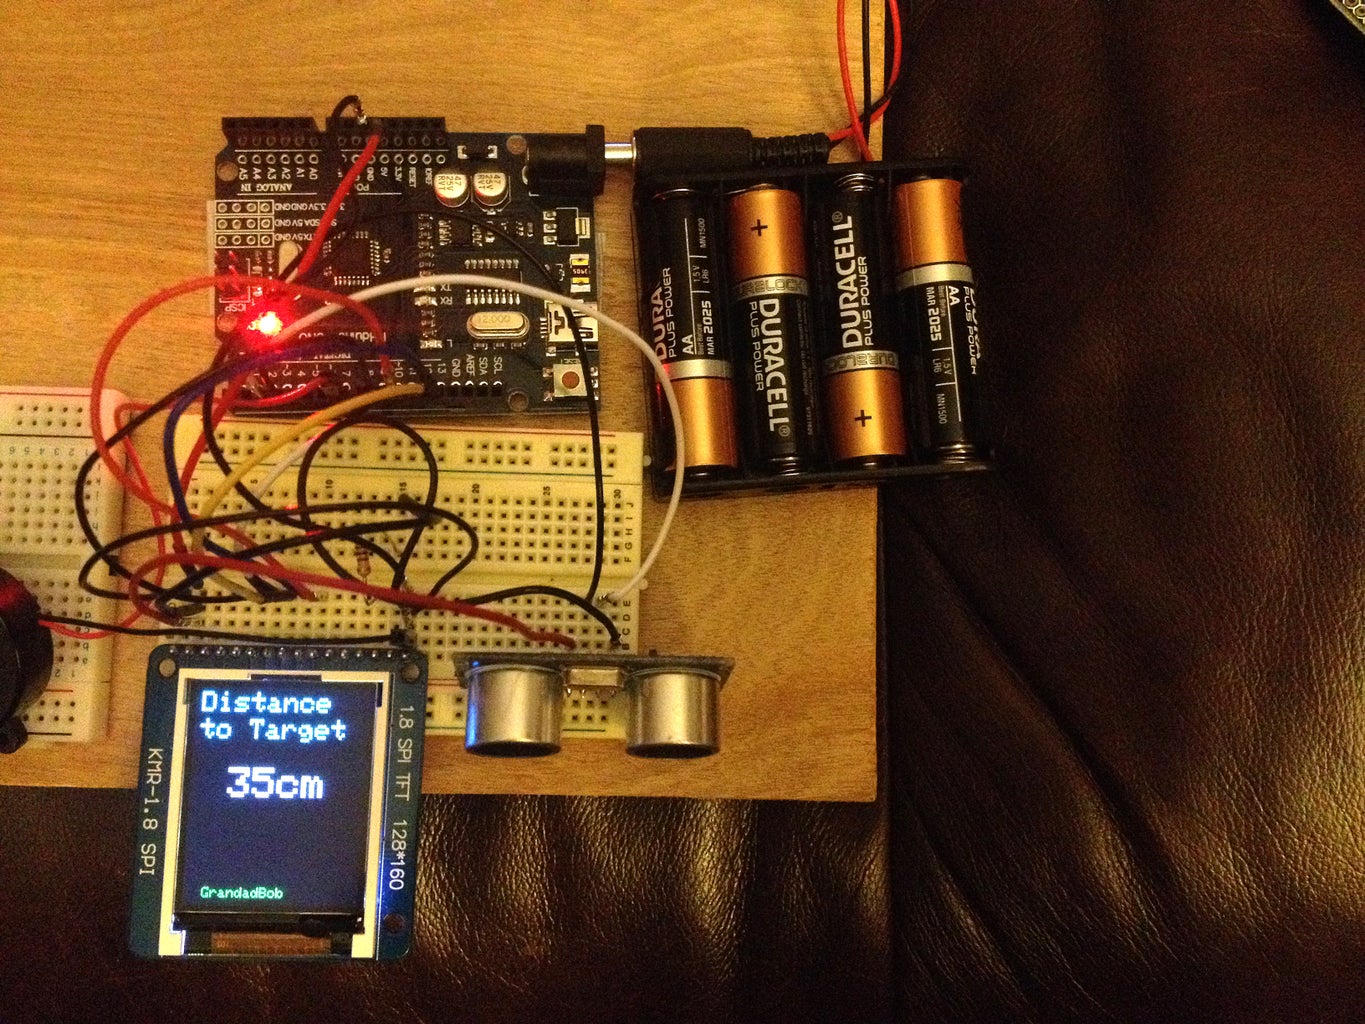

As you can see from the actual image, you could not follow that to wire it up, I have included another image created in Fritzing that should make life much easier but the power supply is not shown though I'm sure you can work that out :)
In the sketch line 81 sets the distance that the buzzer will sound at, Line 84 sets how long the tone is and its frequency, you can tinker with this too. Also change line 37 to remove grandadbob and enter any text you want.
The sketch is added here for download, the text file is for additional information only
If you improve this sketch please let me know and I will add any improvements.


