

Introduction: Arduino Interrupt - LED Brightness


This project is an example of using Arduino interrupts. The interrupt will read the value from the potentiometer and set the LED to the set brightness.
Step 1: Connect the Arduino and Breadboard Power

Connect the ground pin to the ground rail and the 5v pin to the power rail.
Step 2: Connect the Button

- Wire the top-left corner of the button to the 5v rail on the breadboard.
- Wire the top-right corner to a 10kΩ resistor and that to the ground rail.
- Wire the bottom-right corner to pin 2 on the Arduino board.
Step 3: Connect the LED
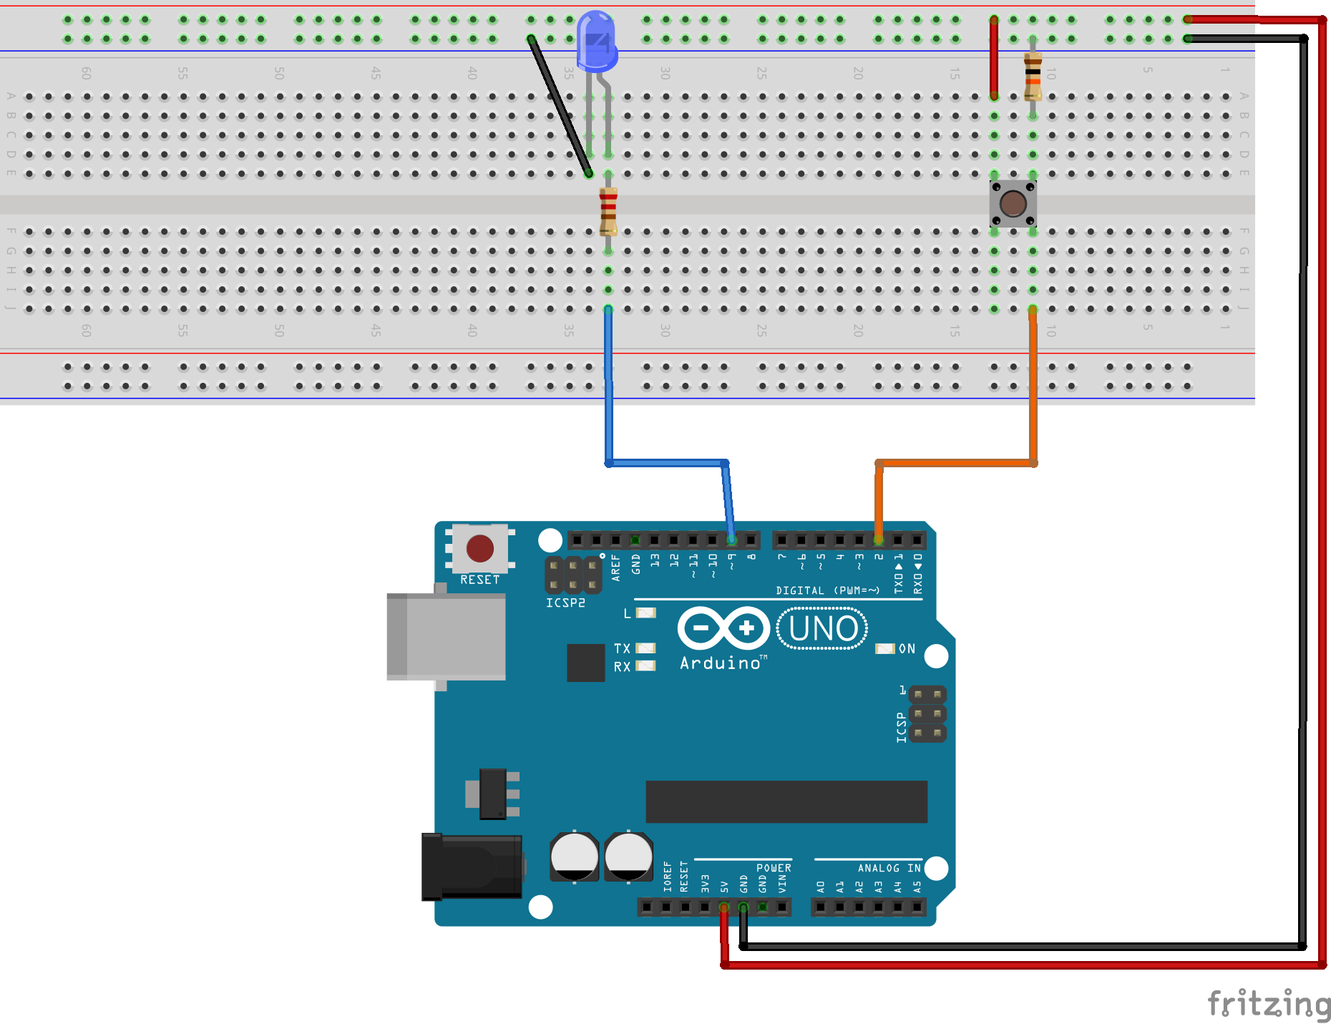
- Wire the LED anode to a 220Ω resistor and that to pin 9 on the Arduino board.
- Wire the LED cathode to the ground rail on the breadboard.
Step 4: Connect the Potentiometer

- Wire one of the two legs to the power rail and the other to the ground rail.
- Wire the other pin to pin A0 on the Arduino board.
Step 5: Upload the Code
Once the code is uploaded, set the potentiometer to the specified brightness level and press the button to update the LED.


