

Introduction: Arduino Nano: Invert Button With Visuino


Buttons, and digital switches are one of the most often used sensors with Arduino. They are also easy to connect and use from code. Sometimes however the button or the switch provides True when we need False, and False when we need True. To compensate for this we need to invert the value in our code.
In this Instructable you will learn how to connect Button to an Arduino, and program the button to control the on-board LED, directly or with inverted value. It also will be a base for a number following Instructables that are in the works :-)
The programming will be done with the help of Visuino - an easy to use graphical development environment for Arduino.
Step 1: Components

- One Arduino compatible board (I use Arduino Nano, because I have one, but any other will be just fine )
- One Button Sensor module I got from this cheap 37 sensors set.
- 3 female-female jumper wires
Step 2: Connect the Button to Arduino


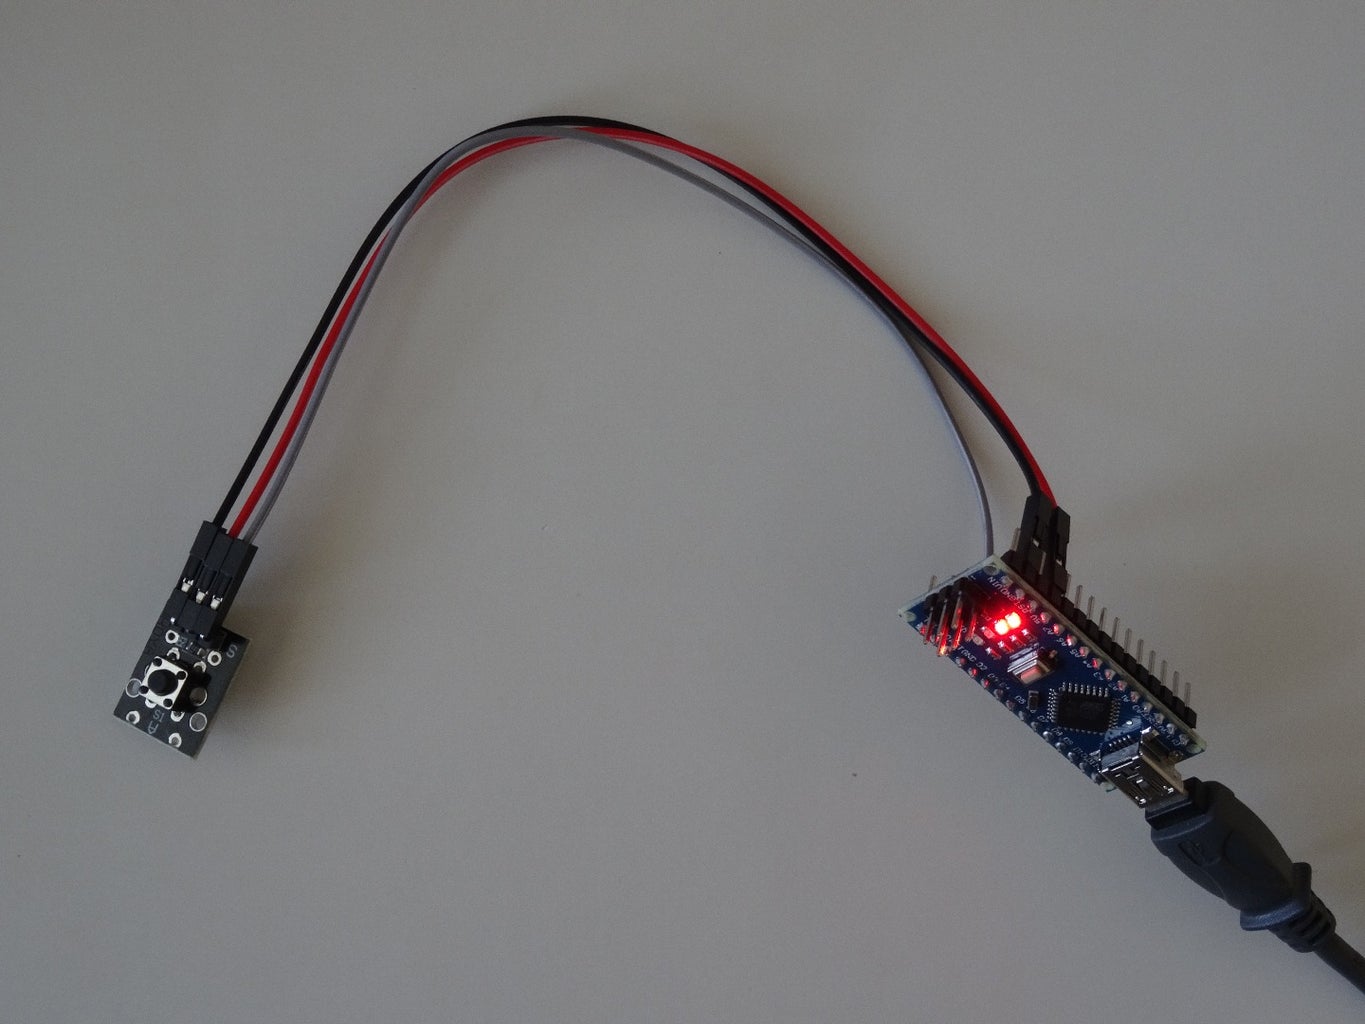
- Connect Ground(Black wire), Power(Red wire), and Data(Gray wire) to the Button Module (Picture 1)
- Connect the other end of the Power wire(Red wire) to the 5V power pin of the Arduino board(Picture 2)
- Connect the other end of the Ground wire(Black wire) to Ground pin of the Arduino board(Picture 2)
- Connect the other end of the Data wire(Gray wire) to Digital pin 2 of the Arduino board(Picture 3, and 4)
- Picture 5 shows where are the Ground, 5V Power, and Digital 2 pins of the Arduino Nano.
Step 3: Start Visuino, Select the Arduino Board Type


To start programming the Arduino, you will need to have the Arduino IDE installed from here: http://www.arduino.cc/.
Please be aware that there are some critical bugs in Arduino IDE 1.6.6.
Make sure that you install 1.6.7 or higher, otherwise this Instructable will not work!
The Visuino: https://www.visuino.com also needs to be installed.
Step 4: In Visuino: Connect the Button


Connect the "Out" pin of the "Digital[ 2 ]" channel of the Arduino component (Picture 1), to the "Digital" input pin of the "Digital[ 13 ]" channel of the Arduino component (Picture 2)
Step 5: Generate, Compile, and Upload the Arduino Code


Step 6: And Play...

As shown in Picture 1, when the button is Not Pressed, the LED on Pin 13 is ON.
If you Press the button, the LED will turn OFF (Picture 2)
Usually this is the opposite of what we want, so in the following steps we will invert the button to fix this.
Step 7: In Visuino: Add Inverter Component, and Connect It


- Type "inv" in the Filter box of the Component Toolbox then select the "Boolean Inverter" component (Picture 1), and drop it in the design area
- Connect the "Out" pin of the Digital[ 2 ] channel of the Arduino component to the "In" pin of the Inverter(Picture 2)
- Connect the "Out" pin of the Inverter to the "Digital" input pin of the Digital[ 13 ] channel of the Arduino component (Picture 3)
- The old connection between Digital[ 2 ], and Digital [ 3 ] will automatically be removed (Picture 4)
Step 8: Generate, Compile, and Upload the Arduino Code


- In Visuino, Press F9 or click on the button shown on Picture 1 to generate the Arduino code, and open the Arduino IDE
- In the Arduino IDE, click on the Upload button, to compile and upload the code (Picture 2)
Step 9: And Play...


As shown in Picture 1, when the button is Not Pressed, the LED on Pin 13 is OFF.
If you Press the button, the LED will turn ON (Picture 2)
This is exactly what we want :-)
Congratulations! You are now master of your Arduino connected button...
Also attached in the ZIP are the two Visuino projects, that I created for this Instructable. You can download and open them in Visuino: https://www.visuino.com
Attachments


Participated in the
Arduino All The Things! Contest


