

Introduction: Arduino Network Game

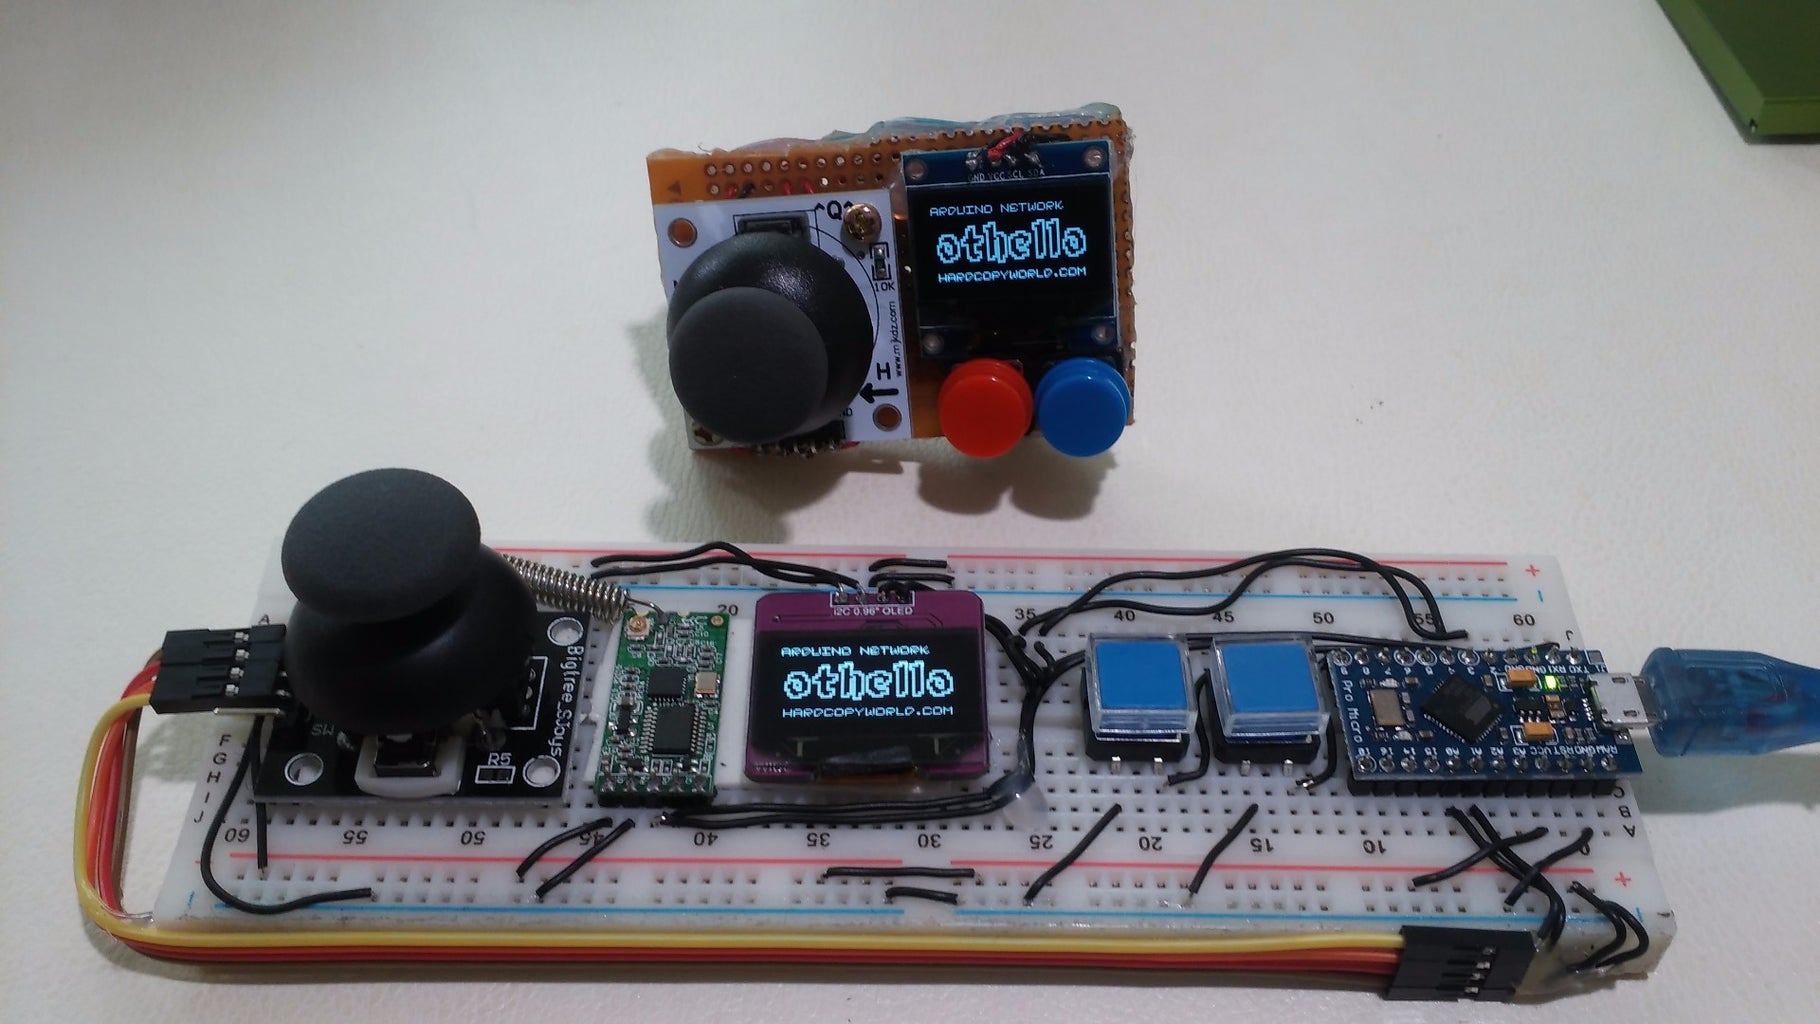


There are several arduino based game-pad like Arduboy, Gameby and Gamebuino. You can make and play these game-pad by yourself. These are single player only but remember that you can also make and play the arduino network game!!
This document shows how to build the network game-pad with arduino and give you the network game example, othello.
Step 1: Othello Game


Othello is the famous multi-player board game. I selected this as an example game cause othello's rule is simple
and suitable for the 1:1 network, turn by turn game. You can get the details about this game in below link.
"... Both players begin the game with two pieces on the board in the four centre squares. Both players take it in turns to make their move which consists of placing one piece down in a legally acceptable position and then turning any of the opposing player’s pieces where applicable. A legal move is one that consists of, for example, a black piece being placed on the board that creates a straight line (vertical, horizontal or diagonal) made up of a black piece at either end and only white pieces in between."
Step 2: Get the Parts


- Arduino : I used the "Arduino Pro Micro" board which is compatible with Arduino Leonardo. So you can use a Arduino Leonardo or Arduino Micro instead. Also you can use Arduino Uno or Nano. But in this case you have to change the source code. (I recommend you to use "Arduino Pro Micro" or "Arduino Pro Mini 3.3v" if you wants portable game-pad.
- OLED display : I used an OLED with 128x64 resolution, I2C interface(4 pin) and SSD1306 driver chip. The screen size, 0.96'' or 1.3'', is not the matter. You can use any other 128x64 OLED but you have to modify the source code and library.
- HC-11 433MHz RF module : HC-11 is simple RF communication module and easy to handle. You don't have to control the pairing process. Just send and receive the data!! One more advantage, you could make 1:N network game also with this module.
http://www.aliexpress.com/wholesale?catId=0&initi... - Joystick module : Major input module for the game. You can easily find this at below link. http://www.aliexpress.com/wholesale?catId=0&initi...
- Buttons : Need two tactile buttons.
To make portable game-pad, you need also:
- LiPo charger module : This module is used for single-cell lithium or lithium multi-section parallel, charging ports can take power from USB.
http://www.aliexpress.com/item/1-a-lithium-batter... - LiPo battery : I used a 3.7V 240mAh LiPo battery.
Step 3: Connect Each Part


Connect each part as like picture.
- Arduino(Pro Micro/Leonardo) - OLED:
3.3V-VCC,
GND-GND,
SDA-SDA,
SCL-SCL - Arduino(Pro Micro/Leonardo) - HC-11:
3.3V-VCC,
GND-GND,
TX(D1)-RX,
RX(D0)-TX - Arduino(Pro Micro/Leonardo) - Joystick :
5V-VCC,
GND-GND,
A1-VER,
A0-HOR - Arduino(Pro Micro/Leonardo) - Buttons :
Connect to D5, D6 (I'll use internal pull-up of arduino)
And I used LiPo charger module in picture above. It has connection holes for battery, power input and power output.
- B+, B- holes in right side is for the LiPo battery's +, -.
- OUT+, OUT- holes in right side is for the arduino. The RAW(or VIN) and GND pins on your arduino should be connected to each of these.
Step 4: Upload the Source Code
You can get the source codes from GitHub link. There are two othello folder. One is for the Leonardo/Micro/Pro Micro board and the other is for the UNO compatible board.
https://github.com/godstale/game-maker/tree/master...
Open ino file with Arduino IDE and upload to your game-pads. Every game-pad uses same source code.
WARNING!! Your joystick module's setting may be different with my own. If there are problems in user input control, modify the InputController.cpp file.
Step 5: How to Play


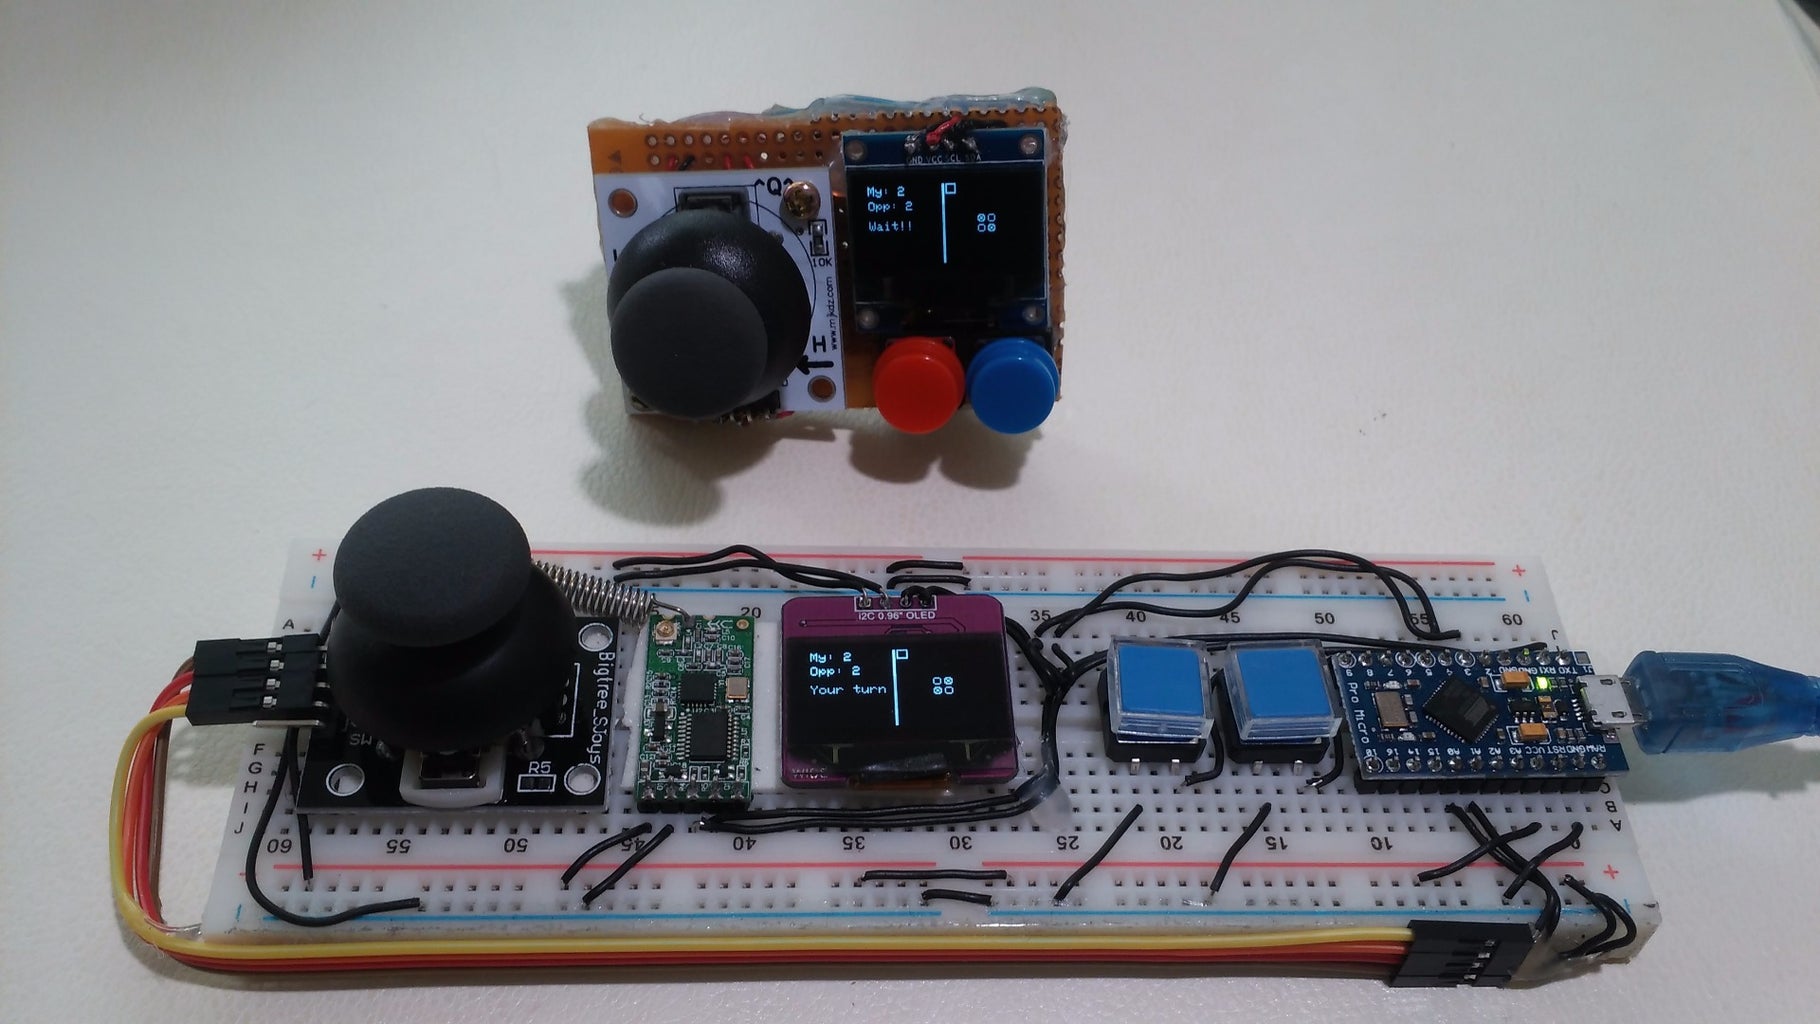

I assume that you have made two network game-pads, A and B.
- Turn on the game-pad A, B.
- Press any button at Logo screen.
- Set A as host and B as client. (You need a host and a client to start game)
- Game-pad A, B starts the game.
- First turn is for B(client). A(host) waits for the response from B.
- After the action of B, B sends response to A.
- After receiving the response, A is activated and B waits.
- Repeats step 5~7 until there is no blank space or you catch all the stone.
Now you can play the game turn by turn with two arduino network game-pad.
Step 6: Play the Game!!
Make and play the game with your friend!! (See the video)
- Original document (Korean)
- Source code (GitHub)
There are few single player game also. (FloatyBall and RunningMan)

Participated in the
Fandom Contest


