

Introduction: Arduino ProtoShield II


In this project, we will be making an Arduino Protoshield II which is the next step of designing and soldering electronics circuit to the Arduino Protoshield.
It’s a fairly easy project and could be used on variety projects.
Step 1: Defining Input and Output
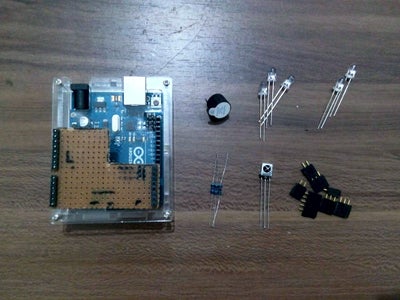
One of the most vital process in making a project is defining the system, input ,and output of it. In this project i'll make an minimum system of Arduino Remote Control (ARC). Don't forget to read the datasheet of every component.
Input of ARC Project:
- IR Receiver TL1838
Output of ARC Project:
- IR Transmitter IR333
- LED (red, green, blue)
- Buzzer

Step 2: Prototyping Connection


In general, the connections are very simple. Follow the instructions and images above, and you should have no problems.
Connecting IR Receiver
- The VCC pin on Arduino's 5V output
- The GND pin to Arduino's GND pin
- The Output to Arduino's digital pin 11
Connecting IR 333 Transmitter
- The VCC pin to Arduino's digital pin 3
- The GND pin to Arduino's GND pin
Connecting LED
- The VCC pin to Arduino's digital pin
- The GND pin to Arduino's GND pin through resistor 10k
Connecting Buzzer
- The VCC pin to Arduino's digital pin
- The GND pin to Arduino's GND pin
Step 3: Wrap It Up!

After making sure that everything works smoothly, you could solder necessary electronics directly on Protoshield and you're good to go!


