

Introduction: Arduino Robot Made From HDD


With an old HDD (we extracted ours from a PS3) you can make a functional robot which can do anything you could program. Here´s a list of the required materials:
-HDD (will be dismounted)
-Jumper wires (min. 12)
-DC motors (min.2)
-Arduino nano (or another similar in size)
-Driver L298n
-Battery (min. 9v)
-Wheels (min.2)
https://youtu.be/wcdWYHLtIU4
Step 1: Making the "chassis"

The first step is basically screw the motors (and the wheels) to the HDD. This gives rigidity to the robot and, of course, it prevents failures while testing. However, there isn´t only one way to do this step; actually, you can screw the motors anywhere you would like to, but you must be sure that place is safe. Here are our results.
Step 2: Connecting Motors, Drive and Battery


You have to connect both of the motors to the driver in any order, but is better to make a difference between each side. The picture shows which sides are for DC motors and which one is to power the drive.
The battery gives 2v for each motor and 5v for the driver, this results in 9v so you will have to use any other power source for the Arduino. After this, you should be able to look if the drivers turns on.
Step 3: Connecting Arduino
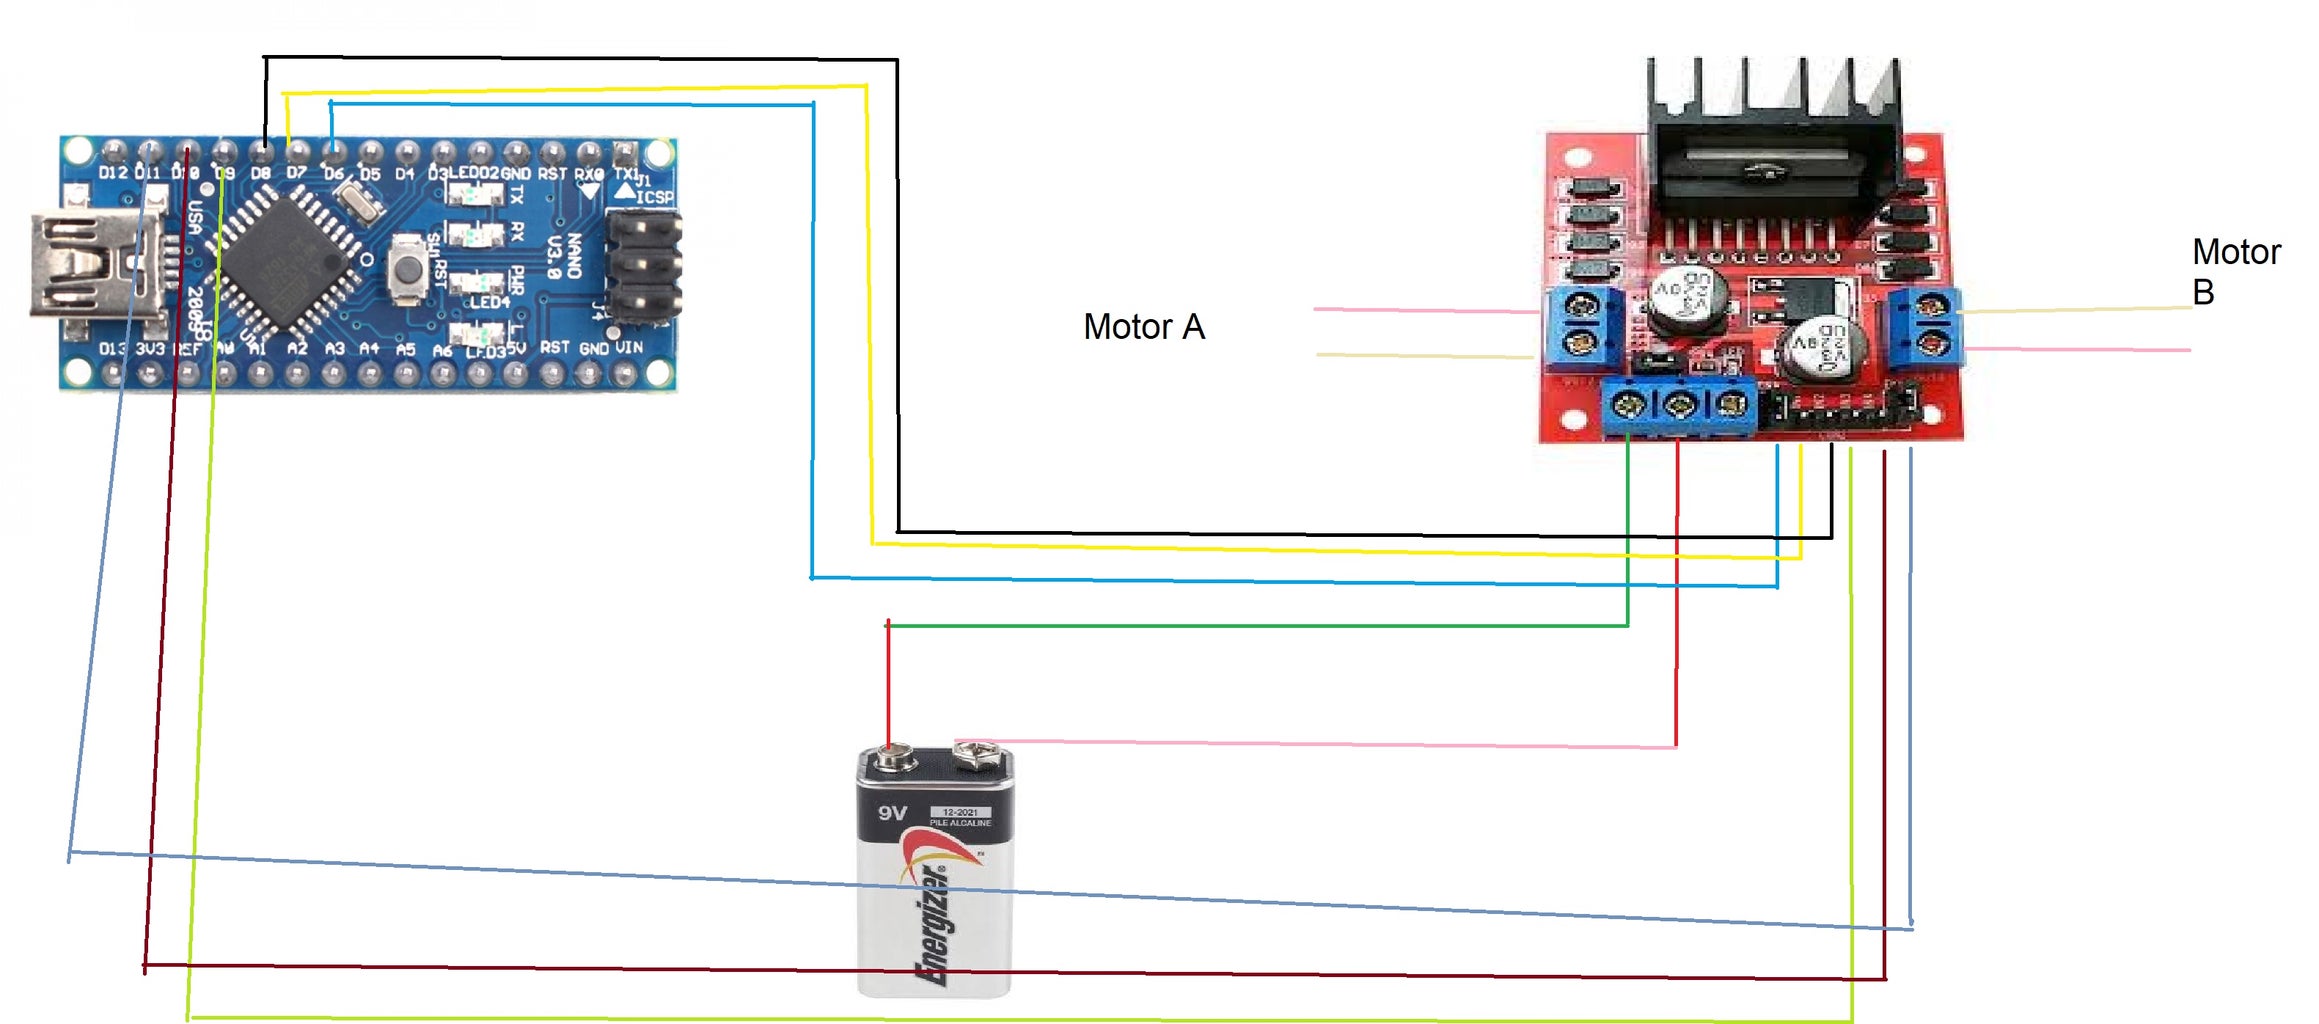
Here is a simple guide to connect driver and motors to Arduino, but it may change a lot while programming because this is for basic actions. In order to power the Arduino we used an android cell phone (USB); however, you can use any other method to power it as well.
Step 4: Programming Arduino
This is the final step, and also is on you to make a creative to use this robot. Here is an example of a simple action like turning on the A motor.
const int pinENA = 6;
const int pinIN1 = 7;
const int pinIN2 = 8;
const int speed = 200;
void setup()
{
pinMode(pinIN1, OUTPUT);
pinMode(pinIN2, OUTPUT);
pinMode(pinENA, OUTPUT);
}
void loop()
{
digitalWrite(pinIN1, HIGH);
digitalWrite(pinIN2, LOW);
analogWrite(pinENA, speed);
delay(1000); }


