

Introduction: Arduino Rocket Guidance


Rocket guidance can be achieved 2 ways, thrust vectoring and fin angling. The way I am guiding my rocket is by using thrust vectoring. Basically, an Arduino with a gyroscope and an accelerometer tell servo motors which way to angle the engine, and the rocket will move to the opposite of the engine's thrust vector. Lets get this show started with some material lists!
Step 1: Material List


This section should give you a basic idea about what you will need, more details will be explained in future steps
1) Power distro board (Custom Made)
2) .25 inch Aluminum billet or 3/8 inch basswood (For the chassis)
3) Rocket Motor
4) MPU6050 6 axis gyro chip
5) Arduino
6) laser cutter
7) Computer
8) Metal Gear Servos
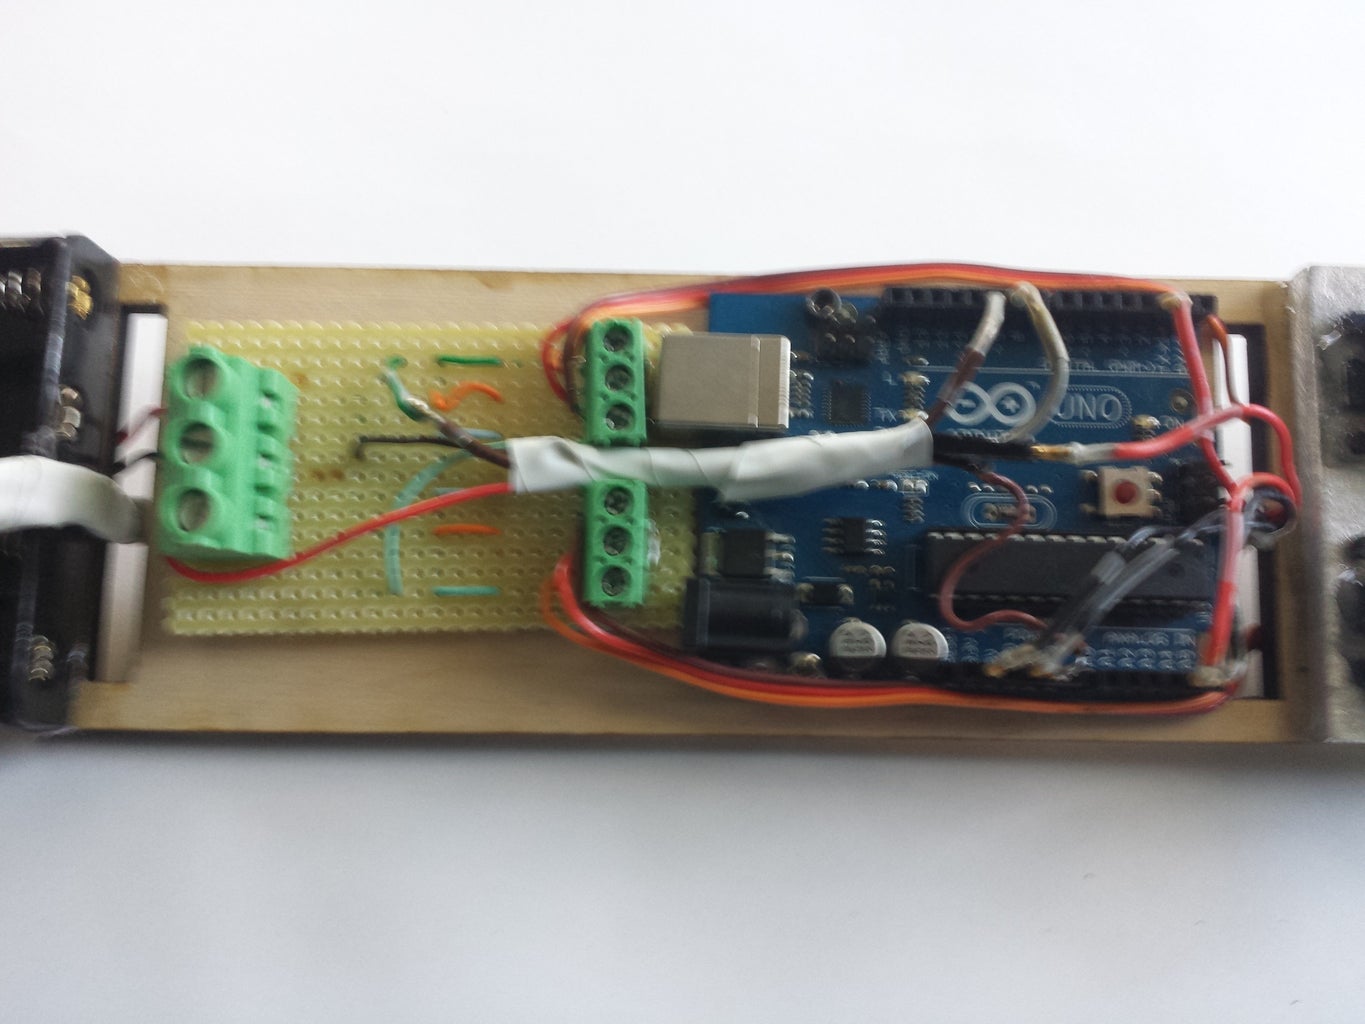
Step 2: Make the Power Distro. Board

Its critical to save weight on a rocket, and the power distro. board will take power from a 11v lipo battery and distribute it to the servo motors and to the arduino/sensors. Using the diagram i posted, make a distro board.
Step 3: Wire the Gyro to the Arduino


The gyroscope has to be wired to the arduino in a specific way for it to work/be read. Since this is a fairly cheap module, no directions were provided and I had to figure it out myself. Using the pictures, make a cable for the gyroscope.
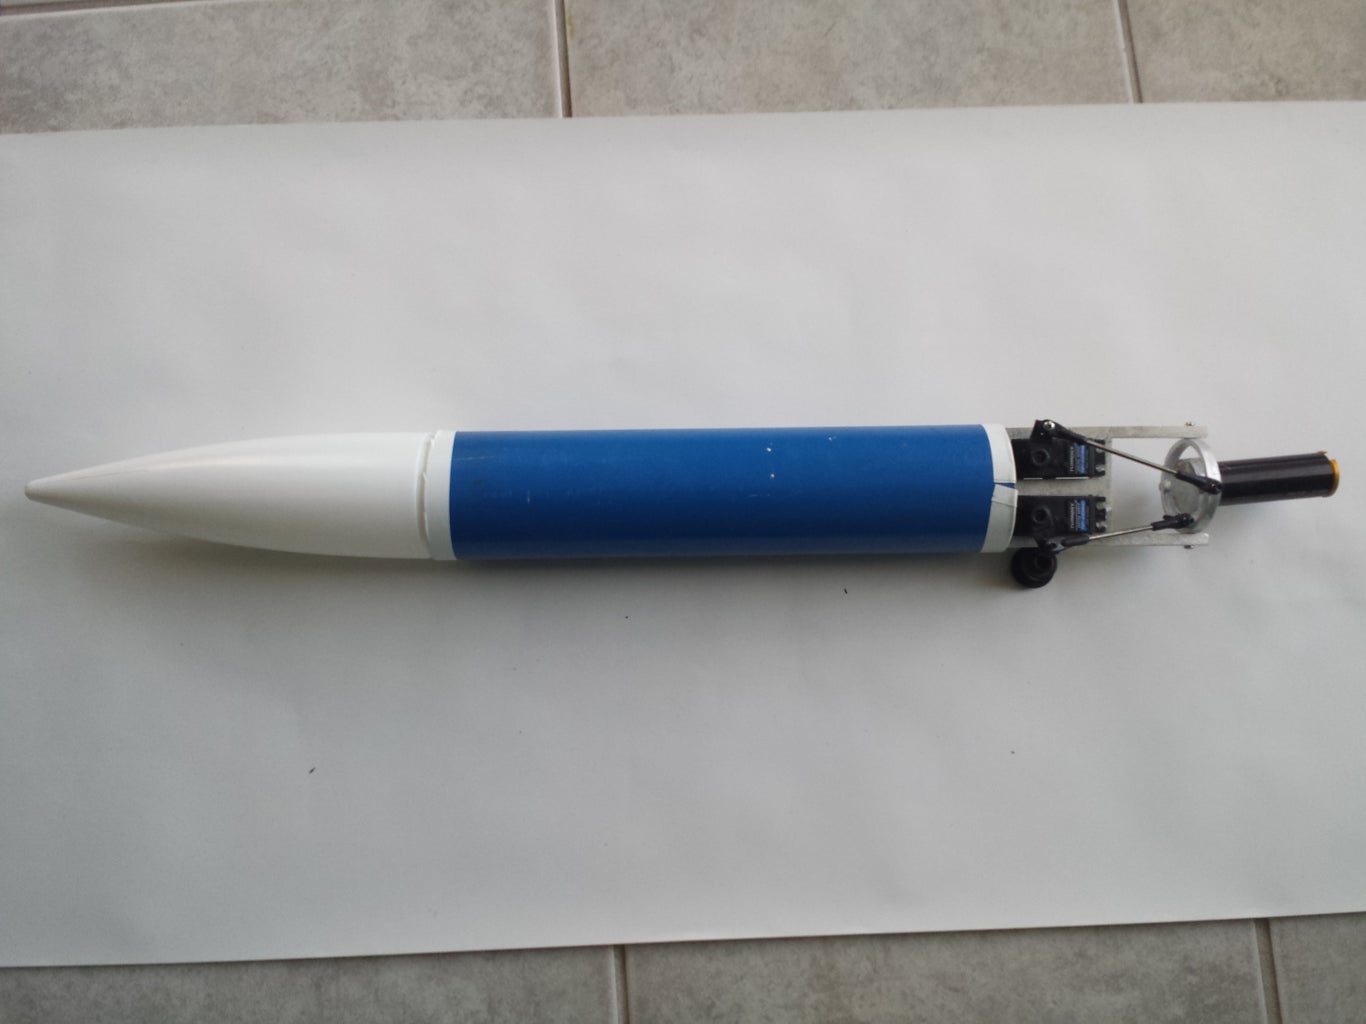
Step 4: Make the Thrust Vectoring Frame

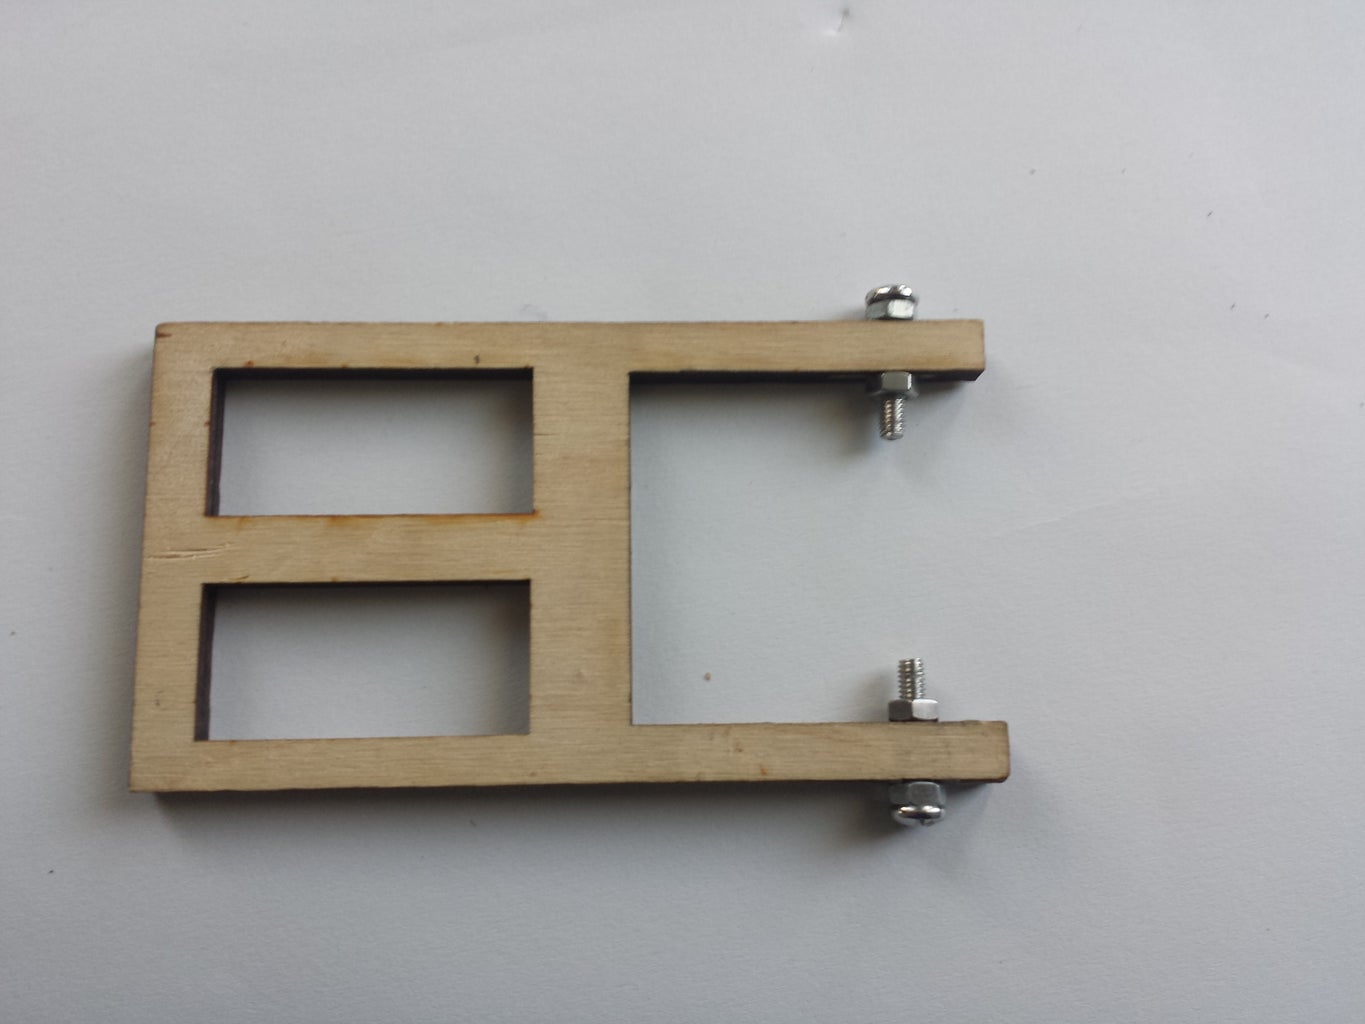
The thrust vectoring frame must be powerful enough to take the rocket motor's thrust and not break. For this reason I went with a custom plasma cut aluminum frame, although if you pick a smaller engine, you could go with a wooden one.
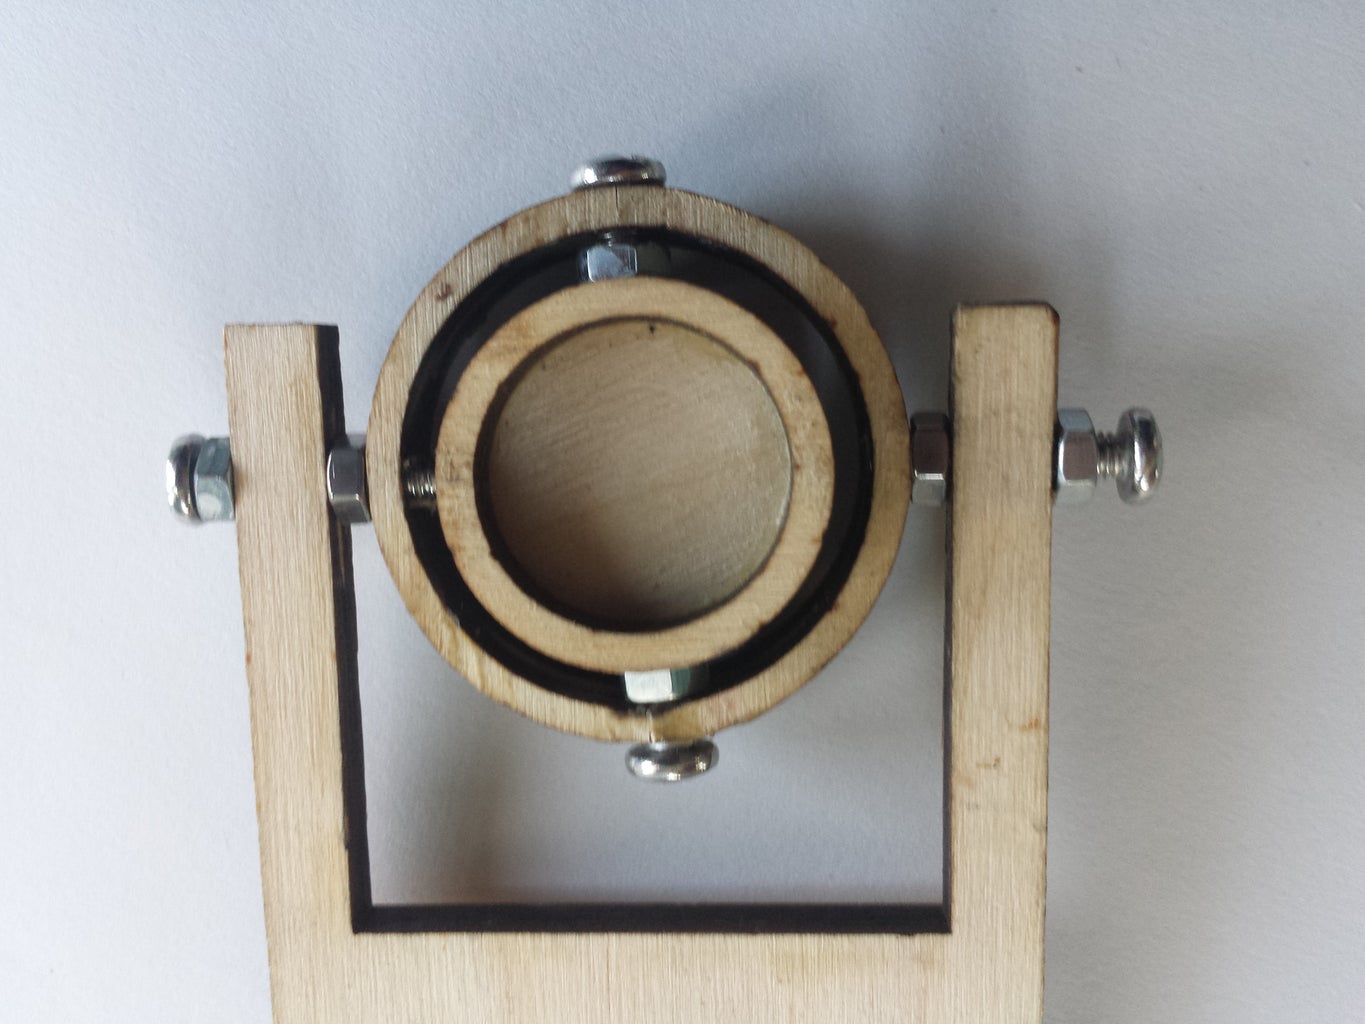
The 2 inner rectangles are going to be used to house the servo motors, while the outer circle moves in the x axis and the inner circle moves in the y axis. The rocket engine will sit in the inner circle. I lost the laser cutting files for this piece so you might have to piece it together yourself
Step 5: Attach Servos to the Frame
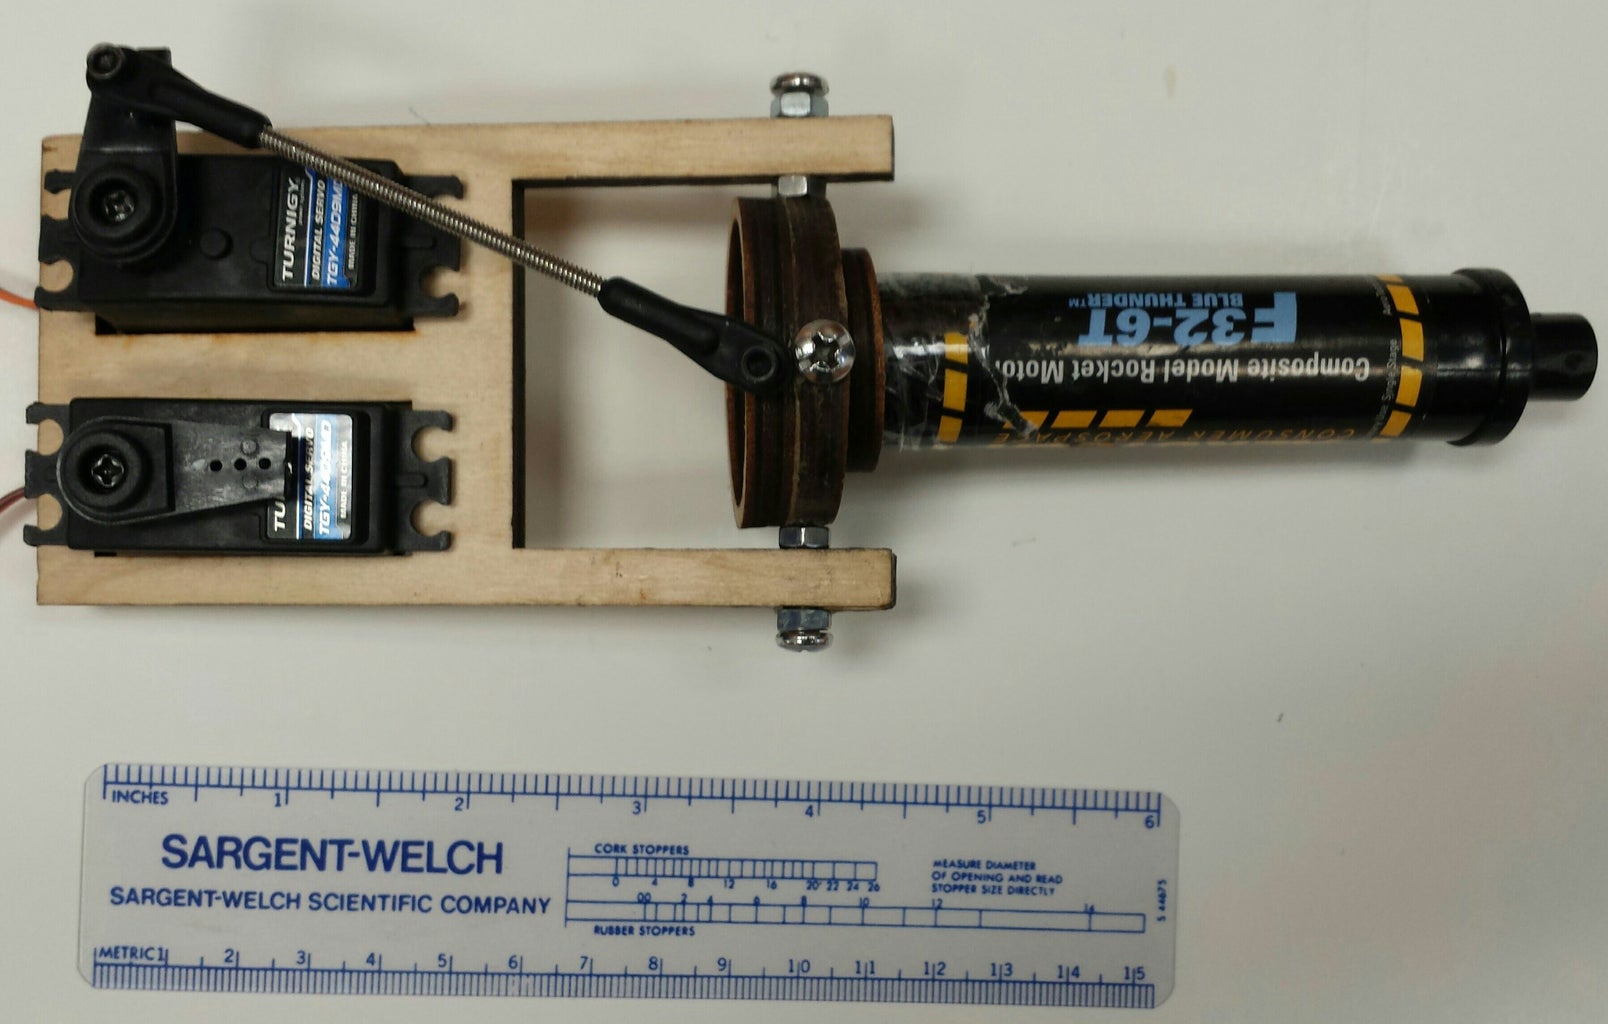
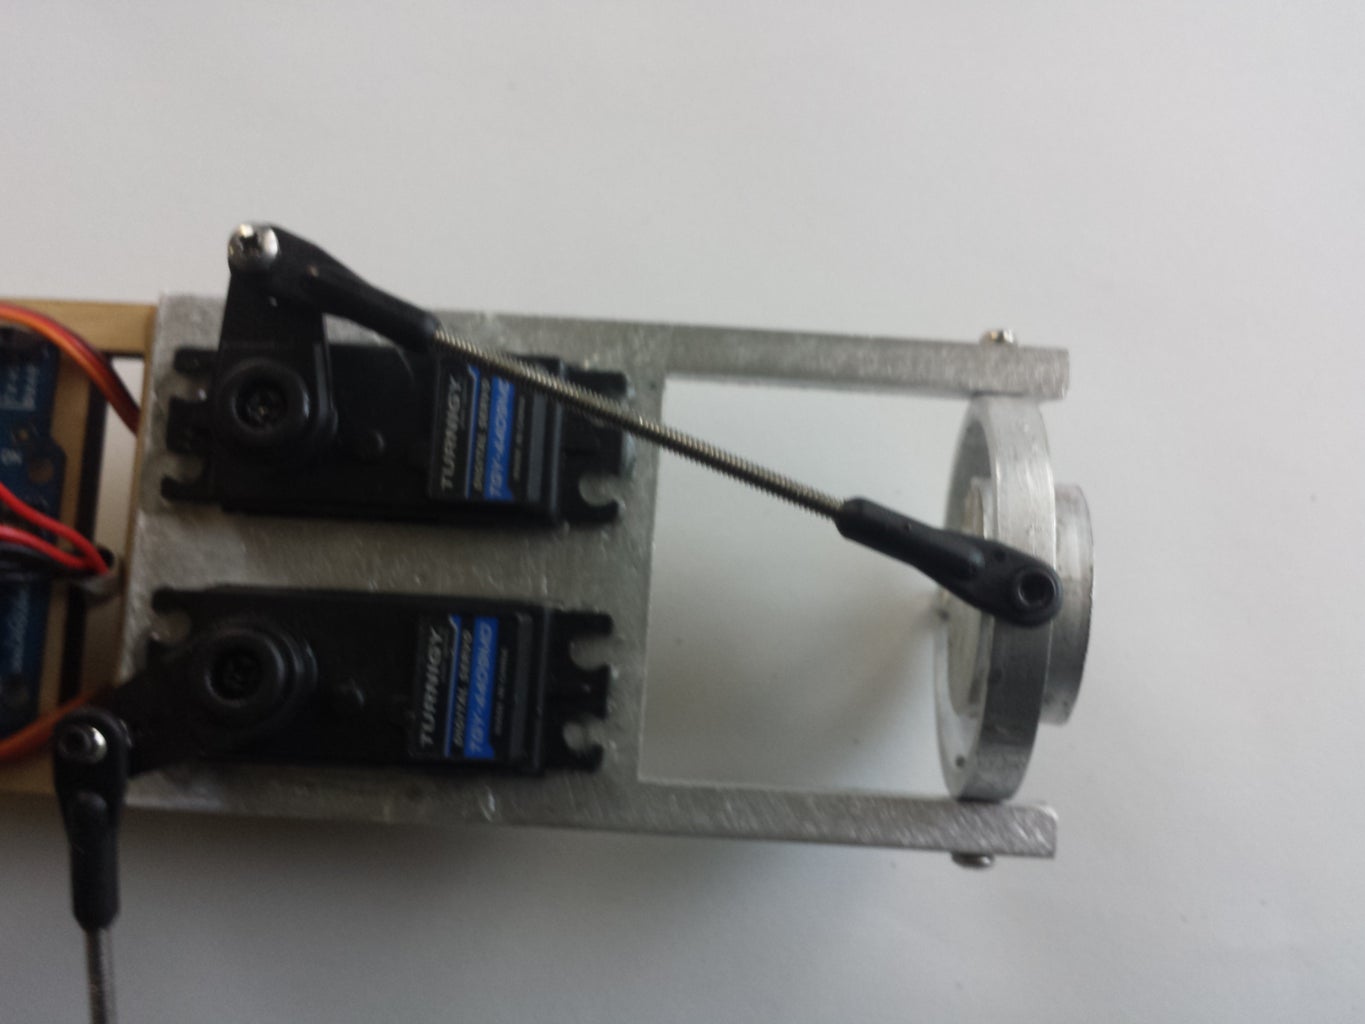
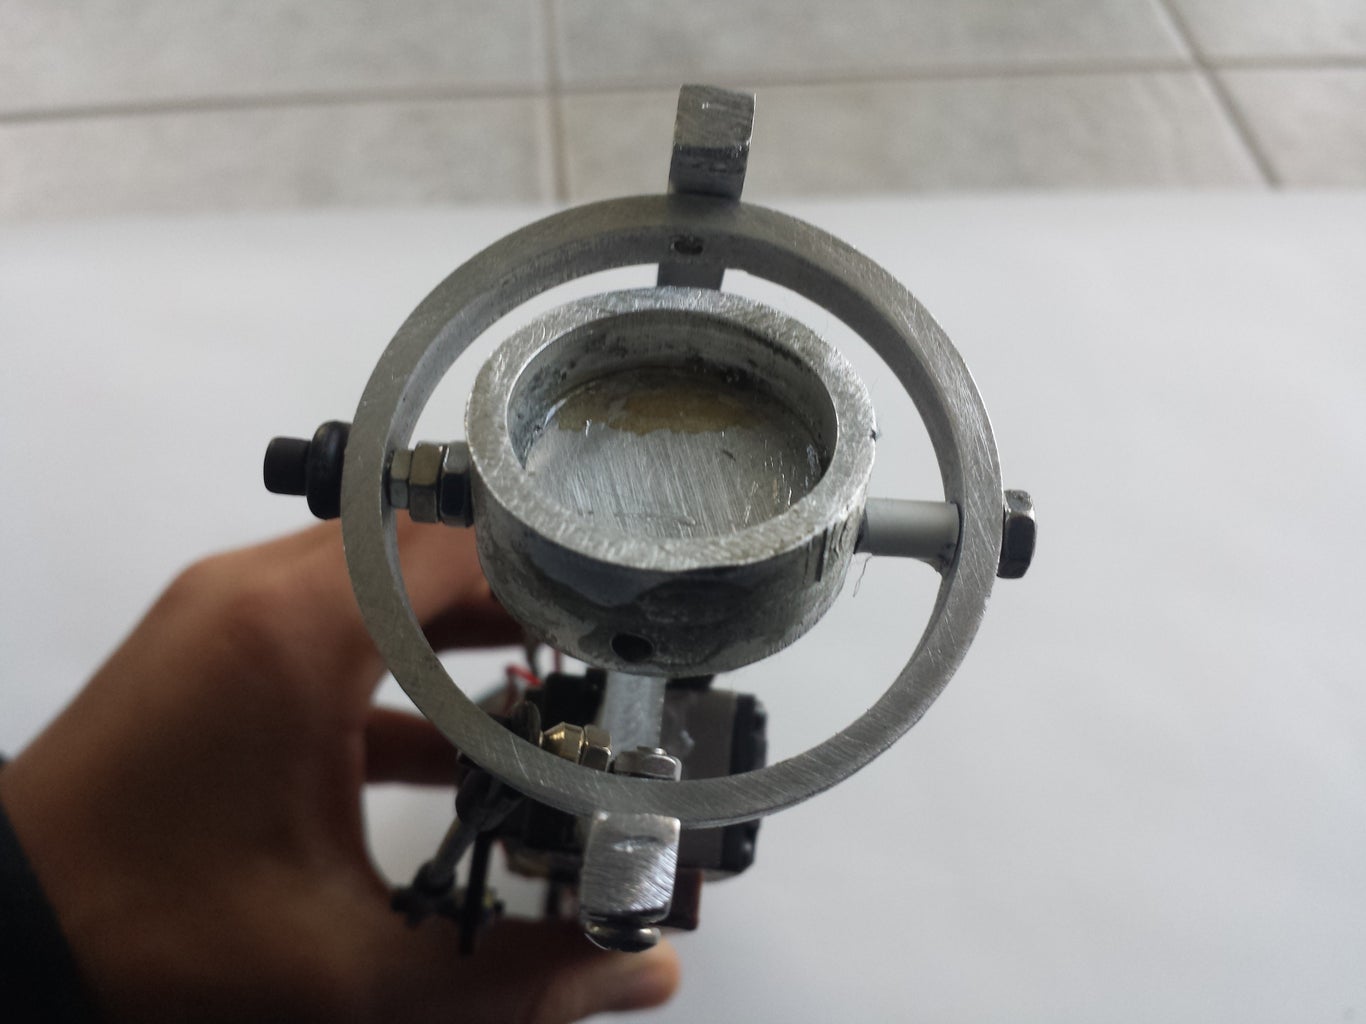


The servo motors I am using are metal geared and shave a fairly fast movement time (critical to rockets). The servos are attached to rods, which connect to both the inner and outer circle. I had to epoxy the servo motors in because they kept coming loose.
Step 6: Make the Electronics Bay
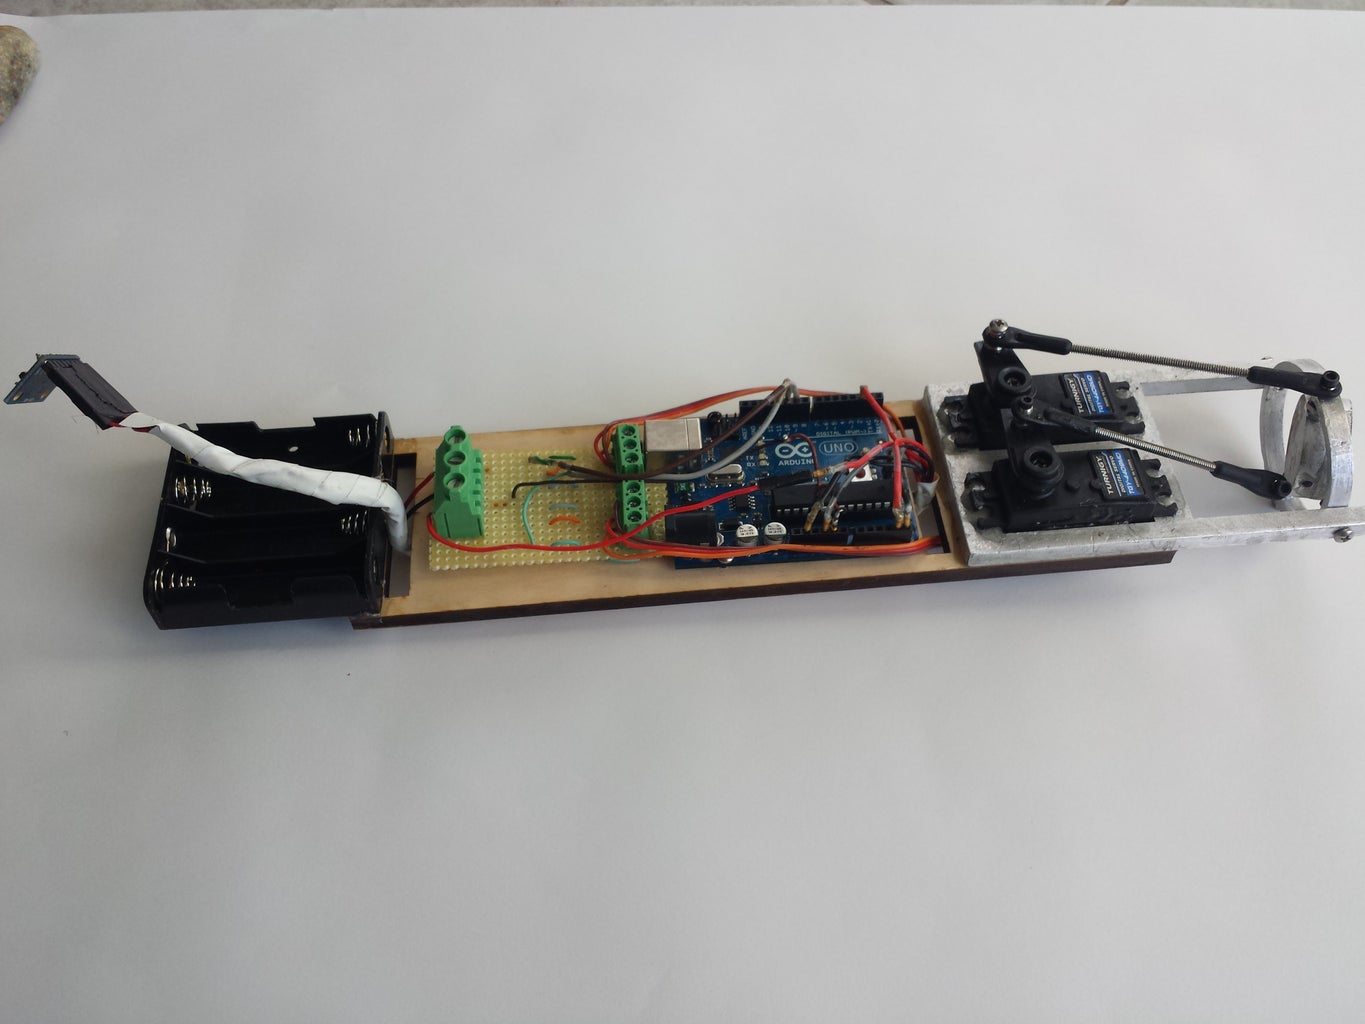
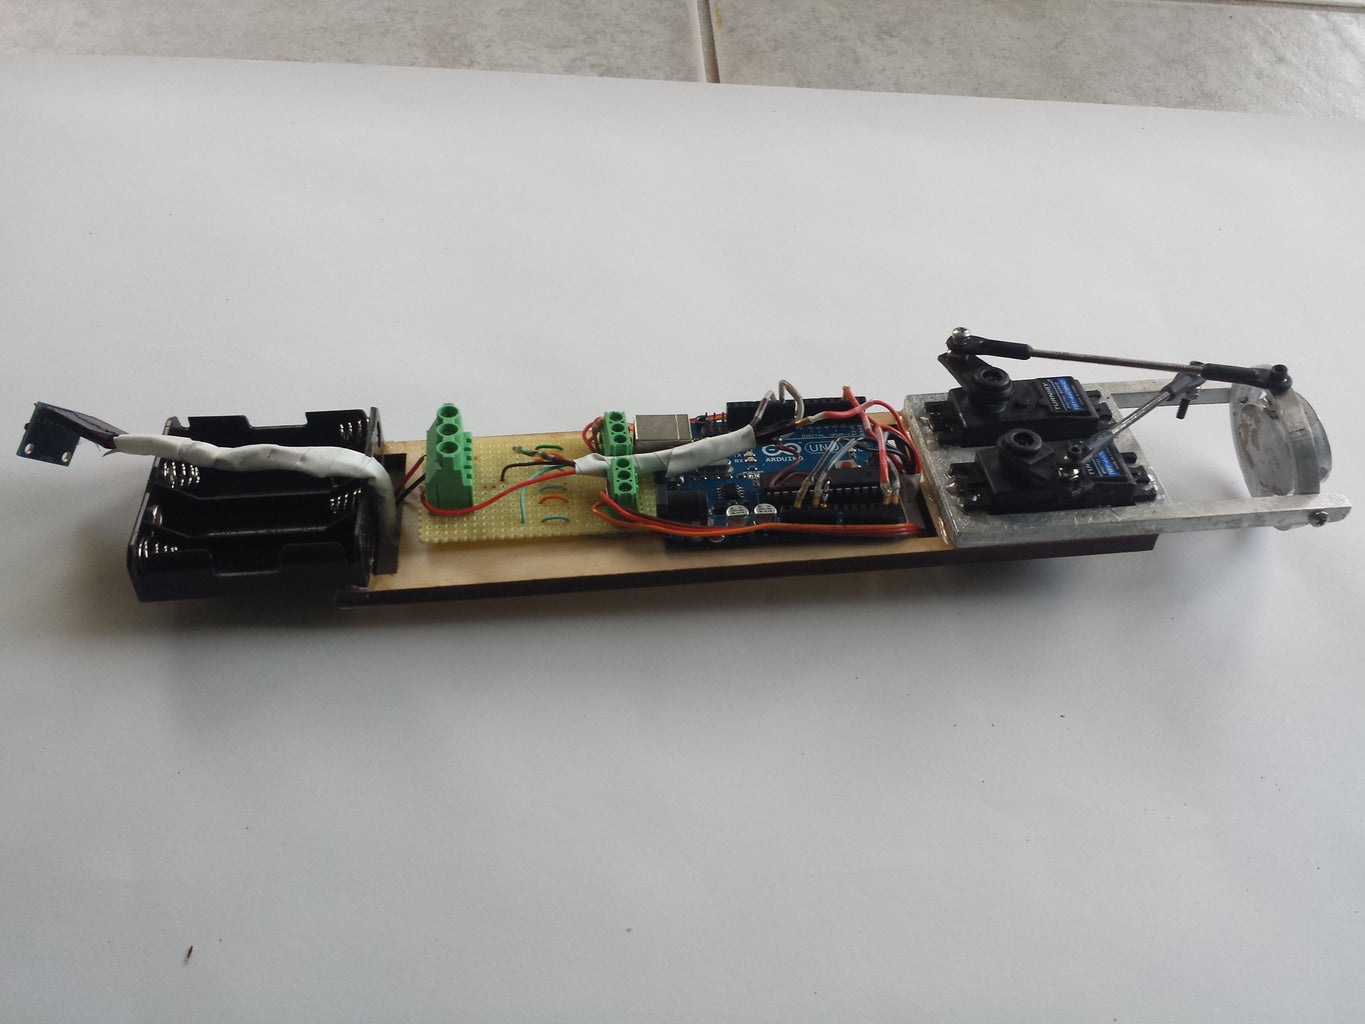
The electronics bay will house the arduino and power board, along with the battery, and will keep these items safe from the rocket's thrust. You have to be creative here and I made mine so I could slide a tube over it for launch
Step 7: Programming
The code here will let the rocket fly straight up without fins using artificial stabilization, great for the first test flight!
Attachments


Participated in the
Microcontroller Contest

Participated in the
Tech Contest


