

Introduction: Arduino Rotary Switch One Analogue Input


Neat way to get 12 switch positions on one analogue pin and also 12 LED output on one digital.
This is a really useful way of using a multi position rotary switch on analogue pin of an arduino board. Put as simply as possible you use 11 resistors in series around the switch with 0 volts at one end and 5 volts at the other, then at each switch position you will get a different voltage.
The program then looks at the voltage and determines the switch position. The first program uses a method of elimination where the voltage is checked if it is higher than a halfway voltage and depending of the result you narrow down the possibilities by half. 3 more checks will give you the switch position.
The second method is much more simple but took me a little while to work it out. if you take the analogue result and divided by a constant calculated from the max bits / 11, or most cases 1023/11 = 93 then you will get a value very near to the switch position (starting at a switch position of zero) HOWEVER this approach didn't work. This was because the steps between each switch position were not exactly 93 and if the value was less the you could get a wrong result.
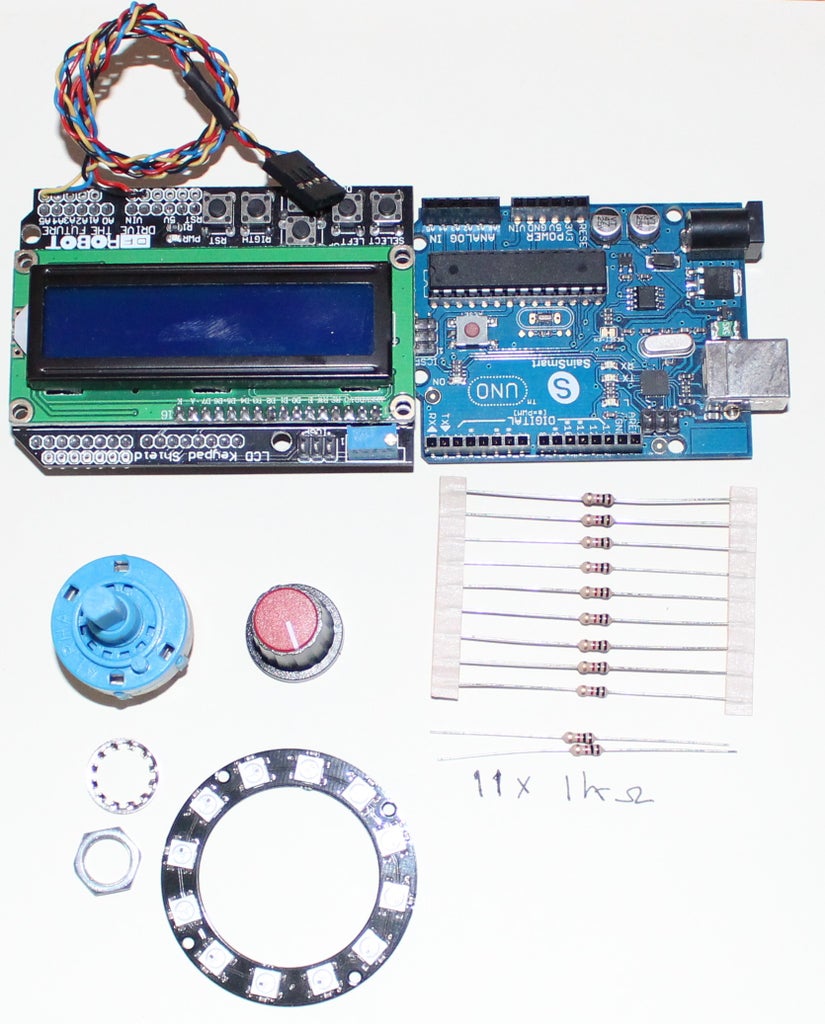
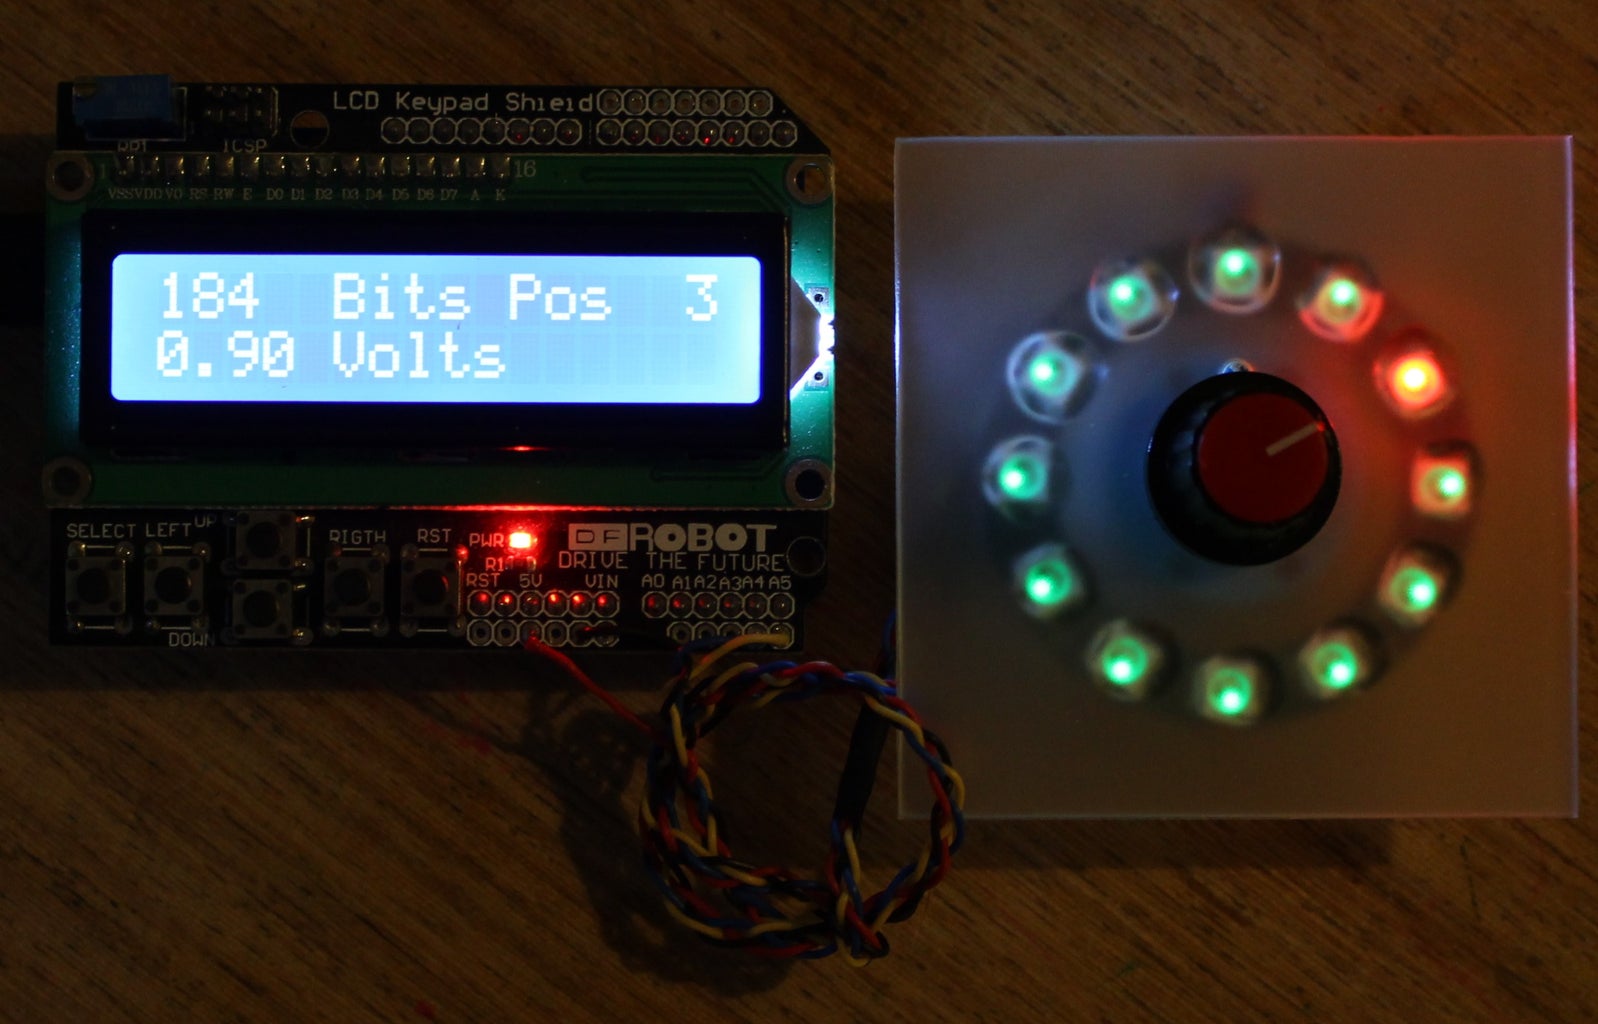
For example:-
you may get a analogue value of 184 which should be the second switch position however when you divide it by 93 the result is 1.978 but as an integer would be displayed as 1!
The easy solution was to use the ROUND() function, and in the above example the result would round up to 2. (Simple really!)
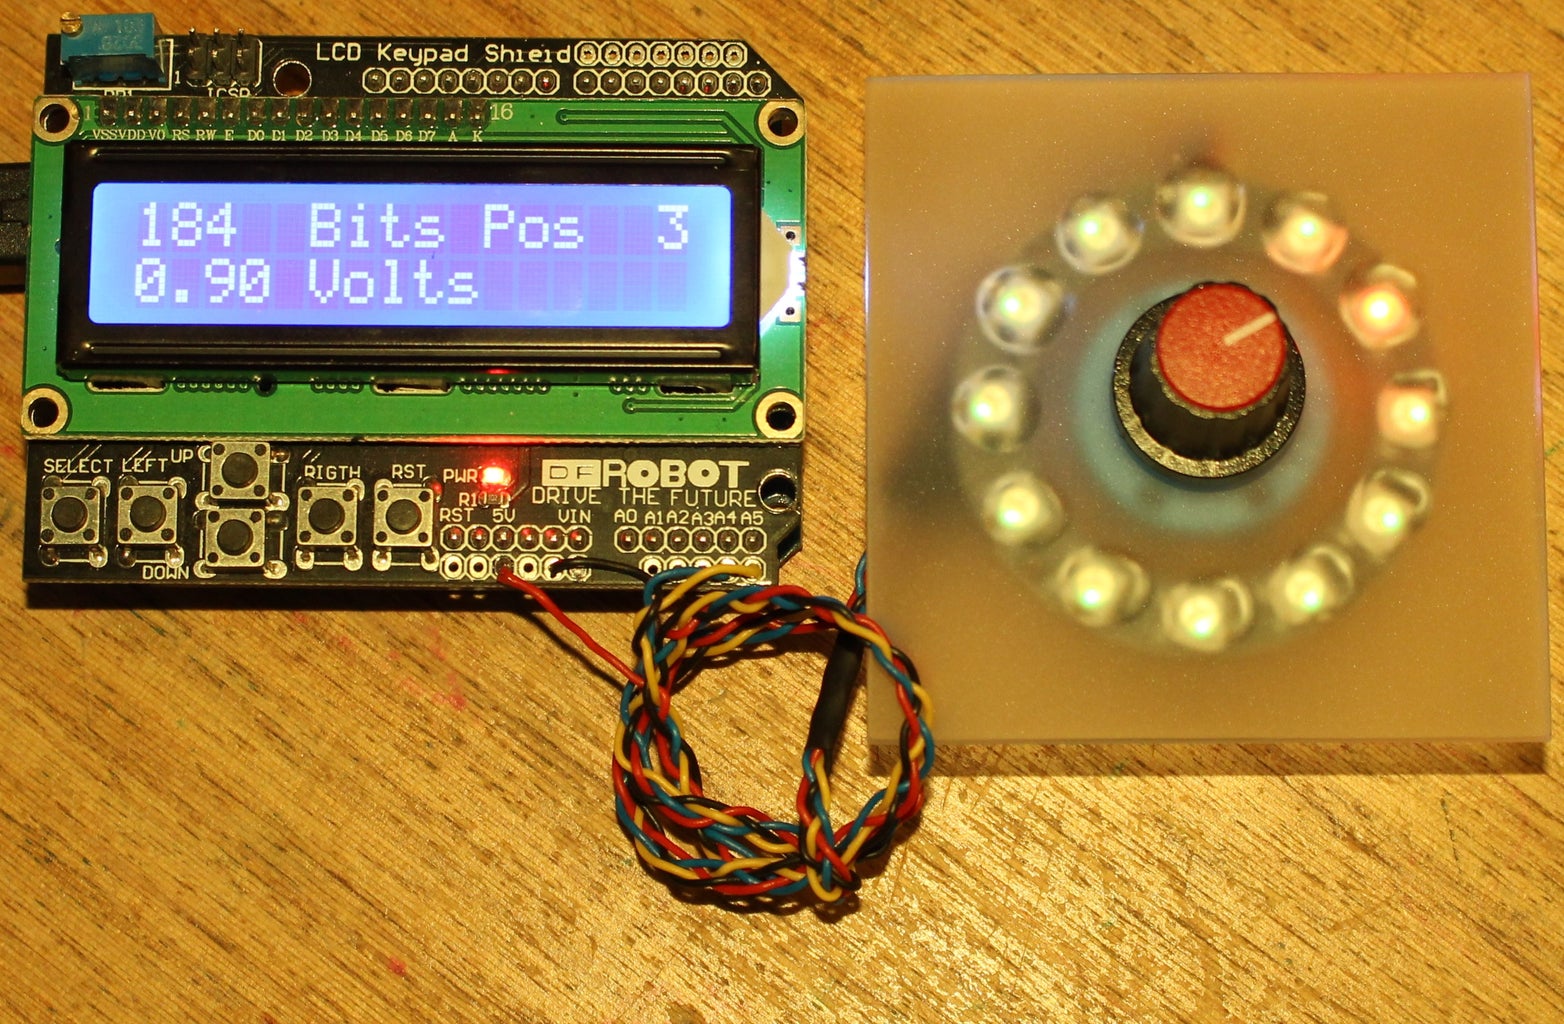
The output in this demonstration is a ring of 12 full colour LED's using the WS2812b devices, what this means is that for 12 different indications you only need to use one digital output from the arduino
Step 1: Parts and Construction.
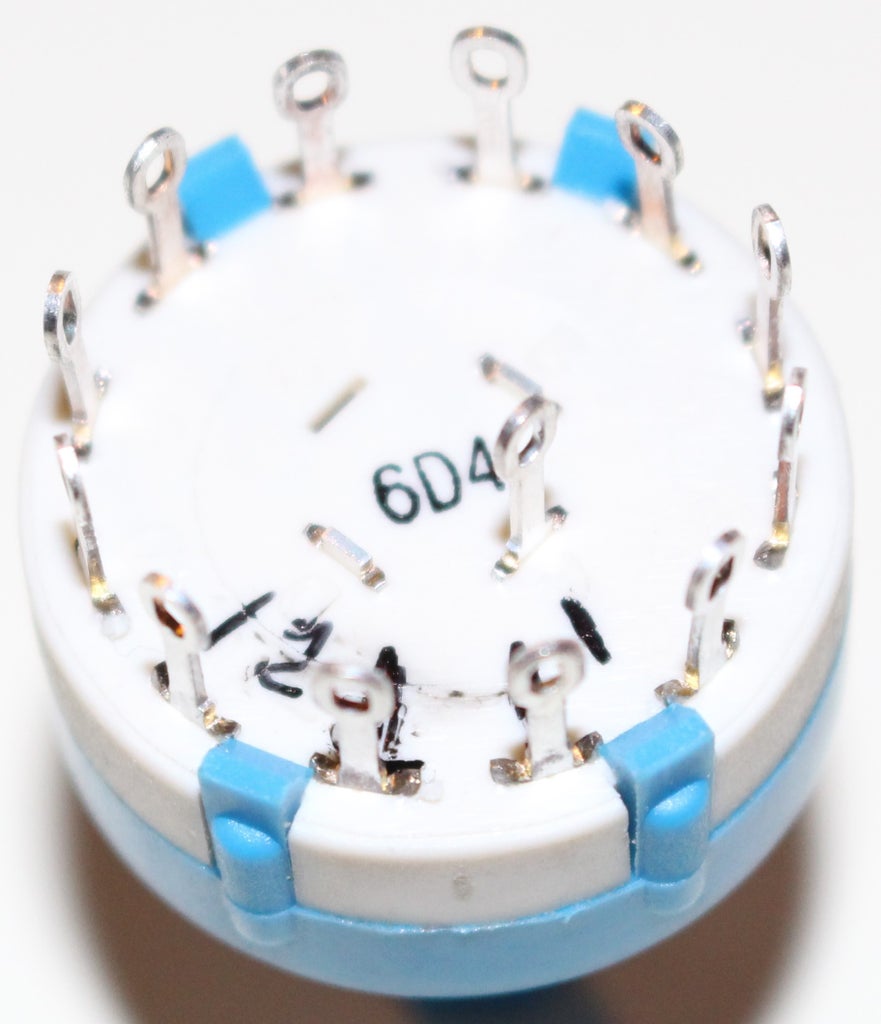
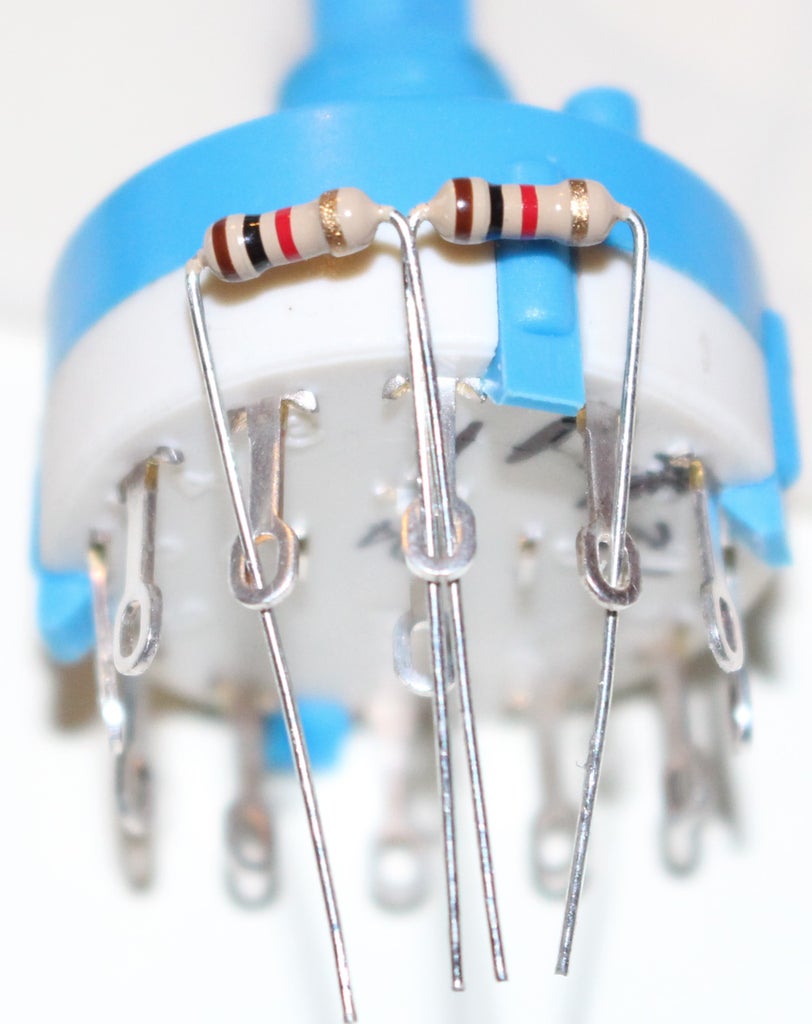
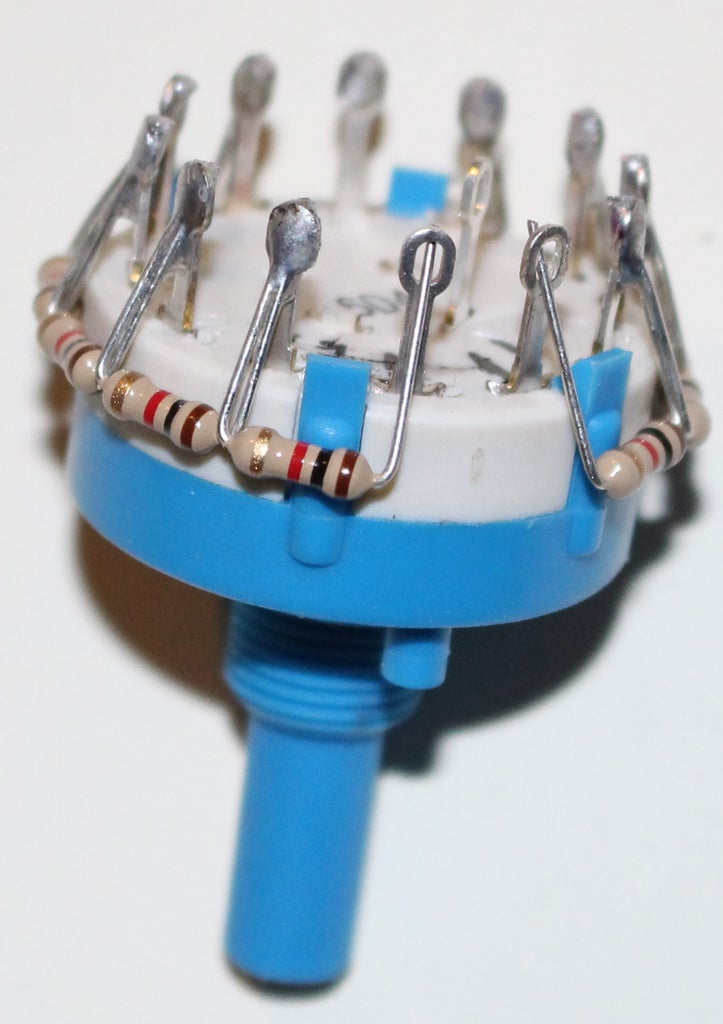
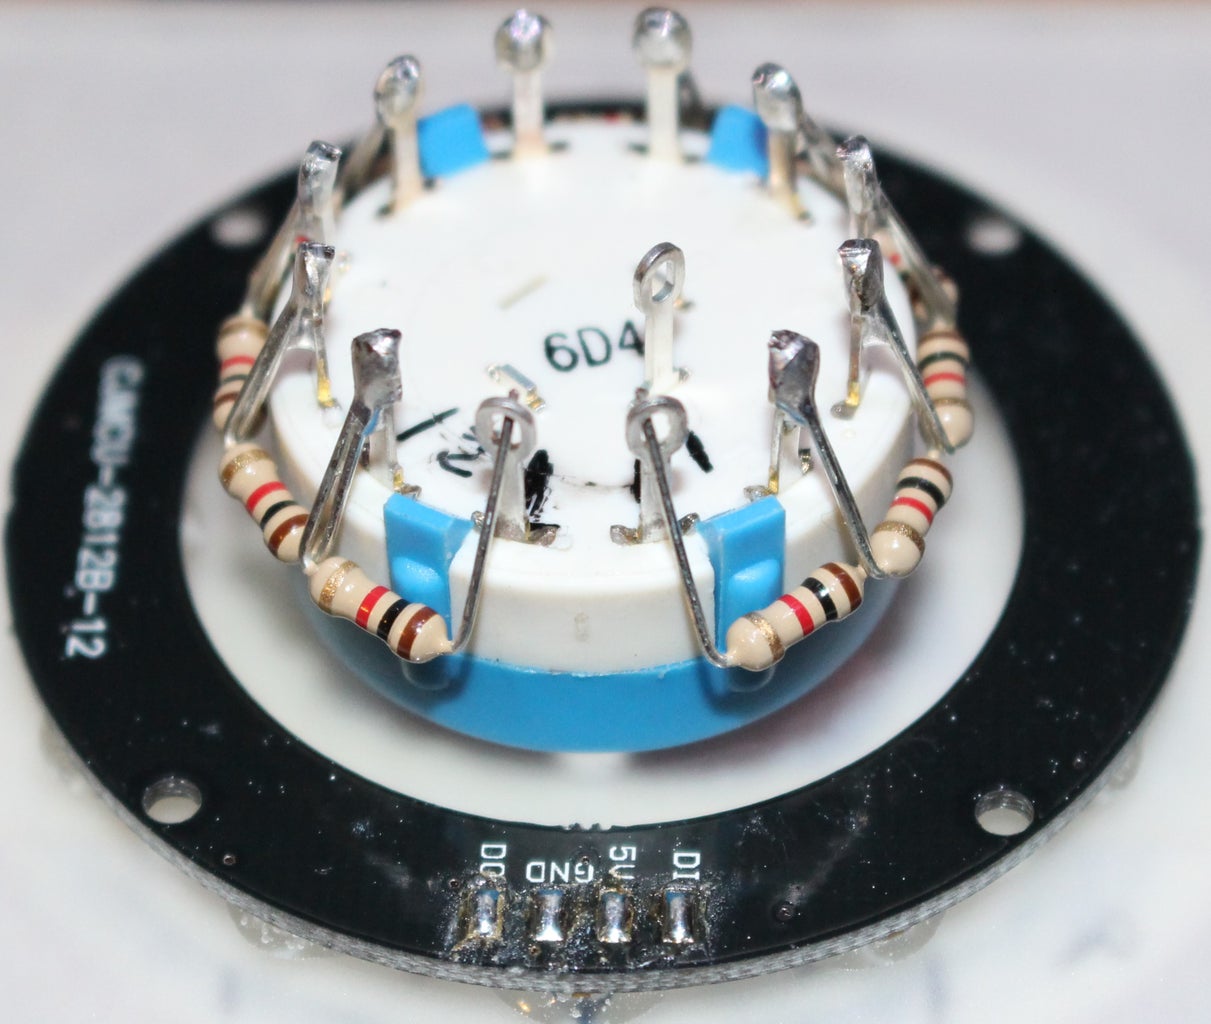
This is a simple build, you need the following parts
1 * rotary switch 12 positions.
11 * 1Kohm resistors.
12 WS2812b LED's or the 12 ring display.
Connecting wire.
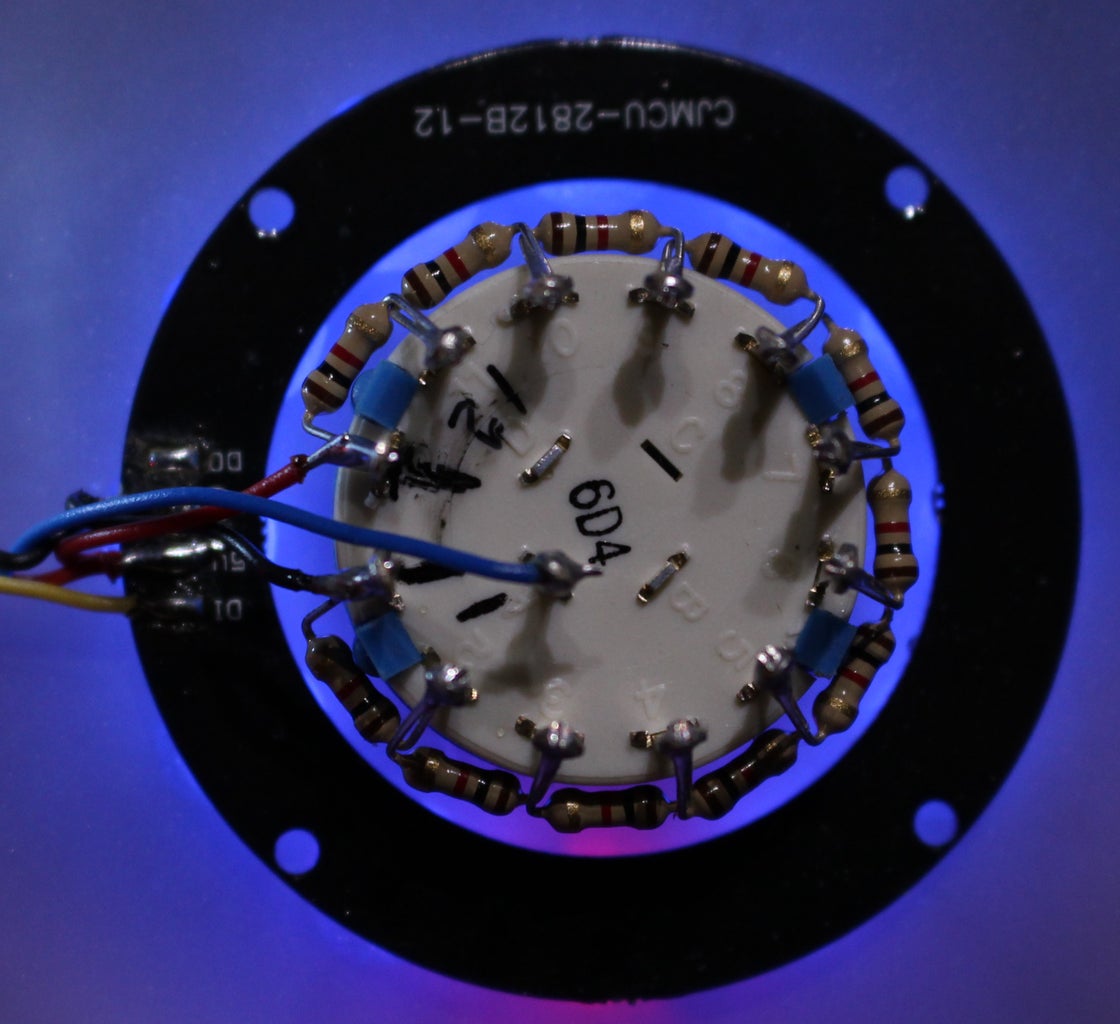
The construction is easy, firstly work out which is the first pin on the underside of the switch, on the one i have you can see the numbers molded into the plastic. From this first pin solder a resistor to the second pin and from the second a resistor to the 3rd and so on until you get to the 12 pin where the chain ends. The first pin should have the zero volt wire connected and the 12 pin should have the 5 volts. the central pin is the one which "picks" of the voltage and connects to the arduino input.
The 12 WS2812b LED's came in a ring of 12 so only needed 5 volts and zero + the digital input. you should be able to see in the last picture that i have used just two power supply wired to power the switch and the display. In total there are only 4 wires which go to the Uno.
Step 2: The Programs.
Long-winded program working out the position by elimination. LCD shows binary bits value, voltage and switch position. includes at the top of the program should be:-
LiquidCrystal.h
Adafruit_NeoPixel.h
LiquidCrystal lcd(8, 9, 4, 5, 6, 7);
int numRows = 2;
int numCols = 16;
int oldAI;
int maxVoltageBits = 1023;
int dividedBits = maxVoltageBits/22;
const int LedOutput = 18;
const int rotaryInput = A5;
Adafruit_NeoPixel strip = Adafruit_NeoPixel(12, 18, NEO_GRB + NEO_KHZ800);
void setup()
{
  strip.begin();
  pinMode(rotaryInput, INPUT);
  pinMode(LedOutput, OUTPUT);
  lcd.begin(numRows, numCols);
  lcd.clear();
  lcd.setCursor(5,0);
  lcd.print("Bits Pos");
  lcd.setCursor(5,1);
  lcd.print("Volts");
}

void whichPosition(int AI)
{
  lcd.setCursor(14,0);
  uint32_t colouroff = strip.Color(0,2,0);// define the colour for OFF.
  uint32_t colouron = strip.Color(30,0,0);// define the colour for ON.
  if ((AI > (oldAI + 10)) || (AI < (oldAI - 10)))// see if the value has changed?
  {
    for (int i=0; i<12; i++)
    {
      strip.setPixelColor(i,colouroff);// it has changed so set all OFF value.
    }
    strip.show();
    if (AI > 11*dividedBits)// must be 7,8,9,10,11,12.
    {
      if (AI > 17*dividedBits)// must be 10,11,12.
      {
        if (AI > 21*dividedBits)// must be 12.
        {
          strip.setPixelColor(11,colouron);
          strip.show();
          lcd.print("12");
        }
        else//must be either 10,11.
        {
          if (AI > 19*dividedBits)// must be 11.
          {
            strip.setPixelColor(10,colouron);
            strip.show();
            lcd.print("11");
          }
          else// must be 10.
          {
            strip.setPixelColor(9,colouron);
            strip.show();
            lcd.print("10");
          }
        }
      }
      else // must be 7,8,9.
      {
        if (AI > 15*dividedBits)// must be 9.
        {
          strip.setPixelColor(8,colouron);
          strip.show();
          lcd.print(" 9");
        }
        else// must be 7,8.
        {
          if (AI > 13*dividedBits)// must be 8.
          {
            strip.setPixelColor(7,colouron);
            strip.show();
            lcd.print(" 8");
          }
          else// must be 7.
          {
            strip.setPixelColor(6,colouron);
            strip.show();
            lcd.print(" 7");
          }
        }
      }
    }
    else// must be 1,2,3,4,5,6.
    {
      if (AI > 5*dividedBits)// must be 4,5,6.
      {
        if (AI > 9*dividedBits)// must be 6.
        {
          strip.setPixelColor(5,colouron);
          strip.show();
          lcd.print(" 6");
        }
        else// must be 4,5.
        {
          if (AI > 7*dividedBits)// must be 5
          {
            strip.setPixelColor(4,colouron);
            strip.show();
            lcd.print(" 5");
          }
          else// must be 4.
          {
            strip.setPixelColor(3,colouron);
            strip.show();
            lcd.print(" 4");
          }
        }
      }
      else// must be 1,2,3.
      {
        if (AI > 3*dividedBits)// must be 3.
        {
          strip.setPixelColor(2,colouron);
          strip.show();
          lcd.print(" 3");
        }
        else// must be 1,2.
        {
          if (AI > dividedBits)// must be 2.
          {
            strip.setPixelColor(1,colouron);
            strip.show();
            lcd.print(" 2");
          }
          else// must be 1.
          {
            strip.setPixelColor(0,colouron);
            strip.show();
            lcd.print(" 1");
          }
        }
      }
    }
  }
  oldAI = AI;
}

void loop()
{
  int readSw = analogRead(rotaryInput);
  whichPosition(readSw);
  float voltValue = readSw*5.0/1023;
  if (readSw < 1000)
  {
    lcd.setCursor(3,0);
    lcd.print(" ");
  }
  if (readSw < 100)
  {
    lcd.setCursor(2,0);
    lcd.print("  ");
  }
  if (readSw < 10)
  {
    lcd.setCursor(1,0);
    lcd.print("   ");
  }
  lcd.setCursor(0,0);
  lcd.print(readSw);
  lcd.setCursor(0,1);
  lcd.print(voltValue);
  delay(50);
}
Second program using ROUND function and using a LCD. includes at the top of the program should be:-
LiquidCrystal.hAdafruit_NeoPixel.h
#include
#include

LiquidCrystal lcd(8, 9, 4, 5, 6, 7);
int numRows = 2;
int numCols = 16;
int oldAI;
int maxVoltageBits = 1023;
float dividedBits = maxVoltageBits/11;
const int LedOutput = 18;
const int rotaryInput = A5;
Adafruit_NeoPixel strip = Adafruit_NeoPixel(12, 18, NEO_GRB + NEO_KHZ800);
void setup()
{
  strip.begin();
  pinMode(rotaryInput, INPUT);
  pinMode(LedOutput, OUTPUT);
  lcd.begin(numRows, numCols);
  lcd.clear();
  lcd.setCursor(5,0);
  lcd.print("Bits Pos");
  lcd.setCursor(5,1);
  lcd.print("Volts");
}

void whichPosition(int AI)
{
  lcd.setCursor(14,0);
  uint32_t colouroff = strip.Color(0,2,0);// define the colour for OFF.
  uint32_t colouron = strip.Color(30,0,0);// define the colour for ON.
  if ((AI > (oldAI + 10)) || (AI < (oldAI - 10)))// see if the value has changed?
  {
    for (int i=0; i<12; i++)
    {
      strip.setPixelColor(i,colouroff);// it has changed so set all OFF value.
    }
    strip.show();
    int newAI = round(AI/dividedBits);
    strip.setPixelColor(newAI,colouron);
    strip.show();
    if (newAI < 10)
    {
      lcd.print(newAI);
      lcd.print(" ");
    }
    else
    {
      lcd.print(newAI);
    }
  }
  oldAI = AI;
}

void loop()
{
  int readSw = analogRead(rotaryInput);
  whichPosition(readSw);
  float voltValue = readSw*5.0/1023;
  if (readSw < 1000)
  {
    lcd.setCursor(3,0);
    lcd.print(" ");
  }

  if (readSw < 100)
  {
    lcd.setCursor(2,0);
    lcd.print("  ");
  }
  if (readSw < 10)
  {
    lcd.setCursor(1,0);
    lcd.print("   ");
  }
  lcd.setCursor(0,0);
  lcd.print(readSw);
  lcd.setCursor(0,1);
  lcd.print(voltValue);
  delay(50);
}
Simple program with no LCD. just input from Rotary switch and output on LED's. includes at the top of the program should be:-
Adafruit_NeoPixel.h
#include

int oldAI;
int maxVoltageBits = 1023;
float dividedBits = maxVoltageBits/11;
const int LedOutput = 18;
const int rotaryInput = A5;
Adafruit_NeoPixel strip = Adafruit_NeoPixel(12, 18, NEO_GRB + NEO_KHZ800);
void setup()
{
  strip.begin();
  pinMode(rotaryInput, INPUT);
  pinMode(LedOutput, OUTPUT);
}

void whichPosition(int AI)
{
  uint32_t colouroff = strip.Color(0,2,0);// define the colour for OFF.
  uint32_t colouron = strip.Color(30,0,0);// define the colour for ON.
  if ((AI > (oldAI + 10)) || (AI < (oldAI - 10)))// see if the value has changed?
  {
    for (int i=0; i<12; i++)
    {
      strip.setPixelColor(i,colouroff);// it has changed so set all OFF value.
    }
    strip.show();
    int newAI = round(AI/dividedBits);
    strip.setPixelColor(newAI,colouron);
    strip.show();
  }
  oldAI = AI;
}

void loop()
{
  int readSw = analogRead(rotaryInput);
  whichPosition(readSw);
  delay(50);
}

Participated in the
Arduino Contest 2016

Participated in the
Epilog Contest 8

Participated in the
Make it Glow Contest 2016


