

Introduction: Arduino SOS Beacon


Morse code is an archaic method of transmitting information as a series of beeps or lights or varying periods of time. Yet, the morse code for help, known as SOS has stood the test of time. Even to date, it is the international symbol for requesting help. This distress signal actually carries little meaning, S and O are simply the two easiest to signal character as determined by morse code. Consequently, it was used as a way to signal for help, and still remains recognized as a visual distress beacon.
This project shows how to use an Arduino and LED to flash an SOS beacon. It is an alternative and frankly, a less boring example of the 'blink a light' tutorial for the Arduino Uno.
Step 1: Tools and Materials

- Arduino Uno
- Breadboard
- 5mm Red LED
- 100 Ohm Resistor
- Jumper Cables
Step 2: Connecting the LED
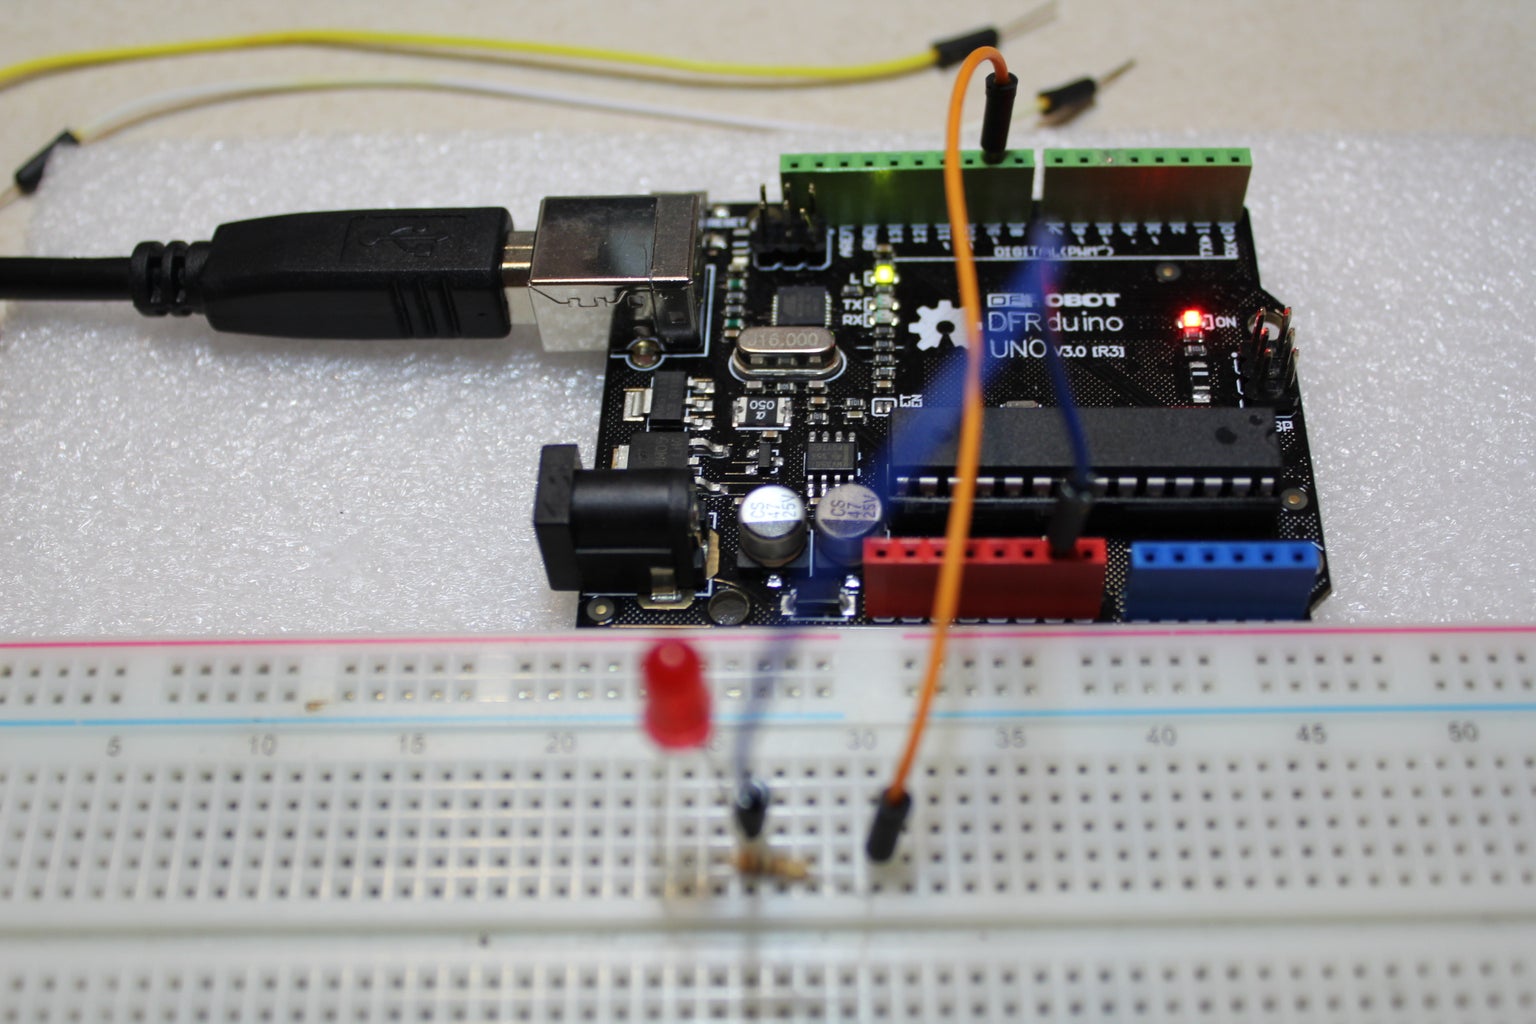
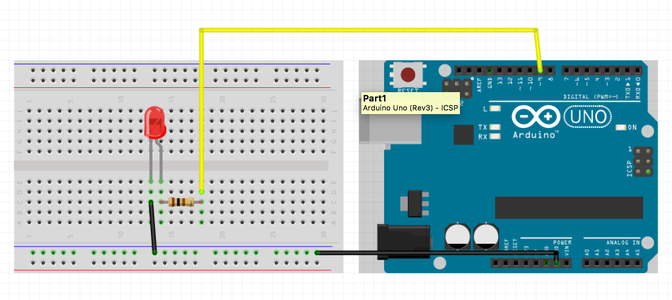
- Connect the negative pin of the LED, which is marked as the flat side of the LED to ground. This is shown on the picture as the blue wire
- Connect the positive pin of the LED to a 100 ohm resistor.
- Then, connect the other end of this resistor to pin 9 on the Arduino. This is shown on the picture as the orange wire.
Step 3: Coding
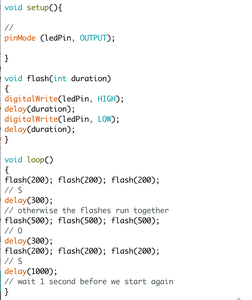
Upload the following code onto the Arduino and watch the LED send an SOS signal by light.
int ledPin = 9;
void setup(){// pinMode (ledPin, OUTPUT);
}
void flash(int duration) {

digitalWrite(ledPin, HIGH);

delay(duration);

digitalWrite(ledPin, LOW);

delay(duration);

}
void loop() {
flash(200); flash(200); flash(200); // S
delay(300); // otherwise the flashes run together
flash(500); flash(500); flash(500); // O
delay(300);
flash(200); flash(200); flash(200); // S
delay(1000); // wait 1 second before we start again
}Step 4: Demo
After the code is uploaded to the Arduino Uno the LED will begin by flashing the letter S, then O and finally S, icy morse code in an infinite loop.

Participated in the
Makerspace Contest 2017


