

Introduction: Arduino Servo R3 Servo Shield


I designed this shield to control mutiple servos.
I added 2 jumpers to select external power for heavy servos or 5 V from the arduino.
I appoligise for the bad english it isn't my native language.
Step 1: The Schematics

In this instructable i added al files from my design you guys are free to alter and use it and please post advise in comments.
Attachments

Step 2: Making the Pcb
I used the toner transfer method to make my prototype.
There are a lot of instructables on this method so I'm not going in depth on this subject.
But i do have some advice
1. Clean the copperside of the pcb with the hard side of a sponge.
2. Apply pressure to the paper so it's stuck after that apply pressure on the sides for a few seconds
3. Adjust the heat of your iron to the paper for example : if it's thin paper then you don't put it on max
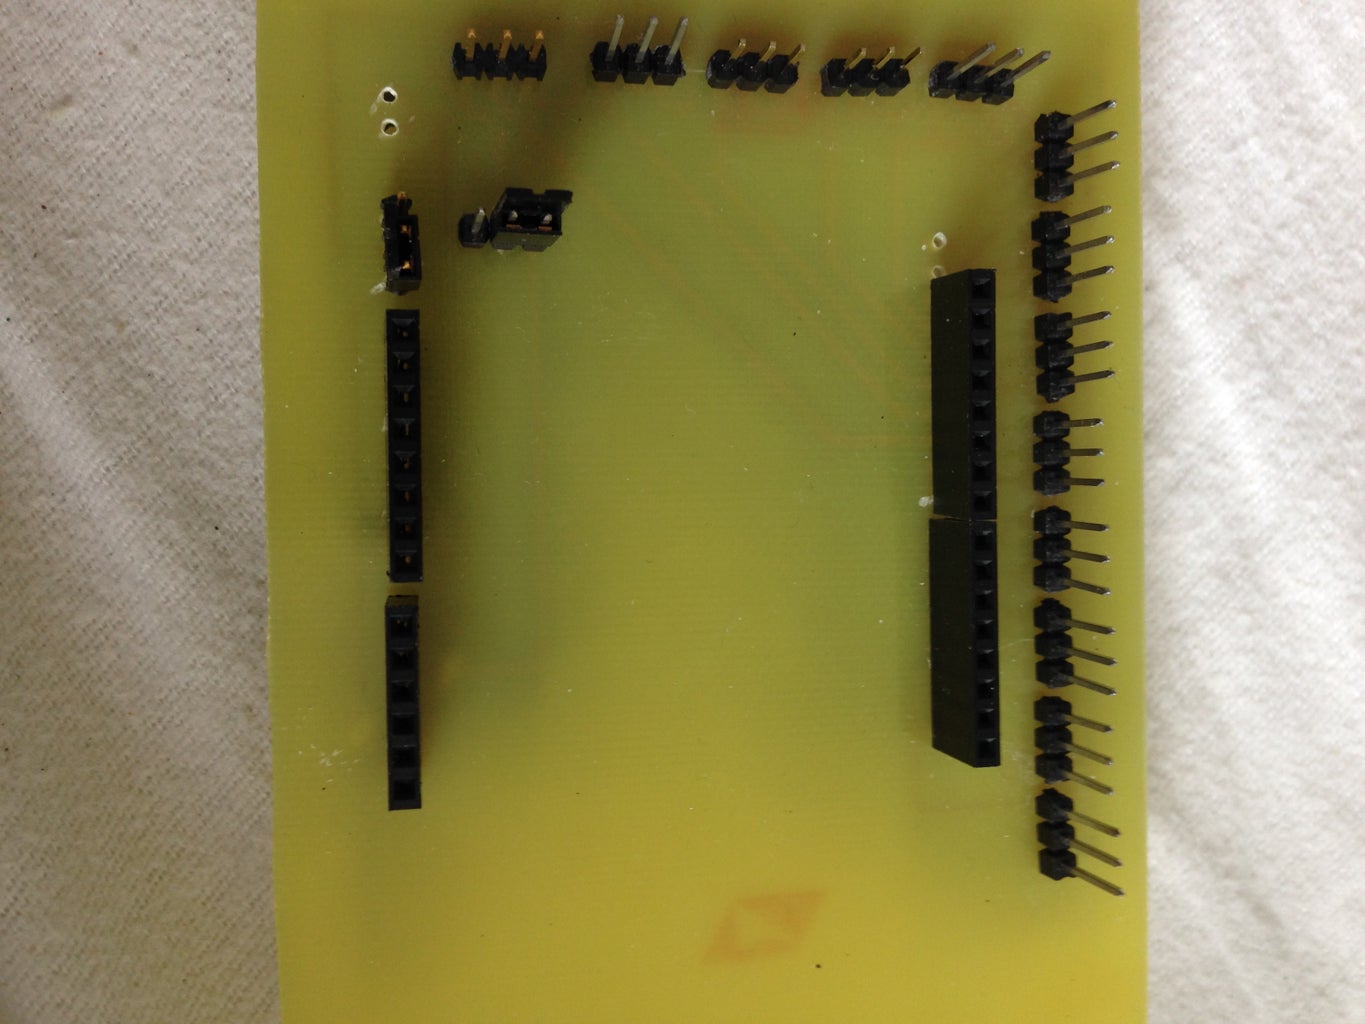
Step 3: The Parts
Once your done with the pcb you can add the parts
I used :
1. 45 male headers
2. 2 jumpers
3. 1 small phoenix connector
4. female header for stackable arduino shields
Step 4: The End Result

Once done it should look a little like this.
I ran out of connectors so i didn't place it on this one but is am stil going to do that.
This shield uses the same code as regular servos.

Participated in the
Robotics Contest 2016

Participated in the
First Time Author Contest 2016

Participated in the
Make it Move Contest 2016


