

Introduction: BBQ to Work Cart


this one is not so much a step by step as different BBQ's will have different frames, but the procedure should be universal, and I wasn't planning an instructable when I started this project.
Step 1:

The first step will be to procure and old propane BBQ, if you don't have one in the backyard, try Craigslist or freecycle, I had two. one I converted a couple of years ago and it holds leftover yard sale items till next time. This cart I am using as a paint cart for mural painting.
you will need some scrap wood or metal if that's what you have. I used plywood, OSB, and some old 1X4's
you will also need an assortment of screws, both wood and metal. I reused some from the BBQ itself.
I also reenforced the back rail with a couple of metal L brackets. (behind the black tool holder)
next, remove the aluminum shell and all burner parts and brackets not needed to hold the frame together, you may want to attach the frame post to one another with wood before removing the shell, as it will be pretty floppy when it is removed.
I used a grinder to cut the bolts holding the shell on as they were to rusted to remove with a screwdriver.
Step 2:

I next used some scrap OSB board to tie the two sides together, then using some scrap wood from the BBQ, tied crosswise between the OSB, I just measured and cut as I went, going with the dimensions of the scrap available to me.
Step 3:

I had a partial sheet of plywood that was bowed, and I cut it to 25X55 but you will need to cut it to whatever your use will be. I mounted it with the bow up and forced it down with screws, into the cross support and the metal outriggers on the BBQ frame.
Step 4:

I also cut a shelf for the bottom of the frame, my other BBQ had a wire rack, so did not require any work. I took some old 1X4 and cut side rails and screwed them in from underneath for the back, you may or may not want to do this step, my other unit does not have this, just a table top basically.
Step 5:

I added some rails low enough to keep gallon cans of paint from slipping off as I move it around, you could go lower or higher as your need demands. it also makes for a stiffer frame. I used self tapping metal screws here.
Step 6:


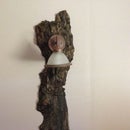
two mods I made immediately, after spilling my ice tea, was to cut a hole for my cup and add a hanger underneath, I may move this to the side rail. I can see me forgetting its under there.
a future mod I am thinking about is cutting a hole for a container to hold water or paint thinner, as needed.
I also put in a plastic tool holder I got at goodwill awhile back, it will hold pencils, brushes and such. I am also considering a metal bracket to hang a trash bag from with clamps, it will be bent up from some flat stock and mounted to a (reenforced) side rail, and held in place with some spring clamps.
these units make great little work stations that are very mobile, they could be used in a mechanics shop, or a crafters room. I'll be using mine as a painters cart.
cut or drill holes in the table top as needed for your tools/storage, leave off the rails if you need a flat surface. make it work for you.


