

Introduction: Bamboo Drop Deck


In our last Instructable 'Build a Bamboo Longboard' - we covered a lot of the basics, and some tips on how to laminate a custom deck with 1/16" Bamboo veneer. At the end of the tutorial, we made mention of a Bamboo drop deck we had built as well.
The focus of this Instructable is to elaborate on parts of the process that are specific to building a drop deck. Much of the process, tools and materials are the same as pressing any other deck in the Thin Air Press vacuum bag, but there are some suggestions that may help when building your first Bamboo drop.
For a full step-by-step tutorial on how to design and press a drop deck, check out our 'How to Make a 1" Drop Deck'
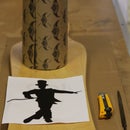
Step 1: Preparing Veneer

Layout your veneers in order, and make sure they are all cut to size before gluing and pressing them onto your mold. You want to make sure that your veneers are not left bigger than your actual mold - this will ensure that they take on the full shape of your mold when pressing.
Cutting your veneers can be done with a sharp utility knife. With a few deep scores, the Bamboo material will bend and break in a straight line relatively easily.
Step 2: Pressing the Drop Deck


This is the most important part of pressing the drop deck. You will notice in the photos that we have pressed all of the layers except the very top sheet (bottom of the board) in our first pressing, and then after it has dried, added the last sheet of Bamboo to the deck and pressed it again. This is done so that the top sheet of Bamboo does not have all the force needed to press the tight bends directly applied by the clamps.
By leaving off the top sheet of Bamboo, we are able to bend the first 7 layers of veneer with the clamps. This is the hardest lamination to do, but once it has dried in the bag for 8 hours, it will keep the shape of the mold and allow you to press the final sheet much easier and reduce the risk of damage to the bamboo.
When you are ready to do the second lamination, apply glue to the underside of the bamboo veneer and the top layer of your already pressed deck. Put them back in the bag, seal it up and evacuate the air.
**Depending on how extreme your drop is, you may still need the assistance of clamps, but they will require a lot less force to bend a single sheet than the first 7 layers.
Leave the deck in the bag for another 8 hours.
Step 3: Cutting, Sanding and Finishing


As we mentioned in the previous Bamboo build tutorial, the material is very easy to cut out and sand afterwards. Each sheet comes pre-sanded, so after the board is cut to shape it only takes a quick sanding to get nice and smooth.
Layout your centerline, mark and drill your truck holes and you are ready to apply your protective coating. Make sure to use a finish that is rated for outdoor use (waterproof), as the main objective is to prevent damage caused by water to you board.
Step 4: Bamboo Drop Deck Done!


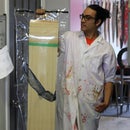
Once you have your board all drilled and sealed, it is ready to be ridden! You can find hardware (wheels, trucks, grip, etc.) online or at your local skate shop. We do our best to support local skate shops, and think it's the best way to learn about the different styles and brands of hardware that are available. For example, because of its springy feeling, a board built with bamboo may typically be used more for cruising or 'dancing' style tricks as opposed to racing downhill. If that is the case, there are trucks and wheels that may be better suited for that use than others, and a skate shop can help determine what is your best option.
If there's anything we missed or you would like to know about, feel free to ask and I'd be happy to help!


