

Introduction: Bamboo Traditional Kite(plastic Welding)


This is how I make kites,it's my version of traditional Asian kites from Indonesia,Bali in particular.Its a perfect thing to do on a breezey day,every childhood is incomplete without kites,no to mention the immense satisfaction that one gets when something built with your own two hands flies.the cost nothing to build,flies very well and are relatively strong.The spars are Bamboo and are tied with any cotton string,the sail is made of a plastic bag preferably a big bin-liner type.the seams are melted with mosquito coils or incense.The. Bags can be melted to make cool patterns on the sail.The bamboo shaving is the hardest part that takes Practice I have been doing it for a while I am still not very good.So come on build a kite.here are some knots you might need:
round turn two half hitches:
larks head knot:
Step 1: Tools and Materials


You will need:
Bamboo sticks
Any thin string,dental floss is suprisingly strong(try to stay away from using fishing line to tie the frame cause it's slippery)
Mosquito coils or incense sticks(I heard mosquito coils are bad for you so I don't use them even though incense sticks are a pain to use)
Plastic bags,the stronger the better(the bin liner types are good)
You can find most of this stuff at home or at a convenience store(note: its worth the trouble to get a good pair of siccors,and a sharp knife,it makes the project so much more enjoyable.) matches or lighter weights(books work really well)
Tools:
Knife
Scissors
Saw(optional)
Step 2: Bamboo


Find a piece of bamboo,if you live in a western country there probably won't be any just lying on the street,but it grows in a lot of climates so if you're handy with a machete you can cut it down and split it.Or maybe get it from an old tiki torch or blinds.just make sure it's not rotten.I found a good piece which I can probably get a couple of kites out of.
Just get the knife and put it on top of the bamboo to cut out a square shaped piece about 3 times as big as the wanted size(the size varies but you want it thinner than a pencil but thicker than a skewer,and the vertical stick-the spine-is thicker than the horizontal one).Also when splitting be aware of nodes,the chamber walls of the bamboo,they can be anywhere on the vertical but on the horizontal it has to be on the middle or not on it at all.Once you have the stick shave off all four corners by laying the stick on your thigh(a pillow can make it more comfortable)and bringing the knife across its length at an angle wich is always changing.constantly remind yourself that you can take off but not put back,practice makes perfect so don't worry if you go through a couple before getting a good one.the cross(horizontal) spar has to be even so always bend it in a semi-circle to check(grab the ends and push them together).
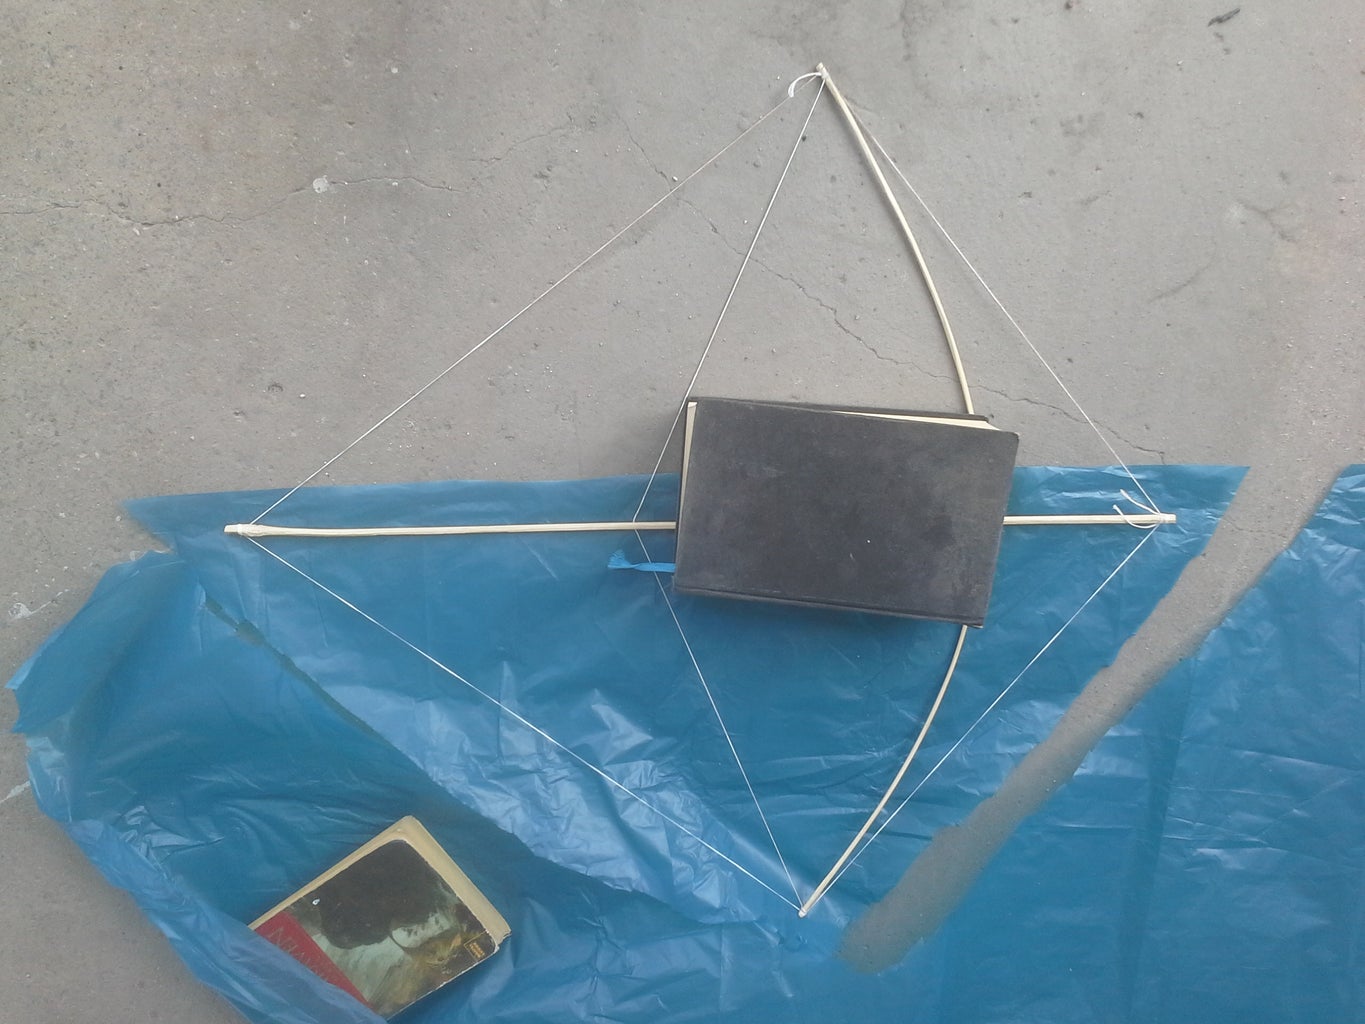
Step 3: Frame


Get the sticks and play around with them to find their right lengths and where they are going to join you can mark it with a little cut or a pen.You know have to know where the exact middle of the cross-spar is,so take a length of string and line up its end with one end of the cross spar then the other end off bamboo mark with your finger,the take the end of string and fold it over to your finger mark,this new doubled string is the distance from the end of the cross spar to the middle of it,mark it.then lash them together,if you don't know how,find a tutorial great skill to have.Then you make a small cross split at each end of a spar,this is for the perimeter line,it goes around the whole kite,it makes it stronger and makes an attachment point for the sail.get a piece of string slighty longer than the cross spar,take an end,put it through the split,tie three half hitches and put it back in the split,do the same for other end.now put a finger where the string that you just tied crosses the spine,slide it down until you like the shape of the cross spar,then mark where the string is and start a VERY little notch a couple of cm down,now as the picture shows,this line when fitted to the notch you get an even bend to the shape of your cross spar.(but you could always leave it unbent like more western shapes).Now you can make the perimiter line,start at one of the spars and put the line through the slit and make three half hitches do this to all corners till you come back to the one you started,cut off excess.Now for the sail(the light sheet that catches the wind,witch is fastened to the frame)
Step 4: Sail

I used a plastic bag for the sail,but there are many substitutes,tissue paper is a very good and colourful choice,newspaper,light fabrics such as ripstop(spinnaker)nylon,basiaclly anything that is light and strong,remember try not to spend to much especially for your first flight,as your kite may not fly well or it may end up stuck in a tree,or having a broken spine after a violent nose dive. lay out your sail material on a flat area,place your frame on top of the sail material and hold it down with a weight such as a book,try to avoid wind-so turn off your fan.Get your scissors and cut about three centimeters around the kite outline,this leaves a hem witch shall be folded onto the perimeter line and secured.The way you do that varies,depending on your material,for paper,normal white/school glue will be enough(although I heard a paste can be made of cooked rice),for plastic bags you can use contact cement(the orange stuff used to fix shoes),or you can use like i did an incense stick or mosquito coil(i heard mosquito coils are bad for you so i stick to incense now).For glue you just spread it along the hems and fold trying to keep the sail tight(although i think contact cement needs to be tacky).for incense just light it and put it atop an edge like the photo so it doesn't go out,position the sail and the frame and fold the hem-i like to do a bit on one corner then stretch the opposite corner do it there so its tight-hold the incense to the hem for a few seconds and press down,try on some off cuts first,there will probably be a hole don't worry,just try different ways until one works good.Make holes every three thumb widths or so along the kite.On the corners there will be a floppy bit,take it and fold onto sail and burn(see picture).Some tips,handle the incense care fully,its very easy to burn a hole in you kite,also as the stick burns little segments build up.its important to tap the stick on an edge to get rid of them or they will drop on the kit and make an enlarging hole.So does the kite look good?You are almost done.
Step 5: Getting Ready for Flight
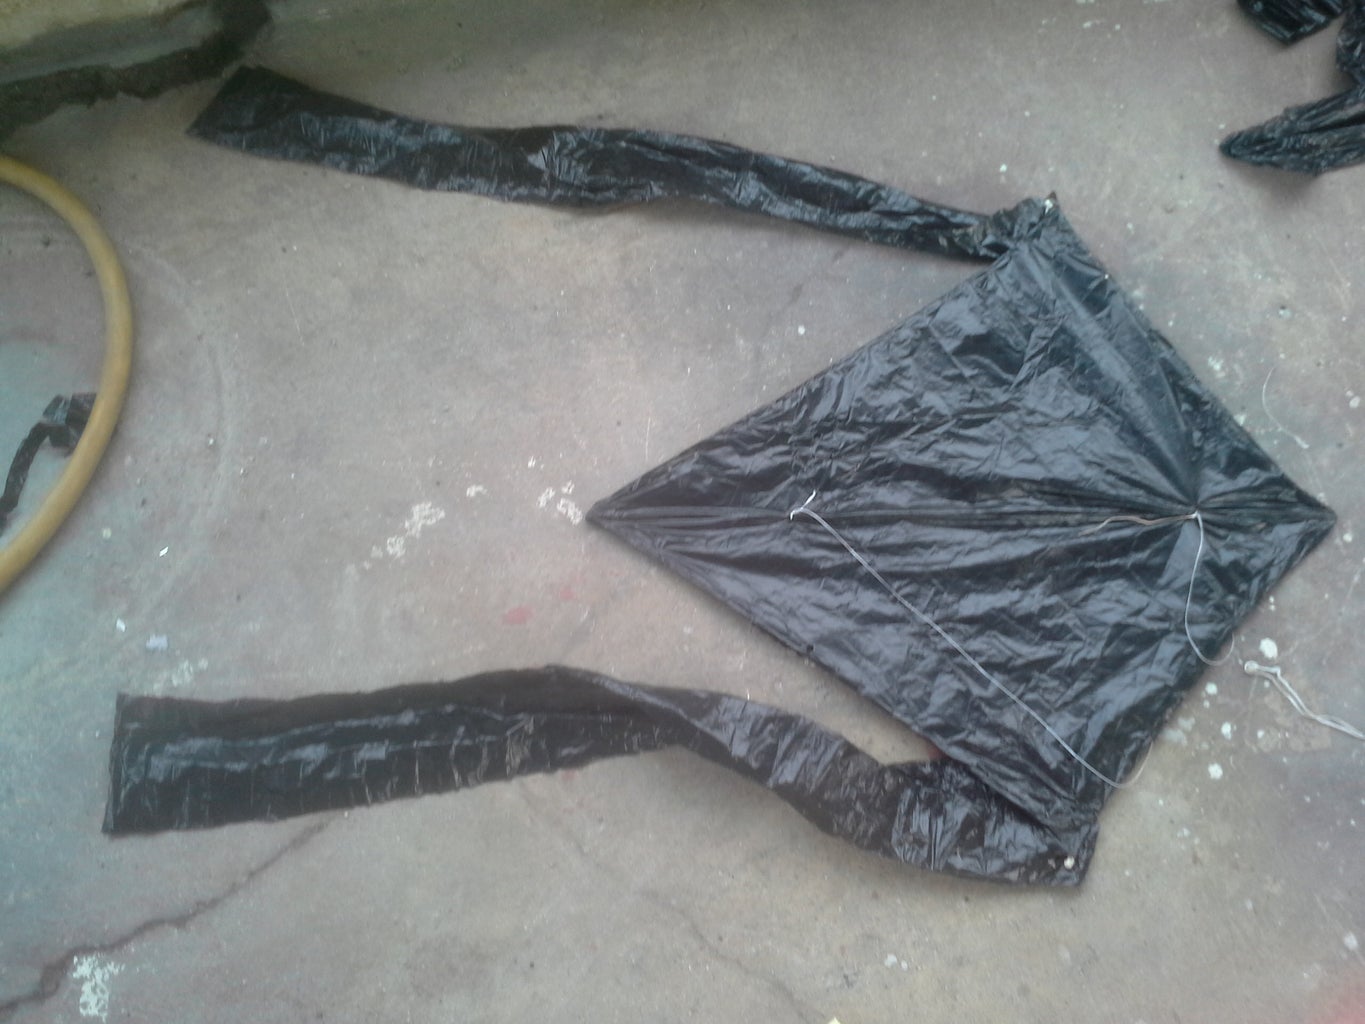
Tails:
strips of sail material attached to the kite will produce drag when flown,thus stabilising the kite,get a rectangle witch has a lot of potential strips roll it into a sushi and cut widths,they should roll into lots of kite tail strips,melt or glue together the strips and attatch to kite,on tail,and wingtips,you only need short ones for the wingtips.
Bridle:
get a round sharp object(,pencil,needle)and poke holes at the spar intersection and about a third of the way up the spine(see pics),tie a line at the holes,to know the length when string is held sideways it should be at the wingtip.Tie a loop to attach the kite,as a rule the angle inbetween the spine and front leg of the bridle when held in the air should be 90 degrees.Although you may change it depending on wind speeds,higher up for stronger winds ect.
Step 6: Flying Your Kite

Now this is the make or brake moment,disappointment or excitment.Get a long length of line on a good reel,it has to allow the line to reel in quick without tangling and be let out quick without hassle,a large powedered milk can works really well,and some fishing yoyos aswell,and you can also use a fishing rod.Tie a loop in the flying line,attatch this to the bridle with a larks head knot,as you see well pulled tie it grips the two bridle legs and stops at the loop.
Find a big flat area with nothing to get the kite tangled on or anyone to crash onto,the beach is one of the best places do do it.First find where the winds coming from,a flag,wave ripples,or a wet finger will tell you this,go to the windward side of the big area to have as much room as possible.with your back to the wind drop the reel to the ground hold out your kite as far out as possible and let the wind take hold of it and let out a lot of line,if the kite flies to one side and crashes,immediately bring it in,if it flew to much to the right then shorten the right tail on the kite and vise versa.Kite flying is a fun thing,and with pratice you will learn all the tricks.Once on the end of its line you may tie it on a secure place i just wrap it around something round a bunch of time with maybe a couple of half hitches.
Tips:when inventing kite designs try to stay within the height:width ratio about 3:1 like a typical diamond,often kite shapes with different design proportions tend to not fly as well.Also similar design can be turning into a stunt kite,or a kite train.More pics coming soon
here is a good kiting site.
if you need some inspiration:
if you liked the instructable,please vote

Participated in the
Outside Contest 2016

Participated in the
DIY Summer Camp Challenge


