

Introduction: Banana/Raspberry Pi + Arduino Rover With Webcam


![RGB-D SLAM With Kinect on Raspberry Pi 4 [Buster] ROS Melodic](https://content.instructables.com/FQZ/Q1F2/K9R6AJTN/FQZQ1F2K9R6AJTN.jpg?auto=webp&crop=1%3A1&frame=1&width=130)

![ROS Melodic on Raspberry Pi 4[Debian Buster] + RPLIDAR A1M8](https://content.instructables.com/FL9/JK5E/JYWVONUD/FL9JK5EJYWVONUD.jpg?auto=webp&crop=1%3A1&frame=1&width=130)
A project I have done in my spare time. It is a full-drive 4 wheel robot controlled through a web interface. If you have any comments or questions please feel free to contact me. This project itself uses 3D printed parts and certain pieces of code that were created by other people. You can find credits and have a look at the original pieces at the end of Instructuble.
Shall we begin?
Step 1: Components You Need


Here's the list of components I used with the links and the alternatives. I live in Shenzhen, China and I bought the parts directly on Taobao.
4-motor robot chassis Alternative: Any sufficiently big chassis will do. This one has 4 motors for some extra torque. The motors are regular cheap yellow motors, rater for
L293D Arduino Motor Shield rev.1 clone Alternative: Better motor shield rated for more current
Arduino Uno clone Alternative: You can use any other Arduino board without significant changes to the code.
6V 4.5Ah Pb battery Alternative: It is possible to experiment with smaller LiPo batteries if you want lighter robot/use only two motors.
Banana Pi Alternative: Can swap for Raspberry Pi 1/2/3 or Orange Pi without significant code changes. I used Banana Pi only because I had one lying around.
Web camera Alternative: Use CSI camera for Raspberry Pi/Banana Pi/Orange Pi
Camera Pan/tilt mount with sg60 servos Alternative: 3D Print tilt/pan mount for example can use this one.
3D printed parts Alternative: Let your imagination and 3D design talents guide you! Also Thingverse :)
Step 2: Connect the Motors With L293D Motor Shield


Connect each motor with motor shield screw terminals. Here's wiring diagram. If you only have two motors and don't want to change the code than attach those to MOTOR 1 and MOTOR 3.
NOTE: For those using different motors with higher current rating, you might need another motor driver. Alternatively, a nice little hack I learnt recently is that you can piggyback two more L293D drivers on top of the existing one(it's the middle chip on the board)!
Step 3: Arduino Uno, Motor Shield Assembly

Put Arduino Uno in the case and install Motor Shield on top of it. There is only one way to do that, if it doesn't fit, you're doing some-ting wong!
Here's the case I used, model created by Esquilo.
Step 4: Connect the Power to Banana Pi and Arduino

I used SATA interface to provide power to Banana Pi(6v). If you have the same board you can also do that, just make sure the voltage is 5v-6v. It's unregulated power supply, so I'm assuming there is a protection circuit for SATA power on Banana Pi M1.
ATTENTION: For Raspberry Pi you have a few options: a safe one(using USB connector to provide 5v) and not-so-safe one(using GPIO pins). Here's the link to read about connecting power to Raspberry Pi GPIO pins. Make sure you
1)Use regulated power supply
2)Set the voltage to 5v
There is no protection circuit for GPIO pins! If you do something wrong, there is a serious chance of damaging the electronics on the board.
For Arduino just wire the power to the input screw terminals on the motor shield. It can take up to 12v.
Step 5: Put Banana Pi in the 3D Printed Case, Assemble the Rest of the Rover

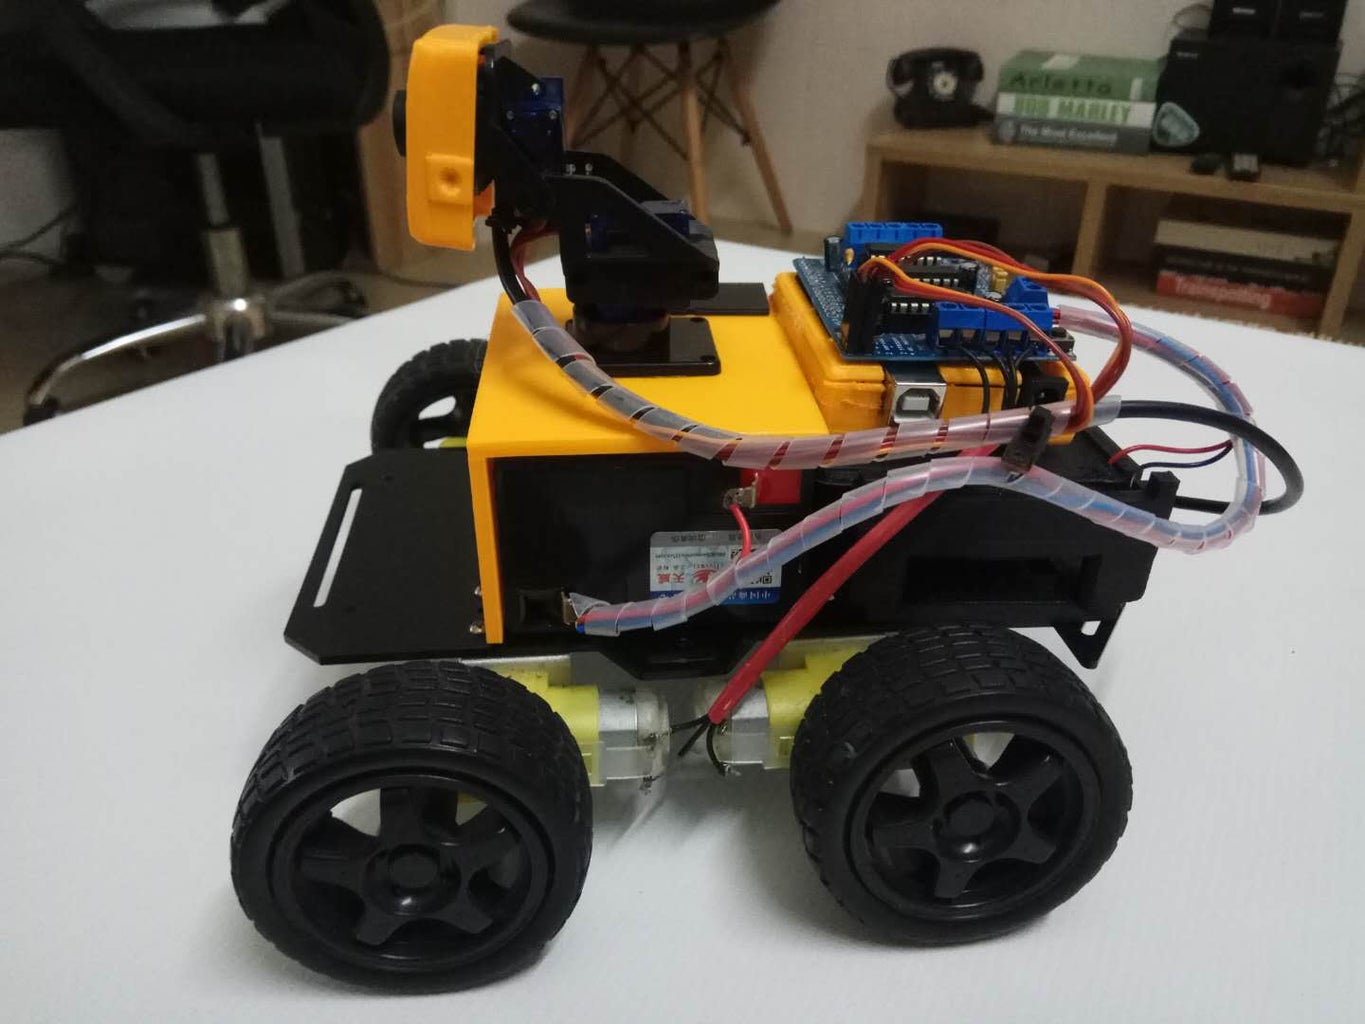
I used this case for Banana Pi from thingverse, created by GermanRobotics. The cover for it I made myself.
Put Banana Pi in the case, cover it with the lid, use glue gun to attach Arduino Uno on top of the Banana Pi case.
Cover the battery with this cover and attach web cam pan/tilt mount to the top.
If you are using Banana Pi you will need a USB hub,since it only has two USB slots(Raspberry 2,3 has four). Purely out of aesthetic concerns I decided to use an OTG 1-2 USB hub and hide the wires inside the Banana Pi case.
Step 6: Hardware Assembly Done!

Let's quickly summarize what we've done so far.
We have assembled the robot platform, connected power to Banana Pi, Arduino Uno, connected motors and servos to the motor driver and used USB hub to connect USB camera and Arduino Uno to the Banana Pi. Now you can test and troubleshoot the hardware. Wiring diagram showing all the connections is in picture for this step.
Step 7: System Configuration

I used Raspbian Lite image for system on my pi. Lite version has no GUI, and comes with only basic packages per-installed. But it takes much less space, which means we can use smaller SD card. If you are not comfortable without GUI you can also install full image.
Connect your pi to the Internet with the Ethernet cable. After it boots up the first step would be to connect it to Wi-Fi.
Run the following command in the terminal
sudo nano /etc/wpa_supplicant/wpa_supplicant.conf
Edit the config file to with your WiFi credentials
network={
    ssid="testing"
    psk="testingPassword"
}
Reboot the pi. Voila! You're now connected to Wi-Fi.
Next we'll need to install pip(Python Package Manager)
sudo apt-get install python-setuptools
sudo easy_install pip
Now we use pip to install Flask for running a webserver and pyserial for pi to communicate with Arduino over serial connection.
sudo pip install flask
sudo pip install pyserial
Last thing will be to install and configure motion package, which we use for streaming video from our webcam.
Follow this great instructable to do this.
Now we are ready to rumble!
Step 8: Starting Up the Software


Remember how I said we are ready to rumble?
Okay, a little bit more grinding and then we can start rumbling :)
Let's download all the necessary files from my github repository.
git clone https://github.com/AIWintermuteAI/pi_rover
Upload rover.ino to Arduino Uno. If you made hardware changes(using different motor shield, for example) you need to change the sketch.
If you are using a web cam, modify line near the bottom of the index.html file in the template folder. Change the URL in the IFRAME line to match the src URL for your video stream.
Now you can start the webserver. Run the following command
sudo python pi_rover.py
If you followed my build very close and have Arduino connected you will see the following(first picture) in the terminal.
Type your robot's ip address in the web browser (for example in my case it was 192.168.1.104), you can check ip address with $ifconfig command on Linux.
/do the celebratory dance here!/
If you have any questions feel free to ask me in the comments. This tutorial is aimed for beginner level, but not zero-beginner, that's why I was quite brief on the things you can just google for(e.g. burn system image to SD card, upload Arduino sketch etc).
Step 9: Credits
The idea and web server code comes from this great instructable by jscottb. I modified it to use more common hardware, like Arduino Uno.
The 3D printed parts from Thingverse.
https://www.thingiverse.com/thing:994827


