

Introduction: Basic Arduino Traffic Light Utilizing Interrupts


The goal of this project is to create a traffic light simulator that reacts to input of a car present at cross road (button).
Required Materials:
- Arduino Uno
- Bread Board
- Bread knife
- Just kidding :)
-Button (Momentary Press)
- LEDs (2 red, 2 yellow, 2 green)
- Resistors (220 ohm(6), 1 Mohm(1))
- 10 or more wires
Step 1: Single LED Connection
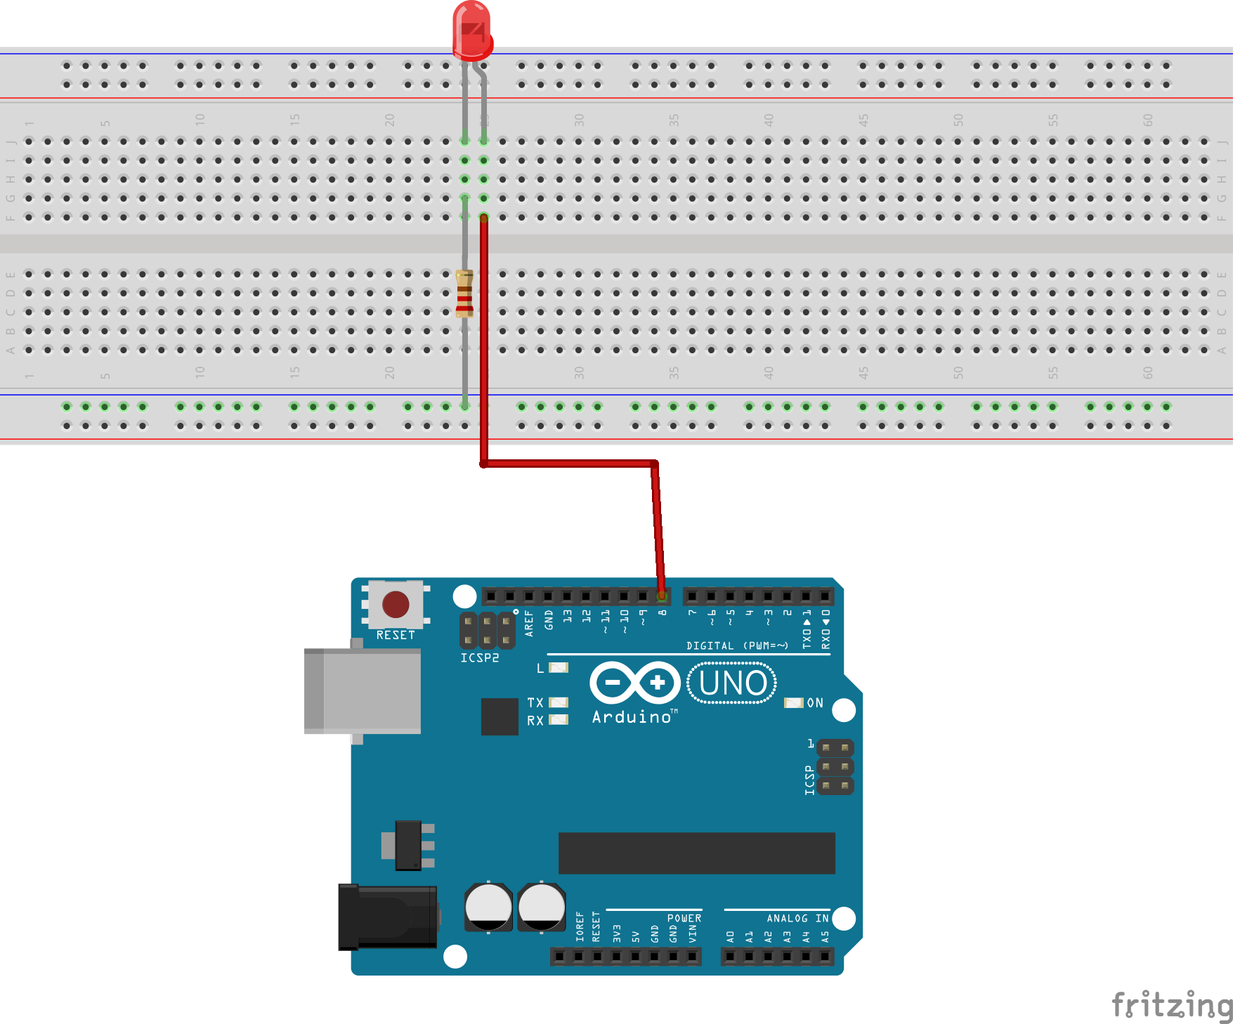
- Add a single red LED to the breadboard
- Connect (+) leg of LED to pin 8 on Arduino
- Connect (-) leg on LED to 220 ohm resistor to Ground on breadboard
Step 2: Connect Yellow and Green LEDs

Connect Yellow and Green LEDs as in the previous step
- Yellow to pin 9
- Green to pin 10
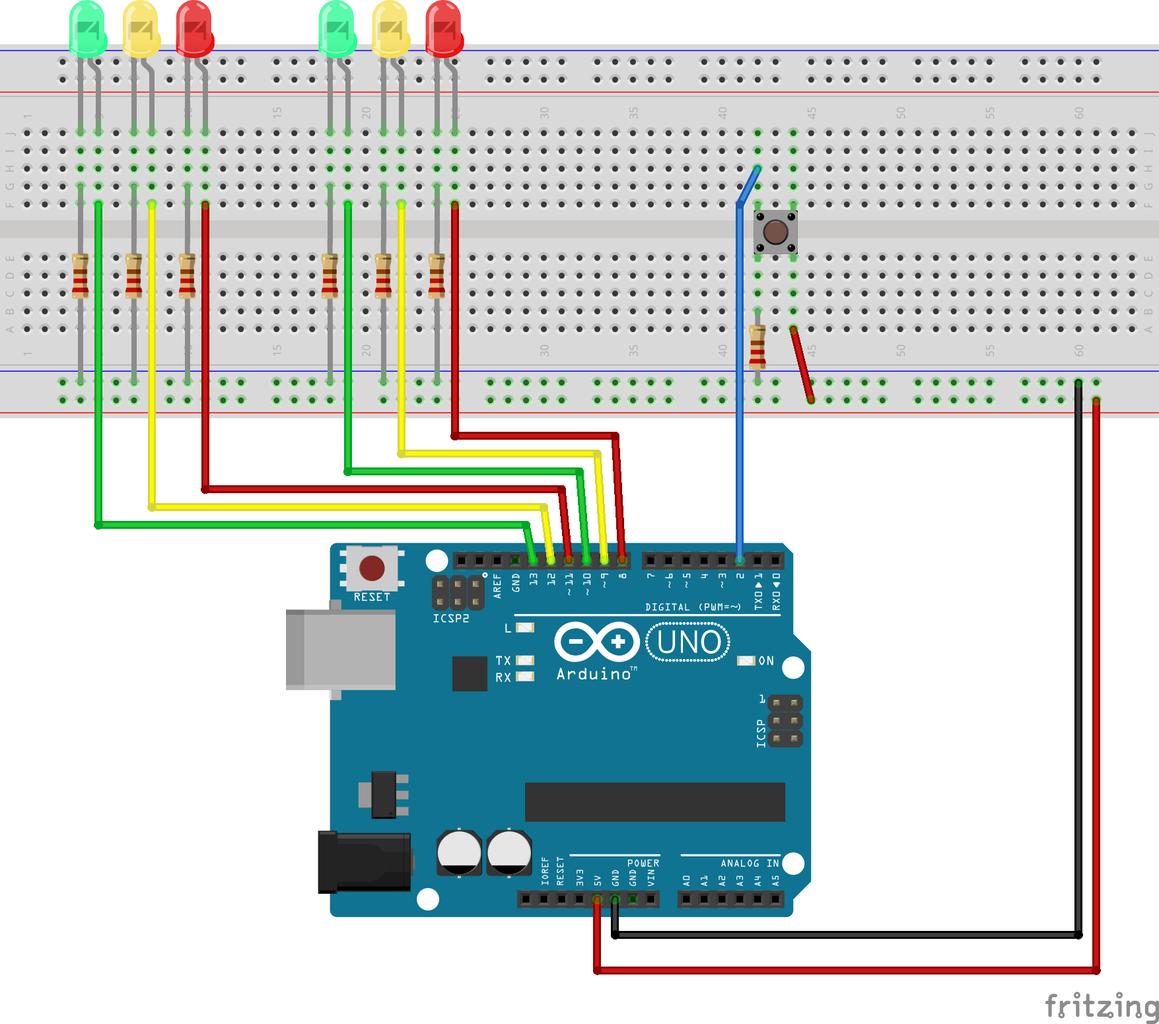
Step 3: Connect LEDs for Second Traffic Light Group
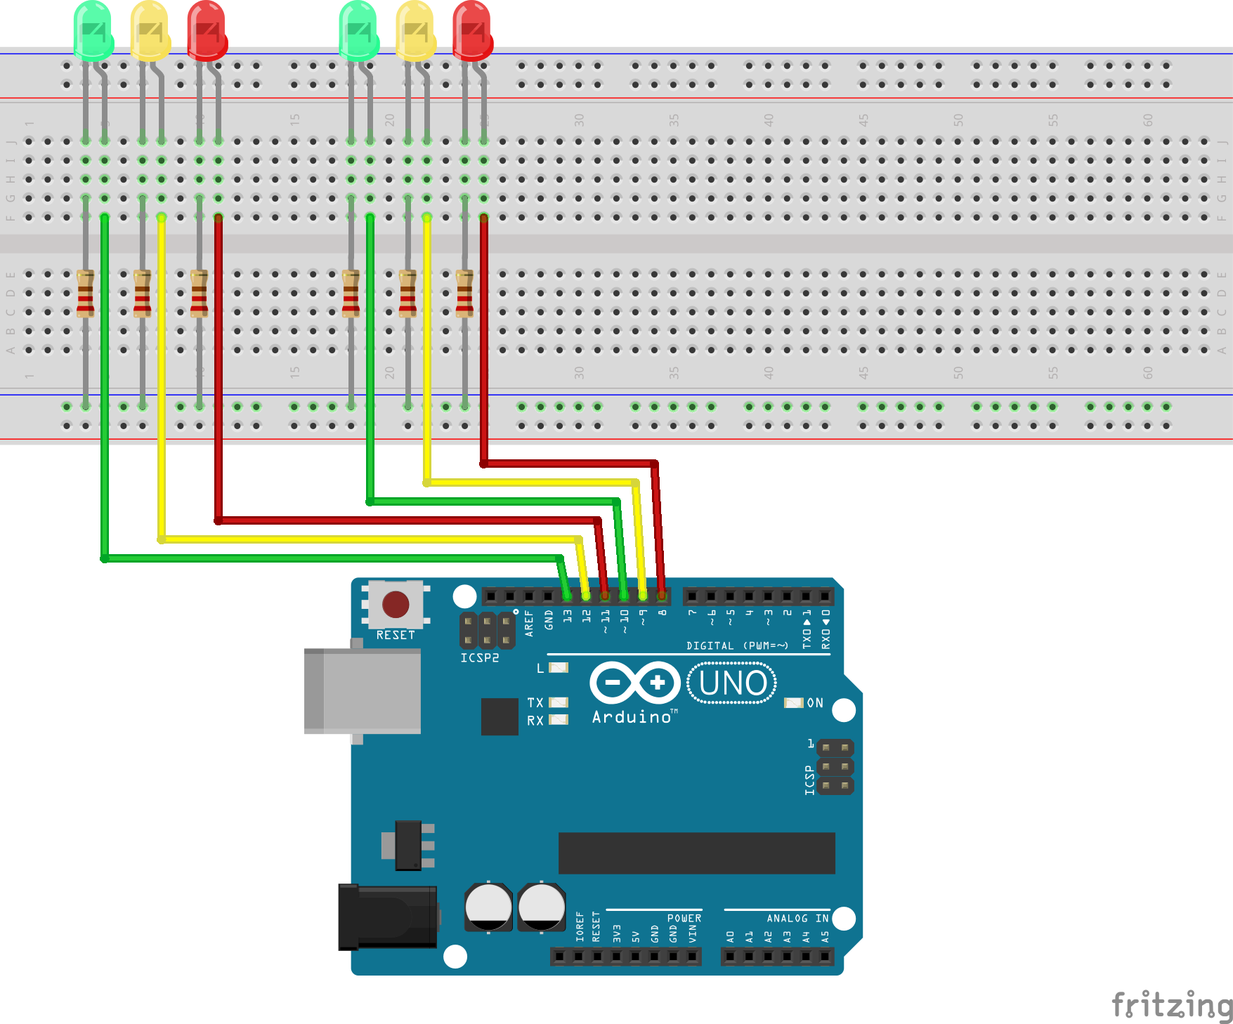
Connect the second set of LEDs as the previous steps
- Red to pin 11
- Yellow to pin 12
- Green to pin 13
Step 4: Connect Button

Add button to center of breadboard
- Connect bottom left with 1 Mohm resistor to ground
- Connect bottom right to power rail on breadboard
- Connect top left to pin 2 on Arduino
*pin 2 or 3 are required for interrupts on Arduino UNO
Step 5: Finish Circuit

Connect 5v and Ground from breadboard rails to Arduino
Step 6: Code
Upload code using Arduino IDE
Code Operation:
- Normal Loop
- Alternates Green lights between light one and light two
- The Yellow light and time delays provide a transition between the green lights
- Interrupt (button)
- If the current loop has light two at red then transition light one to red and light two to green
- return to normal loop


