

Introduction: Basic Recording and Editing With Audacity


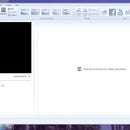
In this instructable I will show you the basic functions of Audacity. Audacity is a free audio editing software. It is very simple to use but has a lot of useful functions. If you have any questions or want a more detailed instructable about a specific funtion of Audacity please comment and I will help you the best I can.
If you like this instructable please vote for it in the A/V contest. Thanks!!!
Step 1: Recording and Playback


The first thing I will show you is how to record and playback sounds in Audacity. These are the most basic functions of Audacity.
To record just click the red dot in the upper left corner.
To stop recording click the orange square in the upper left corner.
To playback the sounds you have recorded or imported click the green triangle in the upper left corner.
Step 2: Importing Audio Tracks


To import audio tracks click on the project tab in the upper left corner of the screen.
Then click on import audio.
Select the file you want to open.
Click open.
Step 3: Selecting Audio


--To select all of the audio click on the edit tab, then click on select, then click on select all, or press Ctrl A on the keyboard.
--To select some of the audio track make sure the select tool in the upper left corner is selected.
Then click and hold at the beggining of the section you want to select.
Then drag the cursor to the end of the section you want to select.
--To select from your cursor to the beggining or end click on the edit tab.
Then click on select.
Then click on "cursor to end" or "start to cursor"
(The selected section of audio will be dark grey)
Step 4: Editing the Tempo of the Audio


-To edit the tempo of the audio select the section of audio you want to edit.
-Then click on the effect tab.
-Then click on Change Tempo (DO NOT CLICK ON CHANGE SPEED, this will change the speed AND pitch of the audio)
-Click and drag the meter to change the tempo (you will have to experiment to learn what "percent change" you need to get the correct tempo)
-Click preview to here a sample of the audio you edited
-When you like the tempo of the audio click on "OK"
(When you change the tempo the selected area will shrink because it is shorter and faster)
Step 5: Editing the Pitch of the Audio


-To edit the pitch of the audio select the section of audio you want to edit.
-Then click on the effect tab.
-Then click on Change Pitch
-Click and drag the meter to change the pitch (you will have to experiment to learn what "percent change" you need to get the correct ptich)
-Click preview to here a sample of the audio you edited
-When you like the pitch of the audio click on "OK"
Step 6: Deleting Audio

To delete audio select the section of audio you want to delete and click on the edit tab then delete, or press Ctrl-K, or press the delete key on the keyboard, or press the backspace key on the keyboard
Step 7: Spliting Audio Tracks


To split audio tracks you have to select the second have of what you want to split.
Then you click on the edit tab.
Then click on split.
(The second half of the split audio will move to a seprate track)
Step 8: Exporting Audio

To export the audio click on the File tab.
Then click on "Export as WAV" or "Export as MP3" (depending on the type of audio file you want)
The name the file and click save.
(If the sound is ever messed up after you export it as WAV or MP3 try exporting it as the other file type than you used the first time)

Participated in the
A/V Contest


