

Introduction: Basics of the Arduino (Duemilanove)


![Artoo [R2] (ATtiny2313 Wall Avoiding Robot)](https://content.instructables.com/FQ5/VD0W/HH2VMVRB/FQ5VD0WHH2VMVRB.jpg?auto=webp&crop=1%3A1&frame=1&width=130)
In this instructable I will be showing you how to write your very first program for the arduino (Duemilanove).
Just follow the steps and as you go to the end, you will have written your first arduino program!
This is a tutorial for beginners who have never used the arduino and have just bought it or are willing to buy it....so if you know a little about the arduino, then just cope with me....
I will be teaching you how to set up a programmable LED with your arduino.
So lets get started!
Step 1: Materials

Materials Required :
Arduino Duemilanove
USB to Arduino cable
An LED (Could be a multi color one as well...but the multicolored one with only 2 leads, because the 4 lead ones are a bit different)
Tools/Equipment required:
A computer (Windows or Mac or Linux)
Internet connection (To download the program)
Step 2: Downloading the Program


Go to the arduino website : http://www.arduino.cc/
And go to the downloads section and select the appropriate download, and then install it.
And try to get the latest version, because the older ones have bugs and are a bit different.
Step 3: Running the Program


After downloading and installing it, you will have something like in the picture.
Open the .exe file, and then the arduino compiler will open up.
If the compiler opened up without any problem, then you are good to go!
If not then try re-downloading and re-installing, and if it still does not work, then download an older (More stable) version.
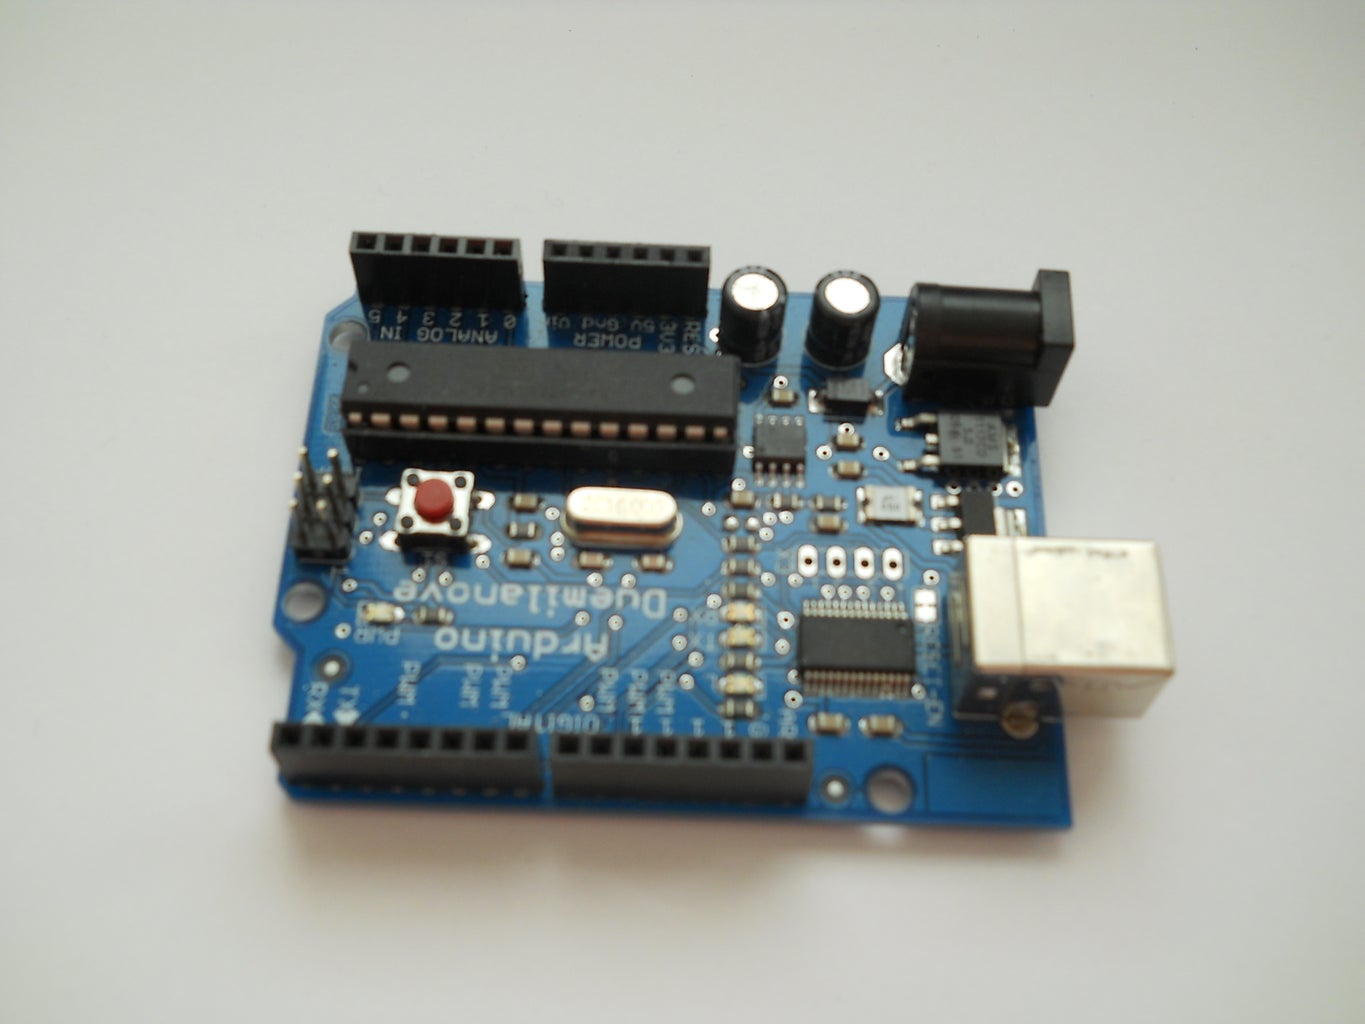
Step 4: Knowing the Arduino


Have a look at the pictures and you can see all the differnt parts of the Arduino Duemilanove.
The main parts are :
The ATmega processor
The Reset switch
The sockets (USB and 9V power supply)
The Analog pins
The Digital pins
Step 5: Knowing the LED


LED is an abbreviation for Light Emmiting Diode, which means it basically is a diode that gives out light.
The LED has 2 leads, the + and the - (As you can see in the picture)
The + is a little longer than the -.
It is the most common and the cheapest way to light something up!
100 LEDs cost only 2$ on ebay!
Step 6: Knowing the Cable


The arduino is connected to the pc by either of 2 ways...one is just by using a basic wire to connect both of them as shown in the picture.
Another way is to use a Bluetooth Transciever to connect to the computer wirelessly.
This is a little more advanced and not required for this project.
Step 7: Writing the Program
This is the program to control the LED on how long it stays on and how long it stays off.
/*
Blink
Turns on an LED on for one second, then off for one second, repeatedly.
*/
void setup() {
// initialize the digital pin as an output.
// Pin 13 has an LED connected on most Arduino boards:
pinMode(13, OUTPUT);
}
void loop() {
digitalWrite(13, HIGH); // set the LED on
delay(1000); // wait for a second
digitalWrite(13, LOW); // set the LED off
delay(1000); // wait for a second
}
Every arduino code has a "Void setup" and a "Void loop"
"Void Setup" is basically what the arduino does once it is turned on, and then once it finishes it, it goes on to "Void Loop"
And what "Void Loop" does is, it keeps repeating itself again and again and again until the arduino is turned off.
The code was taken from Arduino-Examples-Blink
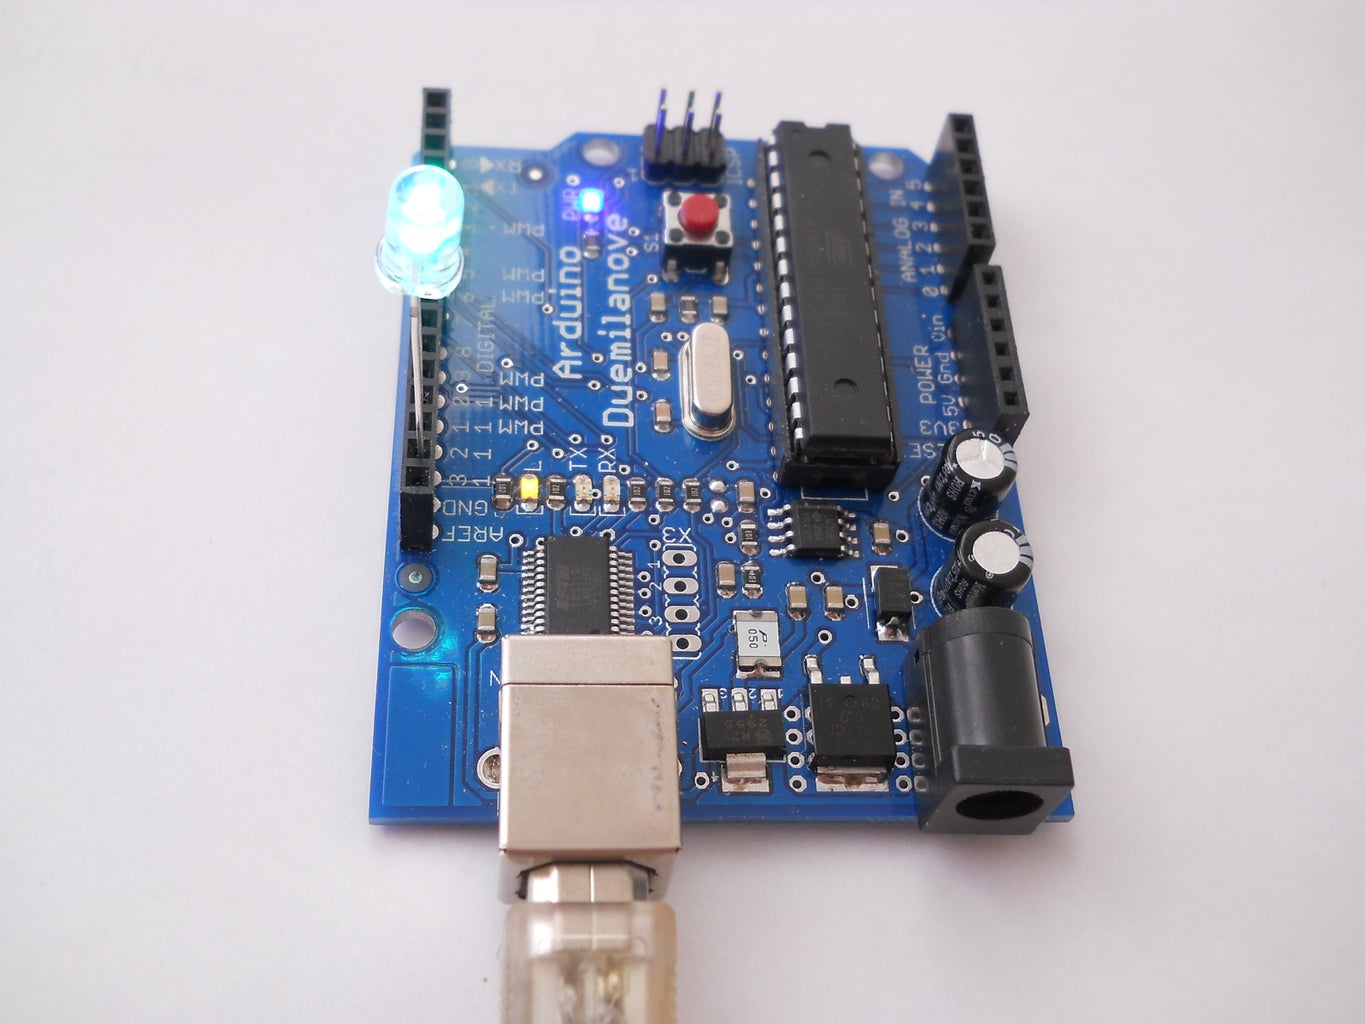
Step 8: Wiring the Hardware


Now that you have the code ready, you will need to wire up the components to the arduino.
We take the LED and connect it to Pin 13 and Gnd beside it. The + goes to Pin 13 and - to Gnd.
We use pin 13 because it has an inbuilt resistor and we can just hook up and LED to that pin, whereas for other pins, we need to add an external resistor to the LED.
Once that is done, you connect the cable to the socket and to the USB, and you are done with the Hardware!!!
Step 9: Settings


Once you have the program typed up, then you go to Tools-Board- and select the correct Board
Then you go to Tools-Serial Port- and select the correct serial port, for most users its going to be COM3 or COM4.
And once that is done, you click the arrow pointing to the right, which says upload, and then your program will be uploaded to the arduino!
Step 10: Finishing and Enjoyment!


And by the last step you will have finished making your very first arduino program and using it!
Now you can change the Delay (1000) to somthing else because 1000 is a second (1000 milli seconds)
So if you write 500 instead of 1000 then the LED will stay on for half a second and so on...
Hope this tutorial has helped you write up your very first arduino program!
Note - This works with any colored LEDs, I used Blue, Red and Green in the pictures!

Participated in the
Pocket-Sized Contest

Participated in the
Make It Glow Challenge

Participated in the
The Mad Science Fair


