

Introduction: Bucket Lightning Bolt


It was whilst I was making a Solid-State Tesla Coils using A duel Mosfet Circuit I had discovered. The problem I was having at the time, was with finding its resonance- this can be very costly on capacitors , spikes kill them very quickly if the circuit is out of tune. I then had this idea to make saltwater leyden jars - the thing is they are slightly unpredictable at times and are very lossy as the dielectric is quite thick. So I decided to upsize some air capacitors.
Step 1: Tools & Materials Needed


I bucket or large bucket like container (plastic paint can) or similar.
Role of heavy duty (Tin-Foil)
Bath/ Sink Plug Chain
Double sided sticky -tape/ cello-tape or Pritt-Stick will all do the same job.
Spray On Adhesive Is Better For Plate To Dielectric Contact [But Trickier To Apply Foil Plate]
Door knob 2" + Diameter or old Sauce Pan Knob (Which I Used)
Nut & Bolt 8-10MM (Tap To Suit)
Washer to suit bolt used (I used bolt from Pan- Knob)
Lid To Fit Your Bucket, or
to make one......Optional Lid-
Ply-Board 5-10mm
or 3-6mm Plastic (Acrylic, Perspex)
Jig- Saw : Only Needed for bucket without a lid....
Discharge Rod (Chicken Stick)
24 inch Dowel 5/8" Dowel
Wire / Coat Hanger.
Step 2: Building Proceedure


**********DISCLAIMER!!!! Proceed With Caution !!!! A Good Knowledge Of High Voltage Is Necessary*********** First we take our bucket and clean, degrease & de-sticker it. WD40 is an excellent sticker adhesive solvent. When we have a dry clean Bucket candidate we need to find a piece of plastic to make a lid/ cover if your bucket comes without one. A piece of thin Perspex 1.5 /2 mm or a piece of Ply-Board 5-10mm will do [Needs to be Sealed, or absorbs moisture]. Mine has a lid. To make a cover turn upside down and draw around the circumference of the bucket/ container Cut using Jig-Saw..
Step 3: Building #2 Lining the Inside


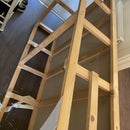
Having sat our bucket on a piece of foil / we draw round the base the obtain a circular piece of foil This is the start of our first PLATE for the Bucket Capacitor ,- we need (2) of these, one for inside one for outside. Now we need to leave an inch from the top inside, measure a length which accommodates this requirement but joins to the bottom circle -Affix with small pieces of tape. Try not to crease foil very much and do not leave gaps or sharp points. The reason for vertical pieces is because it's easier to use (4) pieces than one big piece as our bucket dimensions or not parallel. Affix all edges with tape - now we make a hole in our lid to suit our bolt diameter - mine was 6mm, yours can be larger than this. Now attach chain like the images show( Clamp by Bolting) at the end of the chain use Ali foil scraps to make a ball at the end of the chain (The Chain must touch the bottom of your bucket!!!- now close lid. Our first PLATE is complete.
Step 4: Building #3 Lining the Outside


The 2nd outside PLATE is performed slightly different in respect to covering the sides - our circle is the same, with slight overlap and fixed in place with tape. Our sides are two pieces of Foil, but Placed Horizontally, as this is easier to perform outside then inside. Maybe it's preferential to the builder to do the same inside as out.??? Tape in place avoiding Sharp edges and Air-Gaps. It should still work.
Note: [Spray On Adhesive Is A Better Choice For Plate To Dielectric Contact]
Chicken Stick:// This is a simple Isolated Discharge Wand [Image 4]- using a 24" Wooden Dowel Cut A slight groove to suit wire hanger. Make a (U-Shape) with curls at each end like you building a harp. Attach centre using a u-clamp arrangement.
Step 5: Testing


!!!!!!Dangerous High Voltage & Low Amps But Beware!!!!!!! If you have a big CRT TV turn it on holding the outside ONLY and grounded to a pipe, Use + terminal on the lid to collect static. Or use an AC device like a flyback & Driver to charge. Alternatively use several charged balloons, empty charge to + terminal while grounding - Outside -Terminal. To get a spark join Centre + terminal to Outside Terminal - With (Chicken Stick) .A Visual Spark & a crack should be heard. To measure potential is 1 Meter = 1000 000 Volts, divide spark length to work out potential.
Please Rate & Comment :-)


Runner Up in the
Bucket Challenge


