

Introduction: Build a Hovercraft


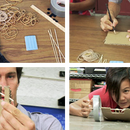

Step 1: Here’s What You Need to Make Your Hovercraft!

Here’s what you need to make your Hovercraft!
CD or DVD
Straw
Packing foam (1-2” piece with a flat side) or dry sponge
Balloon
Duct tape
Rubber band
Barbeque skewer
Pencil (sharpened)
Step 2: Build the Air Supply

- Cut the straw in half.
- Slip it one or two inches into the balloon.
- Attach the balloon to the straw, using tape or a rubber band. Make the seal tight enough so no air escapes, but not so tight that it blocks the air from flowing through the straw.
Step 3: Make the Collar

- Find the flattest, smoothest side of the foam or sponge.
- Use a barbecue skewer to poke a hole through the flat side.
Step 4: Make the Collar (continued)

- Widen the hole with a sharp pencil. Make it about the width of a straw.
Step 5: Attach the Collar to the Base

- Put the flat side of the collar against the disc.
- Line up the hole you made in the collar with the hole in the disc.
- Tape the collar and disc together. Make sure no tape ends up on the bottom of the disk. (That will make the bottom rough and uneven, which will stop the hovercraft.)
Step 6: Add the Air Supply

- Push the open end of the straw into the collar. It should fit tightly.
- Push the straw through the collar so you can blow into it.
- TIP: If the collar is not holding the straw… The straw should sit snugly in the foam or sponge. If the hole is too big, and the straw can move within it, the air will escape. Make a new collar.
Step 7: Inflate the Balloon

Step 8: Power Your Hovercraft

- Once the balloon is full, pinch the straw so that no air escapes.
- Slide the straw back up into the collar so the tip isn’t poking out. (If it does, it will drag on the surface and stop the hovercraft.)
Step 9: Launch Your Hovercraft

- Place your hovercraft on a large, smooth surface, like a table.
- Start the air flowing. Give your hovercraft a push!
- TIP: If the hovercraft is not gliding… Make sure the tabletop and bottom of the disk are smooth and dry. (Water droplets from your breath can slow or stop a hovercraft.) Also make sure that the straw is not poking out. Anything that disturbs the air cushion will stop the hovercraft.
- TIP: If the hovercraft is spinning… If one side is heavy, the hovercraft will go in circles.
- TIP: This is fun too, but if you want your hovercraft to go straight, make sure the weight above is distributed evenly.
- TIP: If the ride is too short... Slow the flow of air through the straw—or try a bigger balloon.
Step 10: Did You Know?

The air flowing through the straw produces a cushion of air under the hovercraft. This layer of air takes up space and lifts up the hovercraft. Now, the disk can’t rub against the table. When objects rub against each other, they produce friction, a force that resists motion and slows down moving objects. Thanks to the layer of air, there is hardly any friction, and your hovercraft glides along without being slowed down.
Step 11: Try This Next!

- Add air. Build a hovercraft that uses two balloons to glide longer or carry more weight.
- Race your hovercraft! Race two different kinds of hovercraft, or race against a friend.
- Play air hockey. Pass a hovercraft back and forth with a friend. Try to score!
- Supersize. Make a big hovercraft, using a foam plate.


