

Introduction: CNC Machine Using Arduino Nano and DVD Drive Stepper Motor
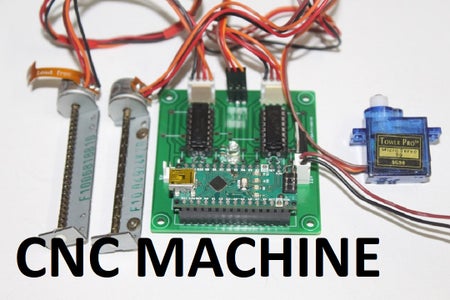
In this instructable, I'll try to explain how you can make your own CNC Machine using Arduino Nano and DVD Drive Stepper Motor. As CNC Machine become very interesting topic in now a day for creators.
Step 1: Introduction

In this instructable, I'll try to explain how you can make your own CNC Machine using Arduino Nano and DVD Drive Stepper Motor. As CNC Machine become very interesting topic in now a day for creators.
Before we start our build process, This instructable project is sponsored by JLCPCB. I have order ready made PCB from JLCPCB only just for 2$.
Step 2: Required Parts


To make this CNC Machine, I used the following parts:
1) 1 x Arduino Nano = Buy - https://amzn.to/37InxOV
2) 2 x L293D Motor Driver IC = Buy - https://amzn.to/39TdwRu
3) 1 x LM7805 Voltage Regulator = Buy - https://amzn.to/3lWy7H8
4) 2 x 16 Pin IC Base
5) 1 x 1K Resistor
6) 1 x LED
7) 2 x DVD Drive Stepper Motor = Buy- https://amzn.to/3gnQHXD
8) 1 x Tower Pro SG90 Micro Servo Motor = Buy - https://amzn.to/3lXAR7d
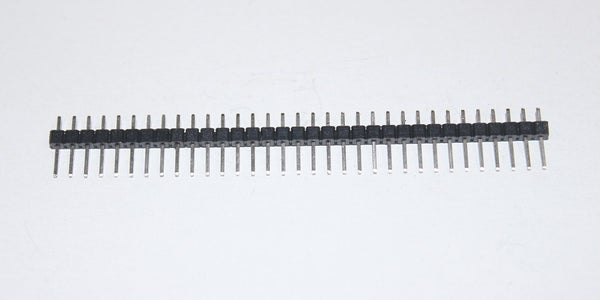
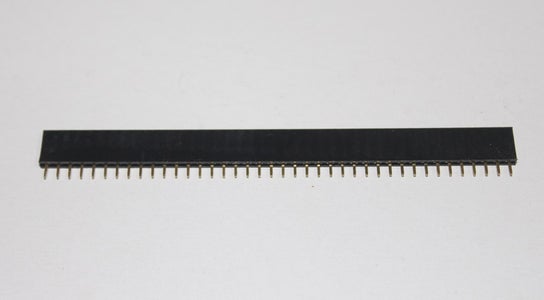
9) 2 x 15 2.54mm Female Header Connector
10) 1 x 3 Pin 2.54mm Male Header Connector
11) 2 x 4 Pin Relimate Male Header Connector
12) 2 x 4 Pin Relimate Header Connector Wire
13) 2 x 2 Pin Relimate Male Header Connector
Note: All required parts listed in the photo gallery so make sure to check it out!!
Step 3: Circuit Diagram and PCB Making


Circuit diagram is shown in the figure. for making PCB for this circuit i used JLCPCB website for ordering online PCB From their website,
First Go to JLCPCB then Click on the QUOTE NOW, then Upload your Gerber file, I have provided the Gerber file for print. after upload completion you can check how your PCB is look like. then process further for ordering the PCB (only just for 2$). that's it. very easy.
Attachments

Step 4: Build Process


On Printed Circuit Board, first mount all parts in its position and solder them in its correct position as shown in photos. As shown in image, solder the four wire on stepper motor of connector. after soldering completion, now you can mount other components i.e. Arduino Nano, Driver IC and Connector as shown in photos.
Hook up the male connector for DVD Stepper motor, Servo motor and Power cables in its correct female connector on PCB.
Now It's time to Upload the code to Arduino Nano.
Step 5: Upload Code to Arduino Nano


First Download the Arduino IDE software from Arduino Website. then open the Arduino IDE software. and COPY-PASTE the code.
Then go to Tools > Select Arduino Board, in our case select Arduino Nano.
and Select Proper Port from the Tools menu.
After it's done Upload your code to Arduino Nano.
 /*
 Mini CNC Plotter firmware, based in TinyCNC https://github.com/MakerBlock/TinyCNC-Sketches
 Send GCODE to this Sketch using gctrl.pde https://github.com/damellis/gctrl
 Convert SVG to GCODE with MakerBot Unicorn plugin for Inkscape available here https://github.com/martymcguire/inkscape-unicorn

 More information about the Mini CNC Plotter here (german, sorry): http://www.makerblog.at/2015/02/projekt-mini-cnc-plotter-aus-alten-cddvd-laufwerken/
  */

#include <Servo.h>
#include <Stepper.h>

#define LINE_BUFFER_LENGTH 512

// Servo position for Up and Down
const int penZUp = 80;
const int penZDown = 40;

// Servo on PWM pin 6
const int penServoPin = 6;

// Should be right for DVD steppers, but is not too important here
const int stepsPerRevolution = 20;

// create servo object to control a servo
Servo penServo;

// Initialize steppers for X- and Y-axis using this Arduino pins for the L293D H-bridge
Stepper myStepperY(stepsPerRevolution, 2,3,4,5);
Stepper myStepperX(stepsPerRevolution, 8,9,10,11);

/* Structures, global variables    */
struct point {
  float x;
  float y;
  float z;
};

// Current position of plothead
struct point actuatorPos;

//  Drawing settings, should be OK
float StepInc = 1;
int StepDelay = 0;
int LineDelay = 50;
int penDelay = 50;

// Motor steps to go 1 millimeter.
// Use test sketch to go 100 steps. Measure the length of line.
// Calculate steps per mm. Enter here.
float StepsPerMillimeterX = 6.0;
float StepsPerMillimeterY = 6.0;

// Drawing robot limits, in mm
// OK to start with. Could go up to 50 mm if calibrated well.
float Xmin = 0;
float Xmax = 40;
float Ymin = 0;
float Ymax = 40;
float Zmin = 0;
float Zmax = 1;

float Xpos = Xmin;
float Ypos = Ymin;
float Zpos = Zmax;

// Set to true to get debug output.
boolean verbose = false;

//  Needs to interpret
//  G1 for moving
//  G4 P300 (wait 150ms)
//  M300 S30 (pen down)
//  M300 S50 (pen up)
//  Discard anything with a (
//  Discard any other command!

/**********************
 * void setup() - Initialisations
 ***********************/
void setup() {
  //  Setup
  Serial.begin( 9600 );

  penServo.attach(penServoPin);
  penServo.write(penZUp);
  delay(200);

  // Decrease if necessary
  myStepperX.setSpeed(250);
  myStepperY.setSpeed(250);

  //  Set & move to initial default position
  // TBD

  //  Notifications!!!
  Serial.println("Mini CNC Plotter alive and kicking!");
  Serial.print("X range is from ");
  Serial.print(Xmin);
  Serial.print(" to ");
  Serial.print(Xmax);
  Serial.println(" mm.");
  Serial.print("Y range is from ");
  Serial.print(Ymin);
  Serial.print(" to ");
  Serial.print(Ymax);
  Serial.println(" mm.");
}

/**********************
 * void loop() - Main loop
 ***********************/
void loop()
{
  delay(200);
  char line[ LINE_BUFFER_LENGTH ];
  char c;
  int lineIndex;
  bool lineIsComment, lineSemiColon;

  lineIndex = 0;
  lineSemiColon = false;
  lineIsComment = false;

  while (1) {

    // Serial reception - Mostly from Grbl, added semicolon support
    while ( Serial.available()>0 ) {
      c = Serial.read();
      if (( c == '\n') || (c == '\r') ) {             // End of line reached
        if ( lineIndex > 0 ) {                        // Line is complete. Then execute!
          line[ lineIndex ] = '\0';                   // Terminate string
          if (verbose) {
            Serial.print( "Received : ");
            Serial.println( line );
          }
          processIncomingLine( line, lineIndex );
          lineIndex = 0;
        }
        else {
          // Empty or comment line. Skip block.
        }
        lineIsComment = false;
        lineSemiColon = false;
        Serial.println("ok");
      }
      else {
        if ( (lineIsComment) || (lineSemiColon) ) {   // Throw away all comment characters
          if ( c == ')' )  lineIsComment = false;     // End of comment. Resume line.
        }
        else {
          if ( c <= ' ' ) {                           // Throw away whitepace and control characters
          }
          else if ( c == '/' ) {                    // Block delete not supported. Ignore character.
          }
          else if ( c == '(' ) {                    // Enable comments flag and ignore all characters until ')' or EOL.
            lineIsComment = true;
          }
          else if ( c == ';' ) {
            lineSemiColon = true;
          }
          else if ( lineIndex >= LINE_BUFFER_LENGTH-1 ) {
            Serial.println( "ERROR - lineBuffer overflow" );
            lineIsComment = false;
            lineSemiColon = false;
          }
          else if ( c >= 'a' && c <= 'z' ) {        // Upcase lowercase
            line[ lineIndex++ ] = c-'a'+'A';
          }
          else {
            line[ lineIndex++ ] = c;
          }
        }
      }
    }
  }
}

void processIncomingLine( char* line, int charNB ) {
  int currentIndex = 0;
  char buffer[ 64 ];                                 // Hope that 64 is enough for 1 parameter
  struct point newPos;

  newPos.x = 0.0;
  newPos.y = 0.0;

  //  Needs to interpret
  //  G1 for moving
  //  G4 P300 (wait 150ms)
  //  G1 X60 Y30
  //  G1 X30 Y50
  //  M300 S30 (pen down)
  //  M300 S50 (pen up)
  //  Discard anything with a (
  //  Discard any other command!

  while( currentIndex < charNB ) {
    switch ( line[ currentIndex++ ] ) {              // Select command, if any
    case 'U':
      penUp();
      break;
    case 'D':
      penDown();
      break;
    case 'G':
      buffer[0] = line[ currentIndex++ ];          // /!\ Dirty - Only works with 2 digit commands
      //      buffer[1] = line[ currentIndex++ ];
      //      buffer[2] = '\0';
      buffer[1] = '\0';

      switch ( atoi( buffer ) ){                   // Select G command
      case 0:                                   // G00 & G01 - Movement or fast movement. Same here
      case 1:
        // /!\ Dirty - Suppose that X is before Y
        char* indexX = strchr( line+currentIndex, 'X' );  // Get X/Y position in the string (if any)
        char* indexY = strchr( line+currentIndex, 'Y' );
        if ( indexY <= 0 ) {
          newPos.x = atof( indexX + 1);
          newPos.y = actuatorPos.y;
        }
        else if ( indexX <= 0 ) {
          newPos.y = atof( indexY + 1);
          newPos.x = actuatorPos.x;
        }
        else {
          newPos.y = atof( indexY + 1);
          indexY = '\0';
          newPos.x = atof( indexX + 1);
        }
        drawLine(newPos.x, newPos.y );
        //        Serial.println("ok");
        actuatorPos.x = newPos.x;
        actuatorPos.y = newPos.y;
        break;
      }
      break;
    case 'M':
      buffer[0] = line[ currentIndex++ ];        // /!\ Dirty - Only works with 3 digit commands
      buffer[1] = line[ currentIndex++ ];
      buffer[2] = line[ currentIndex++ ];
      buffer[3] = '\0';
      switch ( atoi( buffer ) ){
      case 300:
        {
          char* indexS = strchr( line+currentIndex, 'S' );
          float Spos = atof( indexS + 1);
          //          Serial.println("ok");
          if (Spos == 30) {
            penDown();
          }
          if (Spos == 50) {
            penUp();
          }
          break;
        }
      case 114:                                // M114 - Repport position
        Serial.print( "Absolute position : X = " );
        Serial.print( actuatorPos.x );
        Serial.print( "  -  Y = " );
        Serial.println( actuatorPos.y );
        break;
      default:
        Serial.print( "Command not recognized : M");
        Serial.println( buffer );
      }
    }
  }


}


/*********************************
 * Draw a line from (x0;y0) to (x1;y1).
 * Bresenham algo from https://www.marginallyclever.com/blog/2013/08/how-to-build-an-2-axis-arduino-cnc-gcode-interpreter/
 * int (x1;y1) : Starting coordinates
 * int (x2;y2) : Ending coordinates
 **********************************/
void drawLine(float x1, float y1) {

  if (verbose)
  {
    Serial.print("fx1, fy1: ");
    Serial.print(x1);
    Serial.print(",");
    Serial.print(y1);
    Serial.println("");
  }

  //  Bring instructions within limits
  if (x1 >= Xmax) {
    x1 = Xmax;
  }
  if (x1 <= Xmin) {
    x1 = Xmin;
  }
  if (y1 >= Ymax) {
    y1 = Ymax;
  }
  if (y1 <= Ymin) {
    y1 = Ymin;
  }

  if (verbose)
  {
    Serial.print("Xpos, Ypos: ");
    Serial.print(Xpos);
    Serial.print(",");
    Serial.print(Ypos);
    Serial.println("");
  }

  if (verbose)
  {
    Serial.print("x1, y1: ");
    Serial.print(x1);
    Serial.print(",");
    Serial.print(y1);
    Serial.println("");
  }

  //  Convert coordinates to steps
  x1 = (int)(x1*StepsPerMillimeterX);
  y1 = (int)(y1*StepsPerMillimeterY);
  float x0 = Xpos;
  float y0 = Ypos;

  //  Let's find out the change for the coordinates
  long dx = abs(x1-x0);
  long dy = abs(y1-y0);
  int sx = x0<x1 ? StepInc : -StepInc;
  int sy = y0<y1 ? StepInc : -StepInc;

  long i;
  long over = 0;

  if (dx > dy) {
    for (i=0; i<dx; ++i) {
      myStepperX.step(sx);
      over+=dy;
      if (over>=dx) {
        over-=dx;
        myStepperY.step(sy);
      }
      delay(StepDelay);
    }
  }
  else {
    for (i=0; i<dy; ++i) {
      myStepperY.step(sy);
      over+=dx;
      if (over>=dy) {
        over-=dy;
        myStepperX.step(sx);
      }
      delay(StepDelay);
    }
  }

  if (verbose)
  {
    Serial.print("dx, dy:");
    Serial.print(dx);
    Serial.print(",");
    Serial.print(dy);
    Serial.println("");
  }

  if (verbose)
  {
    Serial.print("Going to (");
    Serial.print(x0);
    Serial.print(",");
    Serial.print(y0);
    Serial.println(")");
  }

  //  Delay before any next lines are submitted
  delay(LineDelay);
  //  Update the positions
  Xpos = x1;
  Ypos = y1;
}

//  Raises pen
void penUp() {
  penServo.write(penZUp);
  delay(LineDelay);
  Zpos=Zmax;
  if (verbose) {
    Serial.println("Pen up!");
  }
}
//  Lowers pen
void penDown() {
  penServo.write(penZDown);
  delay(LineDelay);
  Zpos=Zmin;
  if (verbose) {
    Serial.println("Pen down.");
  }
}
Step 6: Download the Processing Software


First download the Processing software from It's Website.
Copy Paste the below code in Processing Software.
then Run the Program. You can see new dialogue box is open. now connect your arduino nano to your desktop PC.
Press P button to select your Port where your arduino nano board is available.
then Press G button to Upload the test Gerber file. It's done.
import java.awt.event.KeyEvent;
import javax.swing.JOptionPane;
import processing.serial.*;

Serial port = null;

// select and modify the appropriate line for your operating system
// leave as null to use interactive port (press 'p' in the program)
String portname = null;
//String portname = Serial.list()[0]; // Mac OS X
//String portname = "/dev/ttyUSB0"; // Linux
//String portname = "COM6"; // Windows

boolean streaming = false;
float speed = 0.001;
String[] gcode;
int i = 0;

void openSerialPort()
{
  if (portname == null) return;
  if (port != null) port.stop();

  port = new Serial(this, portname, 9600);

  port.bufferUntil('\n');
}

void selectSerialPort()
{
  String result = (String) JOptionPane.showInputDialog(frame,
    "Select the serial port that corresponds to your Arduino board.",
    "Select serial port",
    JOptionPane.QUESTION_MESSAGE,
    null,
    Serial.list(),
    0);

  if (result != null) {
    portname = result;
    openSerialPort();
  }
}

void setup()
{
  size(600, 400);
  openSerialPort();
}

void draw()
{
  background(155);
  fill(0);
  int y = 24, dy = 12;
  text("INSTRUCTIONS", 12, y); y += dy;
  text("p: select serial port", 12, y); y += dy;
  text("1: set speed to 0.001 inches (1 mil) per jog", 12, y); y += dy;
  text("2: set speed to 0.010 inches (10 mil) per jog", 12, y); y += dy;
  text("3: set speed to 0.100 inches (100 mil) per jog", 12, y); y += dy;
  text("arrow keys: jog in x-y plane", 12, y); y += dy;
  text("page up & page down: jog in z axis", 12, y); y += dy;
  text("$: display grbl settings", 12, y); y+= dy;
  text("h: go home", 12, y); y += dy;
  text("0: zero machine (set home to the current location)", 12, y); y += dy;
  text("g: stream a g-code file", 12, y); y += dy;
  text("x: stop streaming g-code (this is NOT immediate)", 12, y); y += dy;
  y = height - dy;
  text("current jog speed: " + speed + " inches per step", 12, y); y -= dy;
  text("current serial port: " + portname, 12, y); y -= dy;
}

void keyPressed()
{
  if (key == '1') speed = 0.001;
  if (key == '2') speed = 0.01;
  if (key == '3') speed = 0.1;

  if (!streaming) {
    if (keyCode == LEFT) port.write("G91\nG20\nG00 X-" + speed + " Y0.000 Z0.000\n");
    if (keyCode == RIGHT) port.write("G91\nG20\nG00 X" + speed + " Y0.000 Z0.000\n");
    if (keyCode == UP) port.write("G91\nG20\nG00 X0.000 Y" + speed + " Z0.000\n");
    if (keyCode == DOWN) port.write("G91\nG20\nG00 X0.000 Y-" + speed + " Z0.000\n");
    if (keyCode == KeyEvent.VK_PAGE_UP) port.write("G91\nG20\nG00 X0.000 Y0.000 Z" + speed + "\n");
    if (keyCode == KeyEvent.VK_PAGE_DOWN) port.write("G91\nG20\nG00 X0.000 Y0.000 Z-" + speed + "\n");
    if (key == 'h') port.write("G90\nG20\nG00 X0.000 Y0.000 Z0.000\n");
    if (key == 'v') port.write("$0=75\n$1=74\n$2=75\n");
    //if (key == 'v') port.write("$0=100\n$1=74\n$2=75\n");
    if (key == 's') port.write("$3=10\n");
    if (key == 'e') port.write("$16=1\n");
    if (key == 'd') port.write("$16=0\n");
    if (key == '0') openSerialPort();
    if (key == 'p') selectSerialPort();
    if (key == '$') port.write("$$\n");
  }

  if (!streaming && key == 'g') {
    gcode = null; i = 0;
    File file = null;
    println("Loading file...");
    selectInput("Select a file to process:", "fileSelected", file);
  }

  if (key == 'x') streaming = false;
}

void fileSelected(File selection) {
  if (selection == null) {
    println("Window was closed or the user hit cancel.");
  } else {
    println("User selected " + selection.getAbsolutePath());
    gcode = loadStrings(selection.getAbsolutePath());
    if (gcode == null) return;
    streaming = true;
    stream();
  }
}

void stream()
{
  if (!streaming) return;

  while (true) {
    if (i == gcode.length) {
      streaming = false;
      return;
    }

    if (gcode[i].trim().length() == 0) i++;
    else break;
  }

  println(gcode[i]);
  port.write(gcode[i] + '\n');
  i++;
}

void serialEvent(Serial p)
{
  String s = p.readStringUntil('\n');
  println(s.trim());

  if (s.trim().startsWith("ok")) stream();
  if (s.trim().startsWith("error")) stream(); // XXX: really?
}
Attachments
Step 7: Upload Gerber File to Arduino Board


After pressing G button you can upload your Gerber file to board. that's it. now your CNC Machine will do its job.
Step 8: CNC Machine
That's it. this is the final result of CNC Machine.
It is really very easy project if you want any help you can ask anytime.


