

Introduction: CONTROL SERVO MOTOR USING MOTION SENSOR


HI !!!!!!!!! In this instructables i am teaching you about controlling the servo motor using motion sensor. This is used in nerf gun. Let's get started without wasting the time.Keep following me for HTML and CSS ,Arduino projects.If you had any doubt please leave a comment below i will be pleased to help you.
Step 1: ELECTRONIC REQUIRED :-

- Breadboard
- Jumper wire
- Serco motor
- Resistor
So after billing the electroincs let's get started with building.
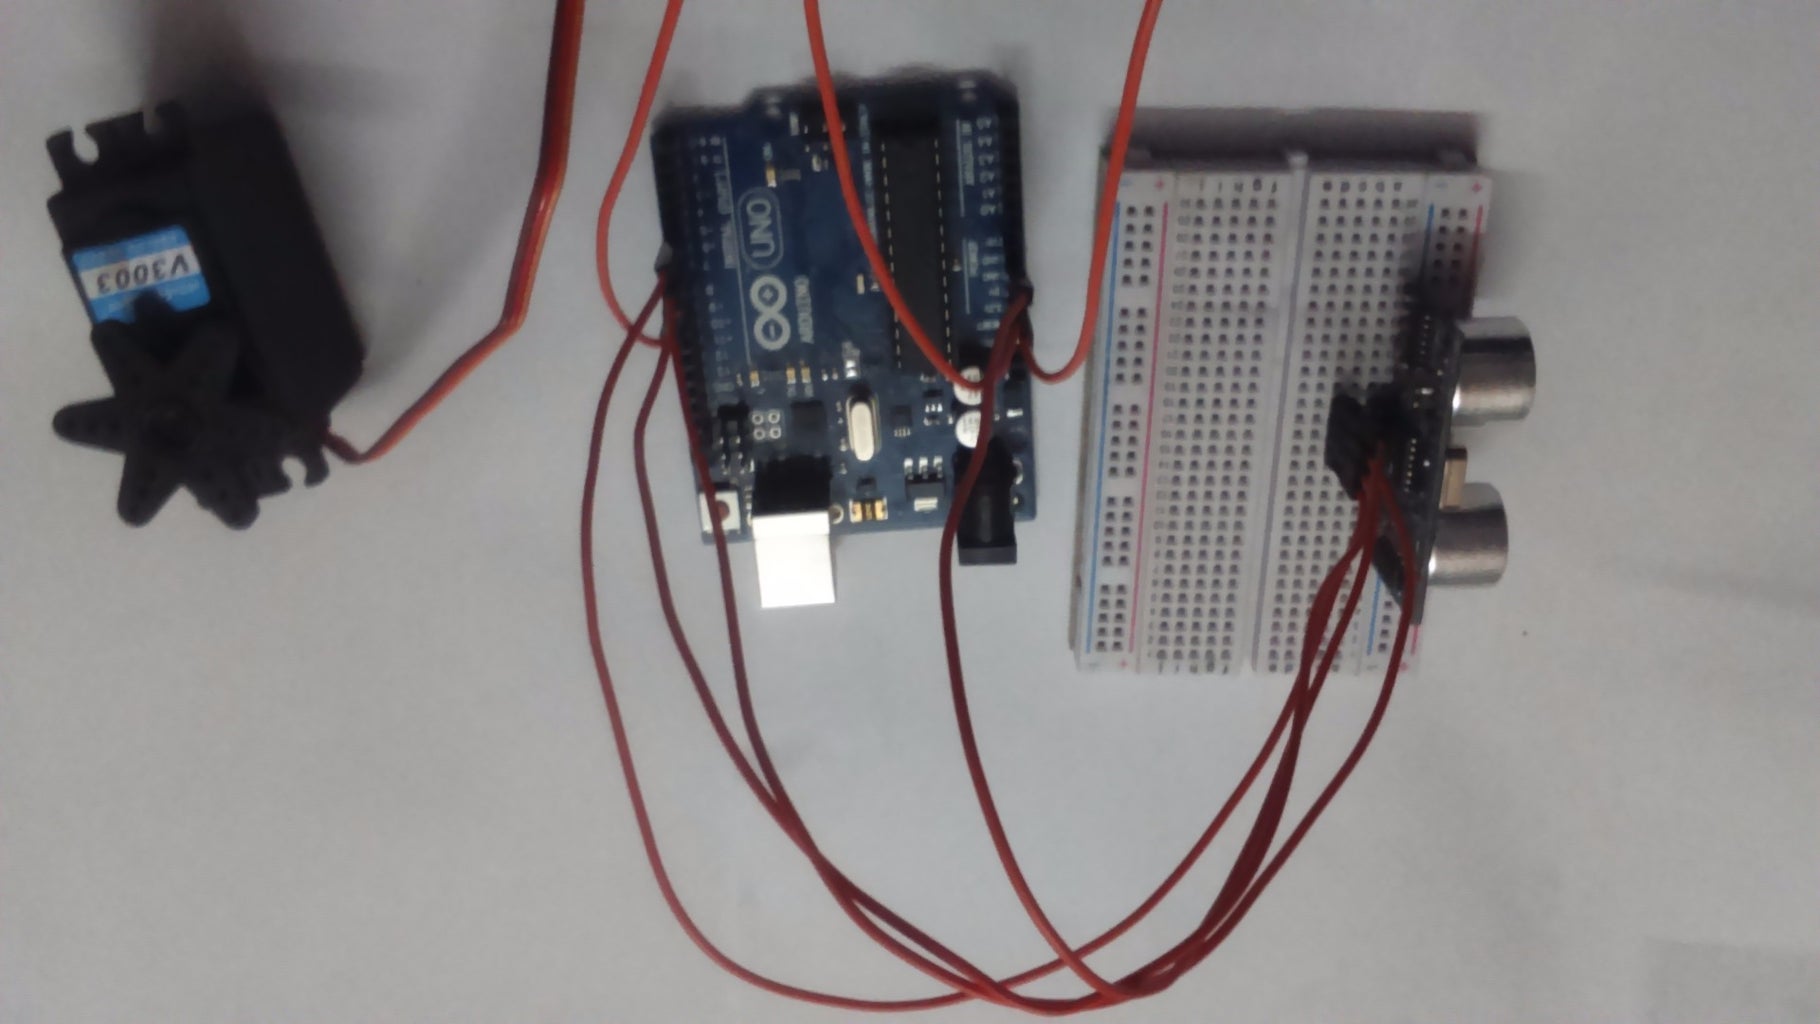
Step 2: BUILDING THE CIRCUITS :-

The wiring in this Instructable is very simple.
- The ground pin (GND) on the PIR sensor should be plugged into the Arduino's ground pin,
- the 5 volt pin (VCC) should be plugged into the Arduino's digital pin 13, and
- the data pin (OUT) should be plugged into the Arduino's digital pin 12.
- The servo's red wire should be plugged into the Arduino's 5 volt pin,
- the maroon wire should be plugged into the Arduino's Ground pin, and
- the signal wire (it was orange on my servo) should be plugged into the Arduino's digital pin 4.
The wiring is complete! If you are confused, look at the pictures or ask in the comments.
Step 3: CODING :-
#include Servo myservo; //creates a servo object //a maximum of eight servo objects can be createdint pos = 0; //variable to store servo position//amount of time we give the sensor to calibrate(10-60 secs according to the datasheet)
int calibrationTime = 30;//the time when the sensor outputs a low impulselong unsigned
int lowIn; //the amount of milliseconds the sensor has to be low//before we assume all motion has stoppedlong unsigned
int pause = 5000;
boolean lockLow = true;
boolean takeLowTime;
int pirPin = 12; //digital pin connected to the PIR's outputint pirPos = 13; //connects to the PIR's 5V pin
void setup(){
myservo.attach(4); //attaches servo to pin 4 Serial.begin(9600); //begins serial communication
pinMode(pirPin, INPUT);
pinMode(pirPos, OUTPUT);
digitalWrite(pirPos, HIGH); //give the sensor time to calibrate
Serial.println("calibrating sensor ");
for(int i = 0; i < calibrationTime; i++){
Serial.print(calibrationTime - i);
Serial.print("-");
delay(1000); }
Serial.println();
Serial.println("done"); //while making this Instructable, I had some issues with the PIR's output //going HIGH immediately after calibrating //this waits until the PIR's output is low before ending setup
while (digitalRead(pirPin) == HIGH) {
delay(500);
Serial.print("."); }
Serial.print("SENSOR ACTIVE");}
void loop(){
if(digitalRead(pirPin) == HIGH){ //if the PIR output is HIGH, turn servo /*turns servo from 0 to 180 degrees and back it does this by increasing the variable "pos" by 1 every 5 milliseconds until it hits 180 and setting the servo's position in degrees to "pos" every 5 milliseconds it then does it in reverse to have it go back to learn more about this, google "for loops" to change the amount of degrees the servo turns, change the number 180 to the number of degrees you want it to turn **/
for(pos = 0; pos < 180; pos += 1) //goes from 0 to 180 degrees { //in steps of one degree
myservo.write(pos); //tells servo to go to position in variable "pos" delay(5); //waits for the servo to reach the position }
for(pos = 180; pos>=1; pos-=1) //goes from 180 to 0 degrees {
myservo.write(pos); //to make the servo go faster, decrease the time in delays for delay(5); //to make it go slower, increase the number. }
if(lockLow){ //makes sure we wait for a transition to LOW before further output is made
lockLow = false;
Serial.println("---");
Serial.print("motion detected at ");
Serial.print(millis()/1000);
Serial.println(" sec");
delay(50); }
takeLowTime = true; }
if(digitalRead(pirPin) == LOW){
if(takeLowTime){
lowIn = millis(); //save the time of the transition from HIGH to LOW
takeLowTime = false; //make sure this is only done at the start of a LOW phase } //if the sensor is low for more than the given pause, //we can assume the motion has stopped
if(!lockLow && millis() - lowIn > pause){ //makes sure this block of code is only executed again after //a new motion sequence has been detected
lockLow = true; Serial.print("motion ended at "); //output
Serial.print((millis() - pause)/1000);
Serial.println(" sec");
delay(50); } }
}


