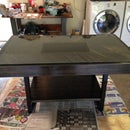
Introduction: Caradonna Coffee Table
This is a coffee table I was commissioned to build last year. It's a blend of rectangular steel tubing and wood. It was a fun challenge to take on, and the owners were very pleased with the results. Hope you like it!
Step 1: Laying It Out
I don't have pictures of my initial sketch, but I had this photo of an inspiration piece which guided me. The finish was very important, and a bit nerve wracking to duplicate, but I had some leeway with size. It was decided to make it 54" x 30" x 18" as it was going in an open space. The most difficult part was sorting out how to join the wood to the steel. After a few sketches and discussions with my engineer father, we decided to drill holes in the steel frame to bolt mounting blocks which would give us adjustability to keep everything true and square.
Step 2: Assembling the Frame
The first step after figuring out the design and purchasing the materials was to begin welding the frame. I used 1-1/2" x 1/2" rectangular steel tube for the skeleton, and 3/4" oak veneer plywood for the boxes. Everything on the frame was MIG welded.
I cut everything on a cut off saw (though a hacksaw would have worked just as well on this material), just to keep the angles consistent. Sizing was pretty easy to calculate since the frame represents the outside dimensions of the finished table.
The long center rib is the main structural assembly. The side pieces were made as individual C-shapes and then attached to the center. The $6 welding magnet I bought for a previous project (Instructable to follow) was invaluable! I would highly recommend one to anyone doing some basic welding. It allows you to keep two pieces together at a variety of angles. I wouldn't say it's ultra-precise, but it gets you close enough to tack things together and then adjust.
Prior to welding everything together, there is one key step for which I no longer have pictures: drilling the mounting holes in the frame. After calculating clearances for bolt heads, furring strips used to join faces of the wood boxes, room for error/adjustment, etc.; we marked and drilled each piece of the frame, on a drill press, to locate the mounting points for the 3/4" square blocks used to join the wood and metal pieces. The only issue we ran into was one of "efficiency." We decided to clamp and drill the holes in the C-shaped pieces all at once, which led to a bit of "crawl" from the drill bit as it passed through the last two pieces. As a result, we needed to shave a couple of washers down, and "massage" the mounting blocks downward on the bolts. Fortunately, everything came out very well in the end, but I would recommend doing it the proper way the first time. Who knew?!
Step 3: Mounting the Blocks
Okay, so there's another step I no longer have pictures for: assembling the boxes. Oops! It wasn't very glamorous, so I didn't think it needed attention (and I didn't intend to make an Instructable at first). Once we had the dimensions of each face figured out, the next important step was to determine the orientation before we started cutting them on the tablesaw. I wanted the grain to run from in one direction from the end, lengthwise down the top, and over the other end. I knew I wanted the sides to be consistent as well, so I chose to make the grain run vertically, similar to the inspiration piece.
Somewhat miraculously, I was able to lay out the cuts to get all of this out of one piece of plywood...until we messed up one cut on the last top piece! Luckily, we were able to get less than a full sheet (oak plywood isn't the cheapest!) to fix the mistake.
Each of the boxes was made using 45-degree miter joints, but the trick was the actual joining. I didn't want to have lots of puttied holes exposed on the visible faces, so a 3/4" square block, just like the mounting blocks, was used to attach each adjoining face with glue and screws. Bombproof construction, and the joints came out tight and clean!! I'm pretty sure that if the owners ever wanted to use the blocks as individual pieces, they'd easily hold an average size American.
Once all of the boxes were constructed, we started the process of attaching them to the skeleton. Physically it was a little awkward to mount them since we didn't want to risk scratching the top by flipping it over if at all possible. Some of the work was blind, some upside down, backhanded, you know, a normal project! We were continually checking for level and square, which paid dividends at the end when everything came out all but perfect! This was critical because each rail holds two mounting blocks, so leveling blocks A & B effects the way B & C fit, which effects C & D, etc. The key, as always, was to get everything close and snug, but not tight. We were able to make little adjustments before locking everything down.
Once everything was in place, it was time to remove the boxes, leaving the mounting blocks, and start putting the finish on the table.
Step 4: Dialing in the Finish
As with any sort of steel finishing, it's important to make sure you have a nice even surface to put your final coat over. I had used an angle grinder and a flap disc to clean up the welds as much as possible when the welding was finished, but now it was time to fill any imperfections and wet sand everything that would be getting paint. I think I used body filler, but I can exactly remember, to smooth out the joints, then I went over everything with 300 and 400 grit wet sanding paper. Elbow grease is your best friend here, and you have to be ready to get very dirty hands!
Once everything was clean and dry, it was ready for paint. I found a finish that I liked, and the eventual owners of course, in a rattle can called Aged Steel. It was perfect for the finished aesthetic. I put on several light coats to avoid runs, and only spent the time painting what could be seen, plus a little just to be sure.
The final step before assembly was to stain the boxes, and this is what I was most nervous about. It needed to come out with a grey tone, but almost look whitewashed at the end. I knew I was going to be putting a satin polyurethane on it at the end, which can add a bit of yellow in my experience. So the question was how to take red oak veneer plywood and make it look grey. The obvious answer was a grey stain...didn't work. Way too dark, even only being on the wood for a few seconds. I eventually settled on using a much darker stain, though I don't exactly remember what color it was, then coating it with a thinned white oil base paint. I believe I ended up with a ratio of 1:1 paint to thinner (I can verify that for anyone interested), which I wiped on the stained boxes, let sit for about 3-5 minutes, then wiped off the excess. Once that was cured, I put on 4 coats of satin polyurethane. This proved to be a bit of a challenge since it wanted to run a bit on the more vertical faces. I solved my conundrum by stacking two cardboard boxes together, one on an angle inside the other, putting the "point" of each box up, which let gravity work evenly on each face.
Putting on the finish probably took nearly as long as the rest of the project, granted I was working on that element by myself. It's a bit hard to tell the finish in these pictures, but everyone concerned was very pleased with the final result!
Step 5: Putting It All Together
After the finish was on and cured, it was just a matter of bolting it all back together. Since I'd never moved the mounting blocks, and had made sure to mark the boxes before removal, everything went back together very smoothly. I believe I added a couple of coats of wipe-on polyurethane once it was all together, just to make sure that the finish was deep and durable (think toddler resistant).
I was very nervous upon delivery, mostly because this is the first piece I made for someone I didn't know, but the response washed all of that away. The new owners loved it and thought it fit their space perfectly. I was flattered to know that it "looked exactly like what I pictured."
Hope you enjoyed!

Participated in the
Metal Contest 2016

Participated in the
Wood Contest 2016


