

Introduction: Cardboard Robotic Arm


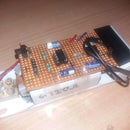
This is an Arduino controlled robotic arm I made just from cardboard and small servos. It takes around 2 hours to build. Once built, you can write all sorts of code to make it do anything.
In this instructable, I include two programmes I wrote. One makes the arm move periodically to lift a small object. The other takes input from the user via potentiometers, and moves the arm. The arduino records this movement and plays it in a loop afterwards.
This instructable focuses mainly on building the hardware. It can be divided into three parts. The claw, the elbow and the base.
Material required-
- Cardboard
- 1 clothespin
- 3 servo motors
- Arduino
- 3 potentiometers (optional)
Tools required-
- Fevicol or Hot glue.
- Black tape
- cello tape
- Knife
- Ruler
- Screwdriver
- Pins
Step 1: The Claw


I used a metal clothespin. Attach one of it's halves to the servo motor with tape and fevicol. You can use hot glue too.
Cut out a piece of cardboard of dimension approximately 3cm X 13cm. Attach the servo blade of the elbow to one end with fevicol and tape. This connection needs to be strong as this joint transmits the torque from the servo to the arm.
To the other end, attach the other half of the clip. After these connections dry, attach the claw servo with more glue and tape.
Ensure that the claw closes properly during servo operation.
Step 2: The Elbow


This part is like the claw in the sense that it has a servo motor attached at one end, and a servo blade at the other.
- Take 3 to 4 layers of cardboard of dimensions around 3cmX 15cm and sandwich them together Make sure that the longer side is along the cardboard grain, for higher strength.
- Towards the top, drill a hole of the dimensions of the servo, and embed it inside the cardboard.
- Make 2 cardboard trusses as shown in the pictures with cardboard which can support the claw during operation.
- Attach the truss to the elbow with fevicol such that a centimeter of space remains. The base servo will fit in this place.
- Coat the bottom surface of the trusses with cello tape to reduce friction.
- Attach the servo blade to the base with fevicol or hot glue, and pins. This joint needs to be strong to ensure proper power transmission from the base to the elbow.
Step 3: The Base

All of the arm's operations are within this region.
- Cutout 3 to 4 layers of cardboard and sandwich them together with tape.
- At the center, you need to fix the base servo. So cutout a t-shaped cavity.
- At the center, fix the servo with fevicol or hot glue.. I used the metal gear mg90 servo for the base.
- Make sure that the servo is in level with the base. The gear should fit in the space we left between the elbow and the trusses.
- There should be enough space in the T- hole for the wires to slip under.
- Mark of the circle in which the elbow will rotate with tape.
- Coat this circle with cello-tape to reduce friction between the base and trusses.
- You can even apply lubricant like machine oil over the cello-tape.
Step 4: Putting It All Together
- Attach the claw piece to the elbow such that at 180 degree the claw touches the base.
- Tape the connecting wires and jumpers to the side of the elbow pillar.
- The elbow pillar should connect with the base servo with little effort. You can make this connection permanent with a screw. I chose to keep it free so that during violent servo movement the arm doesn't get damaged.
- Pass all the wires underneath the base through the hole.
- Attach one final layer of cardboard to the base, which will ensure that the base servo doesn't touch the ground, and the wires are hidden.
Step 5: The Potentiometer Controller

Connect 3 pots to the arduino analog input pins. Any value will do. I used 10k.
Step 6: Code
I have attached the two codes used in the videos and described in the introduction.
UPDATE 18-10-2017
I have updated the code for servoRecordandPlay, now it can record for a minute on the UNO, and for over 4 minutes on the mega with 3 servos. Also, I have specified the pins explicitly.

Step 7: Some Tips...
- Make appropriate measurement before cutting the cardboard, or gluing anything together.
- At every step of the construction, plan where to put the wires. Otherwise it will be a real hassle in the end.
- Give the glue time to dry before powering the servos.


