

Introduction: Carter's Lasercut Tank - Jagdtiger


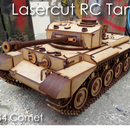
Hello everyone ! this is my new tank : A lasercut RC german Jagdtiger. It was their last and most massive tank destroyer, also my main tank in War Thunder ;)
It requires 3mm material (i cut mine in MDF) at the original scale, which makes it XXcm long, XXcm large, and XXcm high.
You can find the plans on its Thingiverse page. Like the Panzer, don't throw away your scraps, there are parts inside other parts.
But before you cut all the parts, you'll need to gather some material :
- A Dremel with tools to cut tiny metal rods,
- 2x Ø3mm soft rods (XXcm long),
- a Ø3mm screw rod (or soft, a recommend a screw rod here because it is cheaper and can be found easily), approx. 31cm long,
- Ø4mm tubes (Ø3mm inside) for the wheels hinges, to avoid damage on the wood,
- 4 Opitec gears (Ø20mm) if you dont want to use it, i gave equivalent wheels to cut.
Look each photo one-by-one, i added some advices or tips about the assembly.
NB : i didn't assembled mine exactly in the following order, because i might happen that i discovered some parts do not fit, and might be cut again, or else. Do not panic if you see parts that are already added before the correct step.
Are you ready now ? Let's go !
Step 1: The Lower Hull


The first one is easy. But it's only a warm-up.
Step 2: The Cannon Hinge


This part will fit in the uper hull that we will make just after. The cannon will fit inside and will be removable to make the transportation easier. Don't put too much glue, this part must fit its height in the hull. While the glue is drying, put some weight on it.
Step 3: The Upper Hull


This part will remain on the lower hull, and can be removable to access to the electronics and the cannon hinge.
Step 4: The Mudguards


They remain on the uper hull's sides. I made it removable so i can add the front part (which is curved, i didn't dare to design it) later.
Step 5: The Ventilation Face


This face remains on the upper hull. It hides the tensioner (it will be made later).
Step 6: The Front Face


It allows to access to the drive wheels gears.
Step 7: The Back Face


It is removable to allow to put the tensioner in its slide before hiding it.
Step 8: The Front Wheel


Take a ~76mm long 3mm rod.
It's the wheel which will pull the tracks. Be careful to align the teeth of both wheels layers, it happened to me to glue the two teethed wheels on the wrong slots, so just follow the dashed lines to undertsand what i mean (sorry for my bad english by the way :S )
Just stack every layers around your soft rod and add the five arms around it. Put a nice amount of glue on it, it must not slide around the rod. Then add the teethed wheels.
On the other side, add your wheel at~26mm away from the wheel. If it is the lasercut one, glue it firmly.
Step 9: The Back Wheel


Same thing for the back wheel but around a piece of tube (18 mm long for 6 layers). Add a 40mm screw but don't hide it with the cap now. We will wait to put it on tensioner before.
Step 10: The Support Wheels


Each wheels is coupled by pair on an hinge, except for the one in the center which has its own hinge (there is an odd number of wheels on a side, i might do it that way) .
Step 11: The Wheel Caps


This parts will fit on the support wheels in order to hide the screw heads. They are designed to be removable, so don't add glue when you put them. We will add them at the end.
Just stack all the layers in order.
Step 12: The Cannon


I suggest you to make the barrel separately before fit it in the breech. The total length of the barrel will depend of the maount of glue between every layer. I suggest to make the barrel approx.17cm (for the one-doted layers).
Step 13: The Servo Holder


This case receives the servos and hold them at the center of the tank. screw with a scrap of screw rod and two nuts.
You will need to hack the servos to make them able to turn 360° instead of 180°. There are two parts to cut out inside the servo.
Step 14: The Tensioner


The tensioner will hold the back wheels and use the screw to slide backward to make the future tracks stretched. You can access it by removing the ventilation face.
Step 15: The Tracks


Here comes the worst part : The tracks (*dramatic music*). It is a succession of two different track parts that turn around a tooth pick.
I suggest you to glue each track part already in the previous made one, to keep every hole parts perpendicular.
Be ready for about two days of work... Each tracks counts around 80 track parts.
Step 16: The Electronics
Addendum 11/25/2019 :
It has been motorized by an old friend, one of the Delahousse brothers, for the Paris Maker Faire with two DC motors and RC airplane controller nd battery.
The interior had to be cut and glued at the last moment, so i can't really show you how for now.
However, I edited a little video to show it in action !

Participated in the
Make it Move Contest


