

Introduction: Cat Breading Costume


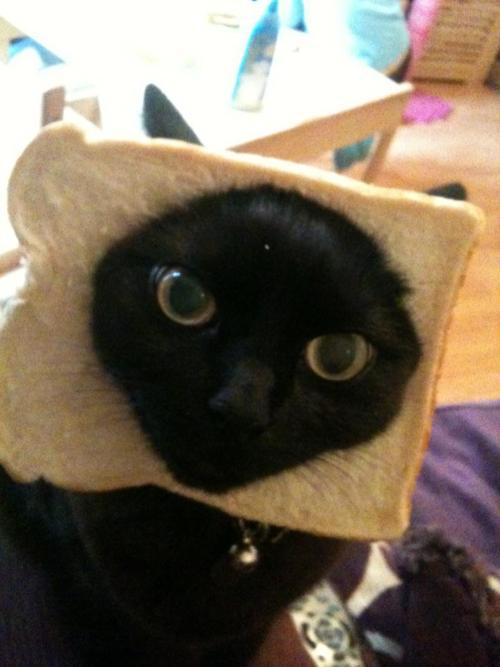
Cat breading is the latest cat-centric meme sweeping teh internetz! It involves putting a piece of bread on your cat's head, photographing their (often horrified) reaction, and then posting the pictures on the internet. (It's kind of like planking, but for people who aren't athletic and like to annoy their cats.) For those who are not familiar, a quick Google image search will lead you to pages and pages of photographs of breaded cats with expressions ranging from "ermahgerd there's a bread on mah head!", "i is totally freakin out right now", "dis is not cheezburger!!!!", to "srsly dude, this is sooo embarrassing", "wtf are you doing to me, man?", and the vindictive "i is gonna pee on all yur clean underwear later...."
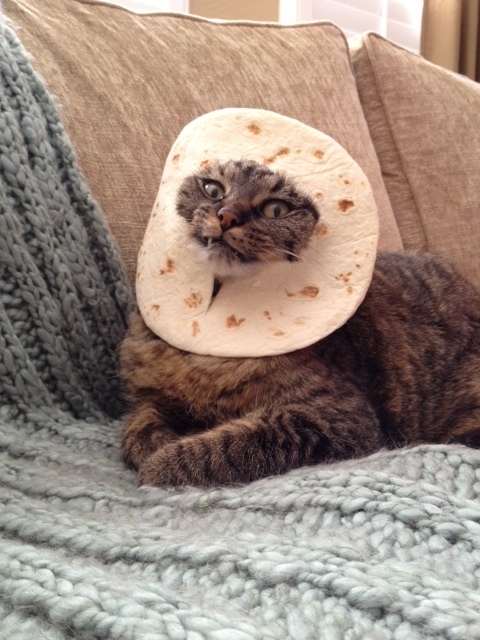
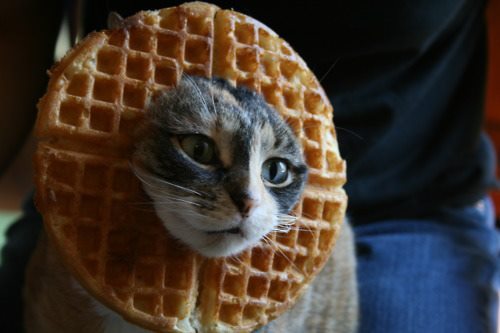
I made this costume mostly so I could openly look at cat pictures at work all day without it being weird, but it turned out to be a really easy last minute costume that takes about an hour start to finish. I went for the classic sliced bread look for my costume, though recently, cat-breading enthusiasts have been using many new forms of bready material to push the limits of this meme (see cat pita-breading, cat tortilla-ing, cat rice-caking, and cat waffling).
Here's how I made it...
Step 1: Materials


Materials:
at least 1.5'x1.5' of 2" cushion foam (fabric store)
tan felt
sturdy cat ear fabric (I used fabric form a cheap witch's hat)
black eyeliner (for drawing on nose/whiskers)
Tools:
hot glue gun
razor blade
scissors
Step 2: Draw Bread Slice Shape


Use a pencil to draw out a ~1.5x1.5' slice of bread on the foam. You will use this as a guideline for cutting in the next step. Be careful not to overdo it with the pencil, you won't be able to erase the lines later, so be sure you don't draw too much into the interior of the slice.
Step 3: Cut Out Slice


Use a razor blade to cut out the bread slice from the foam.
Step 4: Clean Up Edges


Use the blade to clean up any jagged edges in your foam, be careful not to cut your fingers doing this!
Step 5: Cut Tan Felt

Cut a long 4" x 6' strip of tan felt. This will be used to make the crust of the bread.
Step 6: Glue Crust on Bread


Use a hot glue gun to glue the tan strip around the outside of the bread slice.
Step 7: Make Crust Look Pretty


Roll the edges of the crust and glue them down to the slice with hot glue.
Step 8: Cut Hole for Face


Cut a small oval hole in the center of the slice. Start with a hole that is too small to be safe.
Step 9: Adjust Hole Size


Use the razor blade to slowly increase the size of the hole until it fits securely around your face.
Step 10: Make It So That You Can Breathe


I cut away some extra material near the bottom of the slice so that the costume would not choke me after prolonged wear.
Step 11: Cat Ears


Find some sturdy black/grey/brown (whatever color of cat you are) material. I used some of the black foam material from the top of a cheap witch's hat I found at my local dollar store. Felt works too. Cut the material into two large triangles.
Step 12: Glue Ears


Fold over the edges of two sides of the triangles and glue them down. This will give the ears some extra structural stability.
Step 13: Round Ears


I rounded the tip of my cat ears a little. You may leave them pointy if you like.
Step 14: Glue Cat Ears on Bread


Finally, glue down the cat ears to the slice as bread as shown in the images. Be sure not to make them too big, or thy will appear bat-like.
Step 15: Costume Complete!

The last step is to use eyeliner to draw on a nose and whiskers. (Bonus points if you make yourself a tail too!) Then be sure to photobomb all of your friends' halloween pictures by making crazy panic-stricken cat faces all night!

Finalist in the
Autodesk Employee Halloween Contest

Participated in the
Halloween Easy Costumes Contest


