

Introduction: Cheap Arduino SD Card Reader

Hello Everyone
When you make a project using an Arduino sometimes you need to save/load data, but SD card readers can be pricey so in this tutorial I will show you how to make one for under R70 or roughly $5. Most part are easy to come by ,and some can be salvaged.
Step 1: Parts & Tools
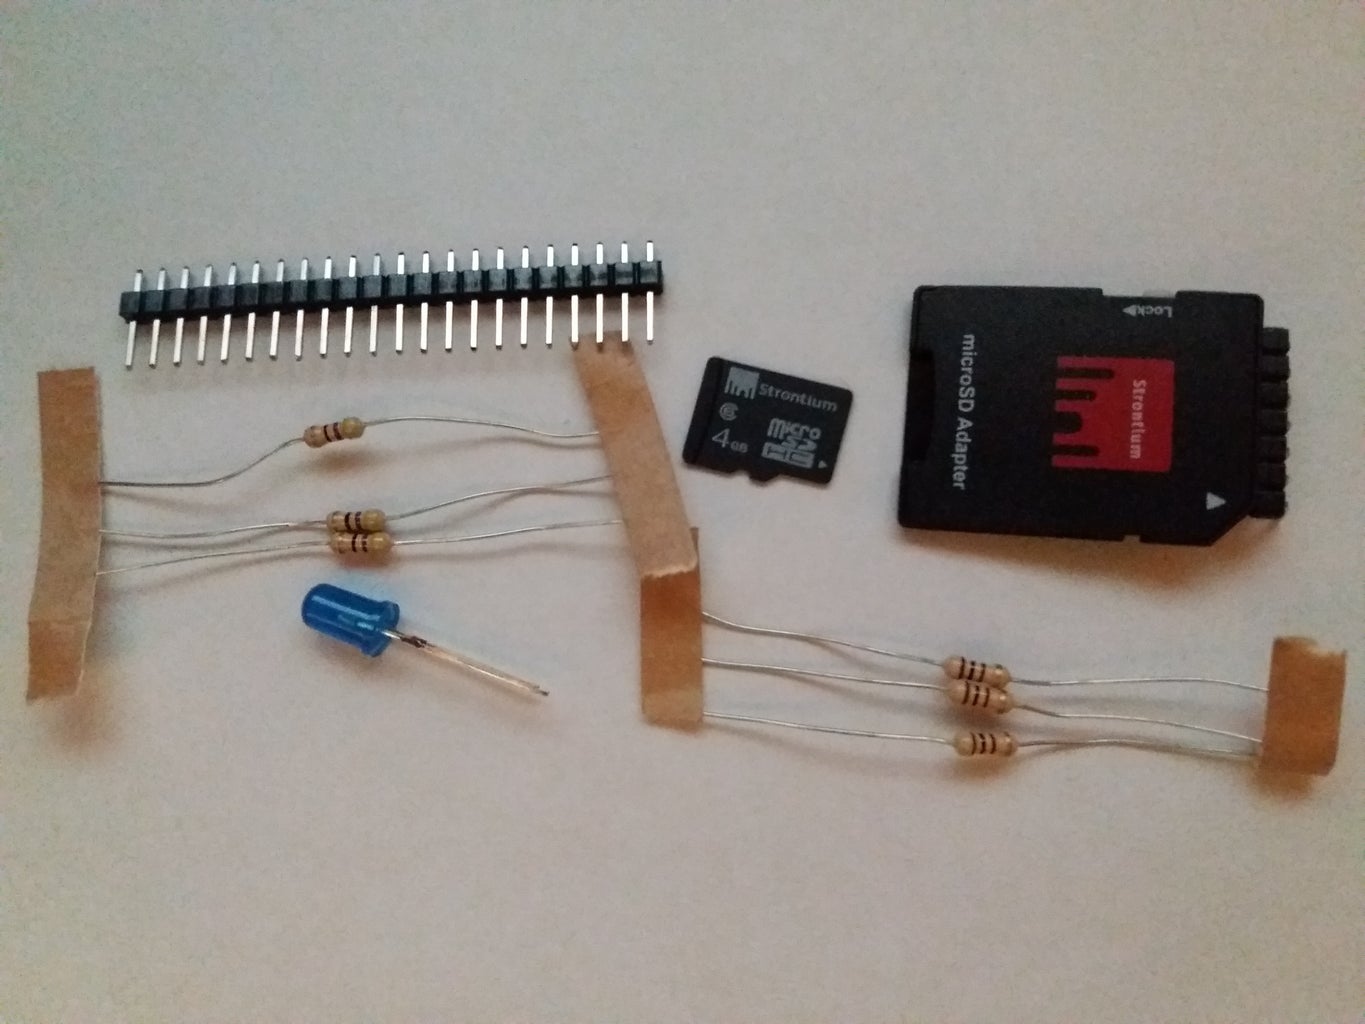
Parts you will need:
- A Micro SD card and adapter (R55 or $3.74)
- Resistors (I used 1000Ω and 470Ω)
- 7 pin Straight/90 degree Header (I bent mine but it depends on you)
- 6 pin Straight/90 degree Header (I bent mine but it depends on you)
- Wire
- Veroboard/Stripboard
- LED*
Tools you will need:
- Soldering Iron with Solder
- Helping hands*
- Wire cutters and pliers
- Multimeter with that can test Continuity*
*Not needed but nice to have
Step 2: Resistors

You may have noticed that I didn't specify the resistance of the resistors you need. There is a good reason for this, you see the Arduino provides 5V out of its pins and a SD card uses 3.3V but can handle up to 3.5V so in this tutorial we are using voltage division to give us the voltage we need. If you don't understand voltage division go read up about it but basically it is just the formula used to calculate how voltage is divided over resistors in series.
The formula is:
Vout = ((Z2) / (Z1 + Z2)) * Vin
So I use resistors with the Values 100Ω and 47Ω
so Vout = ((1000) / (1000+470)) * 5 = 3.4V which is between 3.3V and 3.5V
Thus as long as your resistors give you an output of around 3.3V it should work
Step 3: Preparing the SD Card

I could not find a place that would sell me a SD card holder so I simply Soldered the 7 pin Right angle header directly to the micro SD to SD converter. After it has been soldered I suggest that you use a multimeter to check if the solder points are proper and that the pins do not short with one another.
Step 4: The Circuit

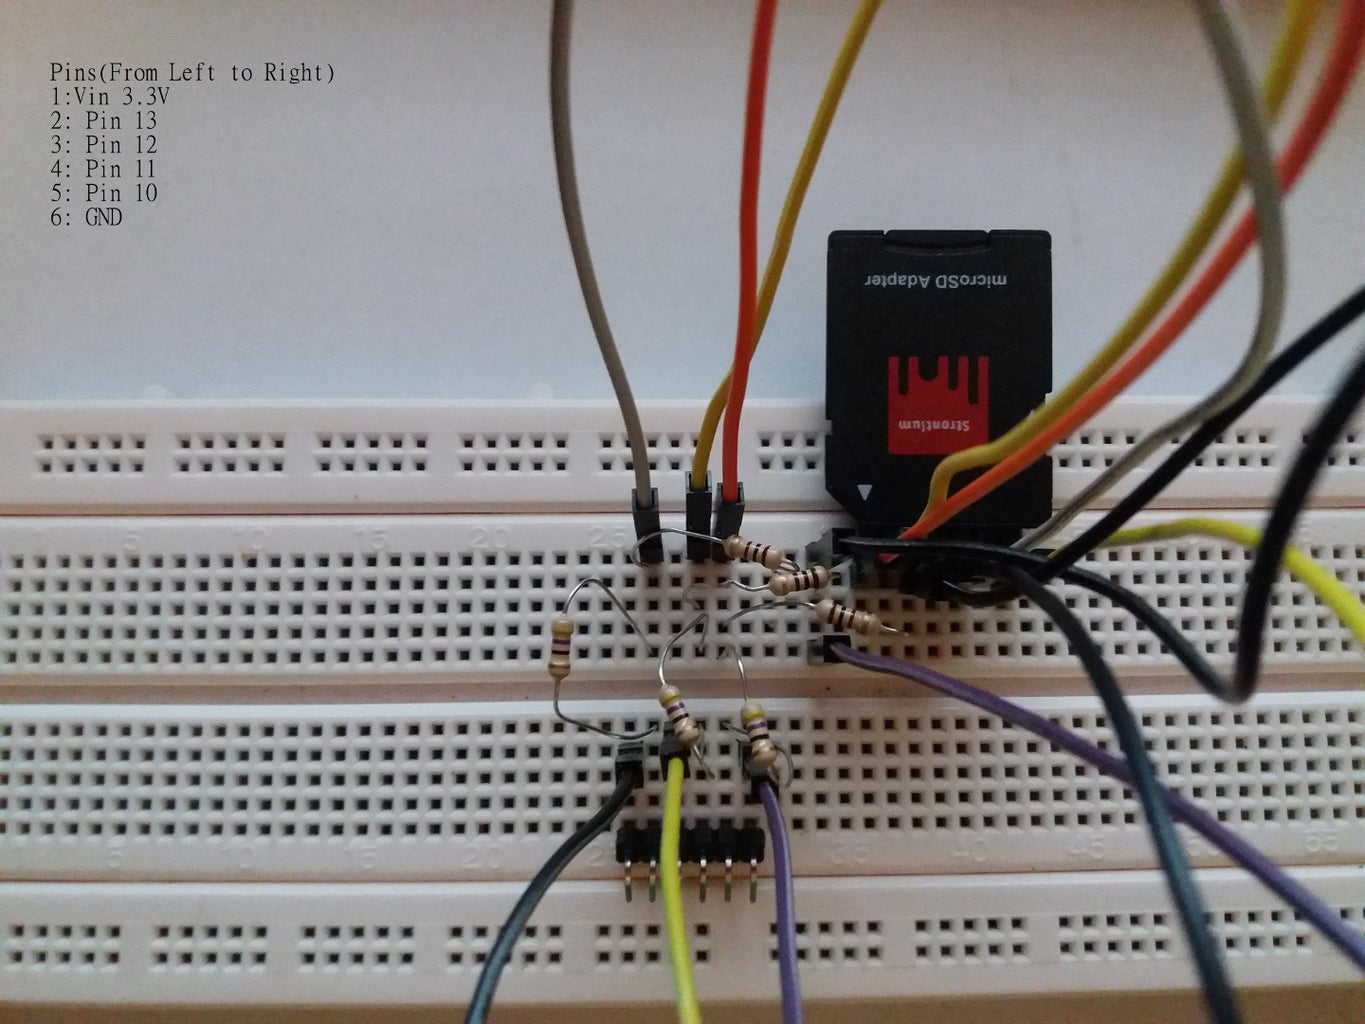
In the image you will notice the two headers the 6 pin header goes to the Arduino and the 7 pin goes to the SD card. Pin 6 on the SD card Header goes to nothing. I strongly suggest that you build it first on a bread board and test before soldering it. I take no responsibility if you damage anything of yours. If you want to add the resistor it would go in series with Vin with a resistor.
Step 5: Soldering


Soldering the components is easy, just follow the circuit diagram in the previous step. If you want an LED you must solder it in parallel to the entire circuit but do not forget the resistor I used one with a value of 220 Ohms. You can use any resistor just make sure that you do not draw too much power from the Arduino.
Step 6: Testing & Troubleshooting


I tested using the built in examples include with the Arduino IDE, and remember to set the pin to the correct one -pin 10 in my case-.If it does not work and you receive an error in the serial monitor then check for bad solder points and that you do not have any short circuits.You do need to insert a micro SD card to test.


