

Introduction: Cheap But Convincing Masquerade Masks


Here's a cheap way to make masquerade or Venetian masks that look as good as real ones.
Most of my body art work requires some sort of props. These are often used only once or twice so they have to be cheap. Good quality masks start at around £20.00 GBP and go on up to hundreds of pounds for an original. Far too expensive to justify for a single shoot.
We're going to use readily available materials to create some nice masks.
Step 1: Materials

What you will need to make these masks.
1 Pk cheap styrene joke shop masks
Some car repair polyurethane resin and glass tissue
Hot malt glue
Cyanoacrylate GEL super glue
Some off cuts of material (I like satin)
Artists acrylic paint and ink
Some lace edging (if you want to get really fancy)
Some two part epoxy putty.
Imagination
The joke shop masks are really cheap, I paid £5.00 for 10 masks, but they are pretty poor quality and at first don't look too promising. The eye slots are all wrong and they have awful nose and mouth holes. The noses are way too small, the lips are not well formed and they are really thin and floppy.
Never mind we can cure all that!
Here's the basic mask. I've marked out better eye holes with a felt pen.
Step 2: Cut the Mask

Using a pair of sharp scissors, cut out the new eye holes. The exact shape and size will depend on the mask you want to create.
I'd advise finding and image of a mask you like and then cutting to that shape.
Here is the original and the trimmed out mask.
Also at this stage you need to decide on the final shape of the actual mask and trim to that shape too.
Step 3: Reinforcing


To cure the 'floppy' nature of these masks, once you have cut it to the final shape,
Turn it over and paint on a thin layer of car repair resin. Allow 10 mins for it to cure then add a second layer adding a layer of tissue to the resin. You will be amazed at how strong the masks becomes after it has cured. Leave it for a couple of hours and then trim up with sharp scissors.
Sand any sharp or rough edges with some normal sandpaper or use your Dremel which speeds it all up a bit. The tissue will block off the poor nose and mouth holes.
Step 4: Adding the Designs

Here I am making a jester harlequin type mask. Since this is a 3/4 mask the problems of the nose and mouth are not an issue.
The mask has been trimmed to shape and a diamond pattern has been drawn on in felt pen.
Using general purpose glue I have stuck on some diamonds of red satin from some off cuts I got for nothing from a dressmakers. Don't worry too much if the diamonds aren't an exact fir at this stage.
Step 5: Start to Paint

Here the red satin has been trimmed back and I'm painting in some black diamonds using acrylic hobby paint.
You can see that the edges are a little ragged.
Step 6: The Clever Bit

Next, very carefully run a bead of hot melt glue round the outside edge of the mask and around the eyes. paint the bead gold (or whatever colour you choose).
Using the superglue gel, run a zig zag bead along each edge of the diamond and leave it overnight to dry rock hard. paint the zig zags in dark brown, feathering the edges over the outer part of the diamonds. You can use a spray can or an airbrush to get a really good effect. Once dry over-paint with gold and silver using the 'dry-brush' technique to highlight the tops of the super glue.
Alternatively, you could use some nice gold lace edging available from material suppliers. You don't need much.
Step 7: Other Designs


If you want a full face mask, you will have to sculpt a new nose and lips with two part epoxy putty.
I found this task very daunting, but it turned out to be easier than I thought.
You can add cardboard or plastic extensions to make a full Jester mask or feathers and what not for other designs. Take a look at the ritual scene from 'Eyes wide shut' or do an internet search for more ideas.
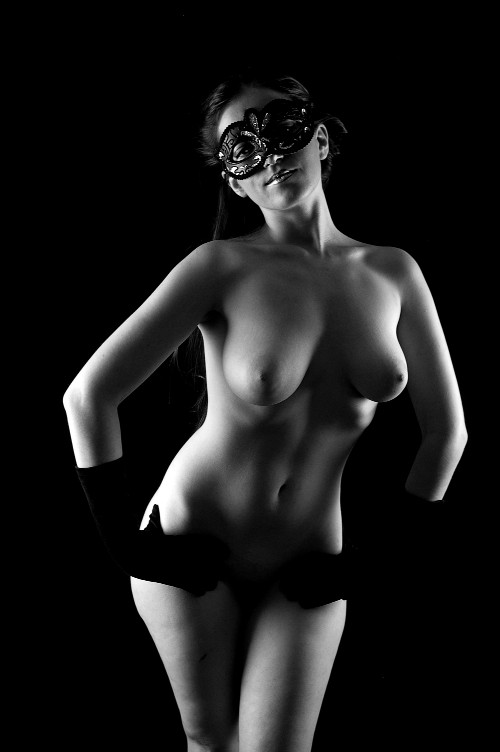
To see why we made these masks, and a shot from the final shoot, you can see an image here, but be warned there is non-explicit nudity before you click the link!
Masked girl


