

Introduction: Child Behavior Modifier


The Child Behavior Modifier records how many times your child has gotten into trouble ( aka Strikes) and when they reach three, a buzzer goes off and an lcd screen announces that they are grounded.
Step 1: Start Simple: Add a Button

The first Step in this Project is simple. Add 1 Button. In this step you need, 4 Male to Male Wires, 1 220 Resisitor and a push button.
<ol><li> Connect the 5V on the Power side to the positive row on the breadboard<li> Connect the GND to the negative side of the breadboard<li>Insert the pushbutton onto the breadboard<li>Connect the power on the postive row to left bottom part of the push button<li>Ground the button by using a resistor to the bottom right part of the push button to the negative row of the breadboard.<li>Connect #13 on the Digital side of the Arduino to the top right side of the button.</ol><p>Verify with your code that the button is registering:</p><p>int child1ButtonPin = 13;//This is the pin our push button is connected to</p>
int child1ButtonState = 0;//Reads the button's state (on/off)
int child1Strike = 0;	// How many strikes the child has
// the setup function runs once when you press reset or power the board
void setup() {
  Serial.begin(9600);
  pinMode(child1ButtonPin, INPUT);
}
// the loop function runs over and over again forever
void loop() {
  //read the button's state (on or off)
  child1ButtonState = digitalRead(child1ButtonPin);
  if(child1ButtonState == HIGH)//Button is pressed
  {
    Serial.println("HIGH");
    delay(5000);
  }
if(child1ButtonState == LOW)
{
Serial.println("LOW");
delay(5000);
}
}Step 2: Modify Code to Register Button Presses


Modify the Code to register a button press:
int child1ButtonPin = 13;//This is the pin our push button is connected to<br>int child1ButtonState = 0;//Reads the button's state (on/off)
int child1PreviousState = 0; // Previous button state
int child1Strike = 0;
// the setup function runs once when you press reset or power the board
void setup() {
  Serial.begin(9600);
  pinMode(child1ButtonPin, INPUT);
}
// the loop function runs over and over again forever
void loop() {
  //read the button's state (on or off)
  child1ButtonState = digitalRead(child1ButtonPin);
  if(child1ButtonState != child1PreviousState)
  {
    if(child1ButtonState == HIGH)//Button is pressed
    {
      child1Strike ++;
      Serial.println(child1Strike);
      delay(1000);
    }
  }
}
Next Modify the Code so that the child gets 3 strikes after which they will receive a message that they are grounded:
int child1ButtonPin = 13;//This is the pin our push button is connected to<br>int child1ButtonState = 0;//Reads the button's state (on/off)
int child1PreviousState = 0;
int child1Strike = 0;
// the setup function runs once when you press reset or power the board
void setup() {
  Serial.begin(9600);
  pinMode(child1ButtonPin, INPUT);
}
// the loop function runs over and over again forever
void loop() {
  //read the button's state (on or off)
  child1ButtonState = digitalRead(child1ButtonPin);
  if(child1ButtonState != child1PreviousState)
  {
    if(child1ButtonState == HIGH)//Button is pressed
    {
      child1Strike ++;
        Serial.println(child1Strike);
if(child1Strike >=3)
{
Serial.println("Child 1 Is Grounded!");
}
delay(3000);
}
} }
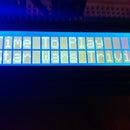
The Serial Moniter should look like the image above.
Note: Make sure you are comfortable with the delay. To little of a delay and it will register 1 button press as more then one!
Step 3: Add As Many Buttons As You Have Children


In this step, we simply copy the last couple of steps. Add as many buttons as you do children. In my case, I add four. Make sure to change your code the Digital pin that the button is wired to. In my case I used pins 12 through 10 to add my buttons. In case you need reminding here is Step 1:
<ol><li>Connect the 5V on the Power side to the positive row on the breadboard <li>Connect the GND to the negative side of the breadboard<li>Insert the pushbutton onto the breadboardConnect the power on the postive row to left bottom part of the push button<li>Ground the button by using a resistor to the bottom right part of the push button to the negative row of the breadboard.<li>Connect (your pin number) on the Digital side of the Arduino to the top right side of the button.</ol><p>You will also need to modify the code to handle all your buttons. Please keep in mind that if you need to be careful of the Strings you used. You cant add to lowercases together. Its best to declare 1 as a String object.</p><p>int child1ButtonPin = 13;//This is the pin our push button is connected to<br>int child2ButtonPin = 12;
int child3ButtonPin = 11;
int child4ButtonPin = 10;
int child1ButtonState = 0;//Reads the button's state (on/off)
int child2ButtonState = 0;
int child3ButtonState = 0;
int child4ButtonState = 0;
int child1PreviousState = 0;
int child2PreviousState = 0;
int child3PreviousState = 0;
int child4PreviousState = 0;
int child1Strike = 0;
int child2Strike = 0;
int child3Strike = 0;
int child4Strike = 0;</p>
// the setup function runs once when you press reset or power the board
void setup() {
  Serial.begin(9600);
  pinMode(child1ButtonPin, INPUT);
  pinMode(child2ButtonPin, INPUT);
  pinMode(child3ButtonPin, INPUT);
  pinMode(child4ButtonPin, INPUT);


}
// the loop function runs over and over again forever
void loop()
{
  //read the button's state (on or off)
  child1ButtonState = digitalRead(child1ButtonPin);
child2ButtonState = digitalRead(child2ButtonPin);
child3ButtonState = digitalRead(child3ButtonPin);
child4ButtonState = digitalRead(child4ButtonPin);
  if(child1ButtonState != child1PreviousState)
  {
    if(child1ButtonState == HIGH)//Button is pressed
    {
      child1Strike ++;
        Serial.println(String("Child 1 Has: ")  + child1Strike + " strikes");
if(child1Strike >=3)
{
Serial.println("Child 1 Is Grounded!");
}
delay(3000);
}
}
if(child2ButtonState != child2PreviousState)
{
if(child2ButtonState == HIGH)//Button is pressed
{
child2Strike ++;
Serial.println(String("Child 2 has: ") + child2Strike + " strikes"); if(child2Strike >=3)
{
Serial.println("Child 2 Is Grounded!");
}
delay(3000);
}
} if(child3ButtonState != child3PreviousState)
{
if(child3ButtonState == HIGH)//Button is pressed
{
child3Strike ++;
Serial.println(String("Child 3 has: ") + child3Strike + " strikes"); if(child3Strike >=3)
{
Serial.println("Child 3 Is Grounded!");
}
delay(3000);
}
} if(child4ButtonState != child4PreviousState)
{
if(child4ButtonState == HIGH)//Button is pressed
{
child4Strike ++;
Serial.println(String("Child 4 has: ") + child4Strike + " strikes"); if(child4Strike >=3)
{
Serial.println("Child 4 Is Grounded!");
}
delay(3000);
}
}
}Step 4: Add a Buzzer


Now lets make sure that your children know that they are grounded. Lets add a buzzer. To connect the buzzer, follow these easy steps.
- Add a Buzzer to your breadboard, plan for space since an LCD screen is coming up.
- Connect the Postive side(the buzzer should have a + on the postive side) to the Pin of your choice. I did 9.
- Connect the other side to the grounded rail of your breadboard.
Next, modify your code to set the buzzer off when a child becomes grounded. There are a couple of different ways to code for your buzzer but I like tone(buzzerName, hertz, duration) for its simplicity So an example of this would be tone(buzzer, 4000, 300).
int child1ButtonPin = 13;//This is the pin our push button is connected to<br>int child2ButtonPin = 12;
int child3ButtonPin = 11;
int child4ButtonPin = 10;
int child1ButtonState = 0;//Reads the button's state (on/off)
int child2ButtonState = 0;
int child3ButtonState = 0;
int child4ButtonState = 0;
int child1PreviousState = 0;
int child2PreviousState = 0;
int child3PreviousState = 0;
int child4PreviousState = 0;
int child1Strike = 0;
int child2Strike = 0;
int child3Strike = 0;
int child4Strike = 0;
const int buzzer = 2;
// the setup function runs once when you press reset or power the board
void setup() {
  Serial.begin(9600);
  pinMode(child1ButtonPin, INPUT);
  pinMode(child2ButtonPin, INPUT);
  pinMode(child3ButtonPin, INPUT);
  pinMode(child4ButtonPin, INPUT);
  pinMode(buzzer, OUTPUT);
}
// the loop function runs over and over again forever
void loop()
{
  //read the button's state (on or off)
  child1ButtonState = digitalRead(child1ButtonPin);
child2ButtonState = digitalRead(child2ButtonPin);
child3ButtonState = digitalRead(child3ButtonPin);
child4ButtonState = digitalRead(child4ButtonPin);
  if(child1ButtonState != child1PreviousState)
  {
    if(child1ButtonState == HIGH)//Button is pressed
    {
      child1Strike ++;
        Serial.println(String("Child 1 Has: ")  + child1Strike + " strikes");
if(child1Strike >=3)
{
Serial.println("Child 1 Is Grounded!");
tone(buzzer, 5000, 500); // Sends a 5 hertz sound for 5 milliseconds }
delay(3000);
}
}
if(child2ButtonState != child2PreviousState)
{
if(child2ButtonState == HIGH)//Button is pressed
{
child2Strike ++;
Serial.println(String("Child 2 has: ") + child2Strike + " strikes"); if(child2Strike >=3)
{
Serial.println("Child 2 Is Grounded!");
tone(buzzer, 5000, 500);
}
delay(3000);
}
} if(child3ButtonState != child3PreviousState)
{
if(child3ButtonState == HIGH)//Button is pressed
{
child3Strike ++;
Serial.println(String("Child 3 has: ") + child3Strike + " strikes"); if(child3Strike >=3)
{
Serial.println("Child 3 Is Grounded!");
tone(buzzer, 5000, 500);
}
delay(3000);
}
} if(child4ButtonState != child4PreviousState)
{
if(child4ButtonState == HIGH)//Button is pressed
{
child4Strike ++;
Serial.println(String("Child 4 has: ") + child4Strike + " strikes"); if(child4Strike >=3)
{
Serial.println("Child 4 Is Grounded!");
tone(buzzer, 5000, 500);
}
delay(3000);
}
}
}<br>Step 5: Add an LCD Screen


Now lets an LCD screen for clear and easy reading.
- First, add an potentiometer to your breadboard to control the lcd screen. Be careful of where you put it since you are probably running out of space by now.
- Use the front left to connect your potentiometer to the power rail
- Use the front right to ground your potentiometer.
- The back will be connected to the lcd screen.
- Add the LCD screen to your breadboard
- Ground the first screen pin to the grounding rail
- Wire the second pin to the power rail.
- Third LCD pin goes to Pin 8 on the Arduino
- Fourth LCD pin goes to Pin 7 on the Arduino
- Fifth goes to Pin 6 on the Arduino
- Sixth Pin goes to pin 5 on the Arduino
- Pins 7 through 10 on the LCD screen are empty
- Pin 11 goes to Pin 5 on the Arduino
- Pin 12 goes to the grounded rail
- Pin 13 goes to Pin 4 on the Arduino
- Pin 14 goes to the back of the potentiometer
- Pin 15 goes to the Power rail
- Pin 16 goes to the Ground Rail.
Now you will have to update your code to use the lcd screen. For that you will use the libary Liquid Crystal. Be careful of your lcd print statements. Remember to clear the screen when you need a new message. Also remember to set the cursor when you want to use two lines.
#include <LiquidCrystal.h> <br>
LiquidCrystal lcd(3,4,5,6,7,8); //Sets the LCD Screen
int child1ButtonPin = 13;//This is the pin our push button is connected to
int child2ButtonPin = 12;
int child3ButtonPin = 11;
int child4ButtonPin = 10;
int child1ButtonState = 0;//Reads the button's state (on/off)
int child2ButtonState = 0;
int child3ButtonState = 0;
int child4ButtonState = 0;
int child1PreviousState = 0; // The Previous state of the button pressed
int child2PreviousState = 0;
int child3PreviousState = 0;
int child4PreviousState = 0;
int child1Strike = 0;       //How Many Strikes a child has
int child2Strike = 0;
int child3Strike = 0;
int child4Strike = 0;
const int buzzer = 9;     // the Buzzer
// the setup function runs once when you press reset or power the board
void setup() {
  Serial.begin(9600);
  lcd.begin(16,2);
  lcd.print("The Child");
  lcd.setCursor(0,1);
  lcd.print("Behavior Modifer");
  pinMode(child1ButtonPin, INPUT);
  pinMode(child2ButtonPin, INPUT);
  pinMode(child3ButtonPin, INPUT);
  pinMode(child4ButtonPin, INPUT);
  pinMode(buzzer, OUTPUT);
}
// the loop function runs over and over again forever
void loop()
{

  lcd.setCursor(0,0);
  //read the button's state (on or off)
  child1ButtonState = digitalRead(child1ButtonPin);
child2ButtonState = digitalRead(child2ButtonPin);
child3ButtonState = digitalRead(child3ButtonPin);
child4ButtonState = digitalRead(child4ButtonPin);
  if(child1ButtonState != child1PreviousState)
  {
    if(child1ButtonState == HIGH)//Button is pressed
    {
      lcd.clear();
      child1Strike ++;
        Serial.println(String("Child 1 Has: ")  + child1Strike + " strikes");
        lcd.print("Child 1 Has:");
        lcd.setCursor(0,1);
        lcd.print(child1Strike);
        lcd.print(" Strikes!");
if(child1Strike >=3)
{
Serial.println("Child 1 Is Grounded!");
lcd.clear();
lcd.setCursor(0,0);
lcd.print("Child 1 is");
lcd.setCursor(0,1);
lcd.print("Grounded!");tone(buzzer, 5000, 500); // Sends a 5 hertz sound for 5 milliseconds
        }
      delay(3000);
    }
  }
  if(child2ButtonState != child2PreviousState)
  {
    lcd.clear();
    if(child2ButtonState == HIGH)//Button is pressed
    {
      child2Strike ++;
        Serial.println(String("Child 2 has: ") + child2Strike + " strikes");
        lcd.print("Child 2 Has:");
        lcd.setCursor(0,1);
        lcd.print(child2Strike);
        lcd.print(" Strikes!");
        if(child2Strike >=3)
        {
          Serial.println("Child 2 Is Grounded!");
          lcd.clear();
          lcd.setCursor(0,0);
          lcd.print("Child 2 is");
          lcd.setCursor(0,1);
          lcd.print("Grounded!");
            tone(buzzer, 5000, 500);
        }
      delay(3000);
    }
  }
if(child3ButtonState != child3PreviousState)
{
lcd.clear();
if(child3ButtonState == HIGH)//Button is pressed
{
child3Strike ++;
Serial.println(String("Child 3 has: ") + child3Strike + " strikes");
lcd.print("Child 3 Has:");
lcd.setCursor(0,1);
lcd.print(child3Strike);
lcd.print(" Strikes!");
if(child3Strike >=3)
{
Serial.println("Child 3 Is Grounded!");
lcd.clear();
lcd.setCursor(0,0);
lcd.print("Child 3 is");
lcd.setCursor(0,1);
lcd.print("Grounded!");
tone(buzzer, 5000, 500);
}
delay(3000);
}
} if(child4ButtonState != child4PreviousState)
{
lcd.clear();
if(child4ButtonState == HIGH)//Button is pressed
{
child4Strike ++;
Serial.println(String("Child 4 has: ") + child4Strike + " strikes");
lcd.print("Child 4 Has:");
lcd.setCursor(0,1);
lcd.print(child4Strike);
lcd.print(" Strikes!"); if(child4Strike >=3)
{
Serial.println("Child 4 Is Grounded!");
lcd.clear();
lcd.setCursor(0,0);
lcd.print("Child 4 is");
lcd.setCursor(0,1);
lcd.print("Grounded!");
tone(buzzer, 5000, 500);
}
delay(3000);
}
}
}
And thats it, thats all you need to build your own Child Behavior Modifer


