

Introduction: Clay Fairy House

Hello this an Instructable that I created and was inspired by Creative D2H's Fairy house.
This was a project I did for a class I am in. It took me about two weeks to complete so here is how I had created this project.
Step 1: Gather Your Materials
You will need:
1. Paper clay
2. Mace jar
3. Sculpting tools
4. Hot glue gun
5. cardboard
6. paint
7. Aluminum foil
Step 2: Cover Your Jar in Clay

First things first, cover you jar in the paper clay
Step 3:


Get your sculpting tools and just start carving little details or designs on your house, just like I did with the windows, door, and so on.
Make sure your windows are see through by taking the clay out in places.
For the platform you will need to cut out circles from the cardboard, hot glue gun both of the circles together then to the house, and after that cover it in clay.
For the roof grab the lid of your jar and wrap the outside of the lid in aluminum foil. The shape won't really matter as much. After that just cover it in clay.
Step 4:
Now that you have made the roof you will need leafs, to make the leaf, you will need to draw the leaf on a piece of cardboard, cut it out, and then mold the leaf from clay out of that.
Step 5:


Start painting your house I suggest you add about 3 coat of paint to give that nice color, as you can see the house currently has one coat of paint.
Step 6:


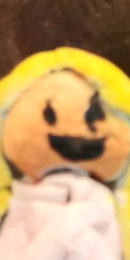
If you were wondering I made the fairy you just need a small ball of clay for the head, and oval like shape for the body and two small legs. stick them together with a toothpick and you should have your fairy. Paint her and there she is.
Step 7:


You should now be done, enjoy your fairy house.


