

Introduction: Clothes Dryer Heater Repair


If you have an electric clothes dryer, and it turns but there is no heat, it's very likely that the heating element is faulty. That's what had happened to my sister's dryer. Normally you would just replace the element and it would be fine. I, on the other hand, decided, in the spirit of "instructables" to repair the broken element.
Well, I succeeded, and here's how:
Note: When you figure out how to get the heating element out -- and there are instructions on the web for just about every make (just google "replace heating element for -----whatever make & model of dryer you have-----") --try this solution. It's cheap, but if it does not work for you, you can always buy a new heating element.
Tools needed
1. Multimeter
2. Needle nose plier
3. Blow torch or gas stove or small campfire to melt plastic insulation on the crimp-on-terminal or wire nut
Parts required
Crimp-on-terminal or wire nut
Step 1: Test Element

Using a multimeter (or DVOM -- Digital Volt Ohm meter) whatever you want to call it, test the heating element to determine if it is faulty.
With the multimeter set to Ohms, connect the meter probes to the contact terminals of the element.
If your meter shows open circuit, your element is definitely faulty.
If the meter shows some reading when connected, it's possible you have a good element, and there is some other problem with the dryer circuitry. You could google for instructions on how to test and diagnose the problem, I am not going into that in this 'ible.
If you have no meter or you don't know how to use one, just visually check the heating element coils. If you find a break somewhere, like I did, you've located the problem.
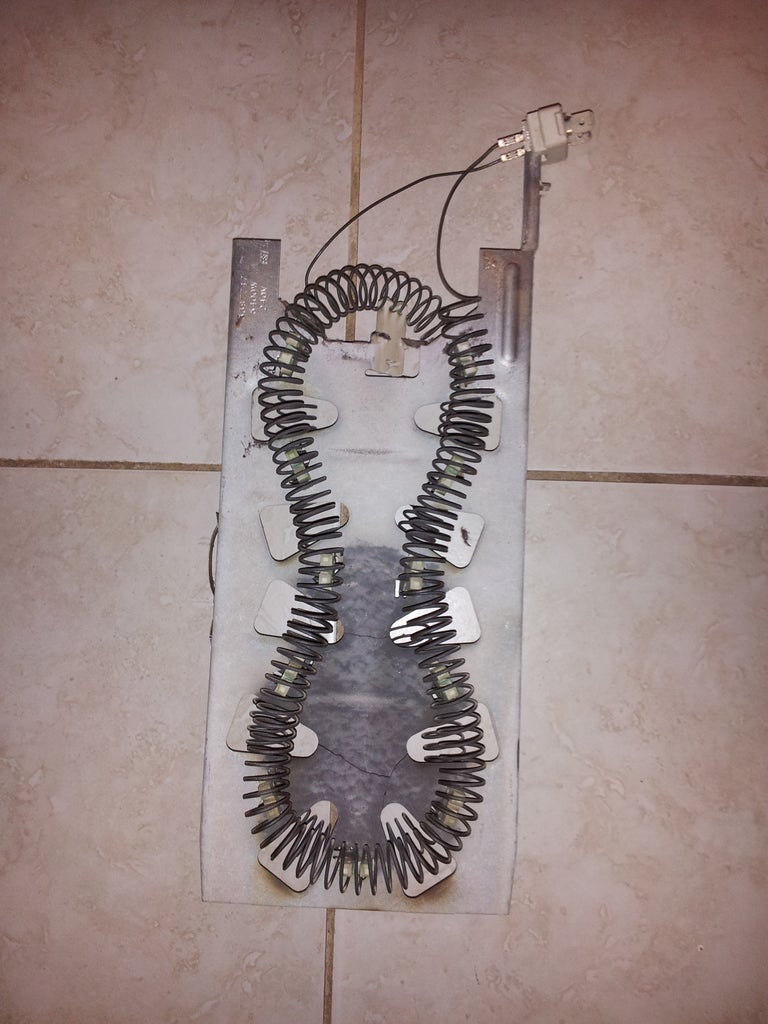
Step 2: Prepare Broken Ends

So I found where the coil was broken, by moving each turn of the coil with my fingers. It's hard to see this just by looking, but you may be lucky. Anyway, I had to find a way to repair the break.
I carefully striaghtened the broken ends with a needle nose plier. Remember that the element wire is probably brittle, so don't bend it around too much. I was a bit too hasty in doing this one and the result was that it failed and I had to redo the repair after a day. The second time around fixed it good!
Step 3: Prepare the Crimp-on-terminal or Wire Nut


I used a crimp-on-terminal to connect the broken element ends together. However, like I mentioned before, I had some small nicks in the wire ends after straightening, and the element failed after a day of use.
The second time around, I used a yellow wire nut, after carefully snipping off the damaged ends of the element.
Now, since this part is going to get red hot in use, you cannot leave any plastic insulation on the crimp-on-terminal or wire nut that you are going to use for the repair. The plastic on the crimp-on-terminal just pulled right off. I used a small propane torch to melt off the plastic on the wire nut for the second repair.
I also broke off the blade part of the crimp-on-terminal so there was no extra metal that could short on the element body.
Insert the broken ends of the element into the crimp-on-terminal and squeeze the metal with a plier, or better still with the crimping portion of the plier -some pliers have that. In case you are using a wire nut instead, carefully screw the ends inside the wire nut metal section, using a plier.
Once the ends are securely connected together, make sure the element coils will not be touching the metal body of the element housing, especially where you straightened the broken ends. Carefully bend the repaired section away from where it may short out.
Test the element with a meter to make sure it works and then insert it back into place and run your machine.
If all went well, your dryer should be working again. My sister's has been running for a month now without problems.
A quick note: Before putting your dryer back in service, make sure you check that the dryer vent is clean. Over the years, lint buildup in the vent, will block the flow of air, causing the heating element to overheat. That's what probably burnt out your heating element in the first place. So make sure you clean your dryer vent at least once a year.


