

Introduction: Combat Robots


I am not going to define robot combat. What I will do is cover how to construct a one. There is no perfect way to build a robot so I'll just run by different ways you can build a robot and find events. (For the robot contest I'll tell you that I'm between 13 and 18)
Step 1: Weight Classes


The weight classes for combat robotics are
Flea weight- 75 grams
Fairy weight/ U.K Ant- 150 grams
U.S Ant weight- 1 pound
Beetle weight- 3 pounds
Mantis weight- 6 pounds
Hobby weight- 12 pounds
BotsIQ Mini class- 15 pounds
Feather weight- 30 pounds
Light weight- 60 pounds
Middle weight/BotsIQ Large class- 120 pounds
Heavy weight- 220 pounds
Superheavy weight- 340 pounds
The most popular class is U.S ant weight. It is cheaper to build a small robot over a big one. As a rule of thumb go to the Builder's Data base event page, find an event near you, or was by you. See what the lightest weight class with competitors is and go for it.
Step 2: Weapons


There are a variety of weapons that combat robots use. However, wedges tend to win. If you are reading this you are most likely a first time builder meaning that you should kiss even more than the pros. So here is just a list of some of the common weapons.
Spinners
1. Bar spinner- Very simple and sturdy, still not for the first time builder
2. Dome spinner- Powerful, but a bit complicated to make
3. Drum spinner- Tremendous amounts of energy but VERY hard to balance
4. Full body spinner- A shell spins around the robot as an impacter
Lifters/ Flippers
1. Flipper- Requires pneumatics, not easy, but has been done successfully more than once
2. Lifter- you could make a complicated four bar lifter, or a single pivot lifter, both designs have been proven successful
Unusual Weapons
1. Crushers- Requires hydraulics, these designs are hard to make but deadly win implemented right
2. Grabbers- Self explanatory, grab a robot, pick it up, drop it. Very hard to make.
3. Axes/hammers- Not really unusual, but I have to put it somewhere. Do NOT put on anything lighter than a hobby weight.
Passive Weapons
(Very good for beginners)
1. Wedges- Simple, few moving parts, it's a fact wedges win
2. Rammers- Need a lot of power, more expensive than a wedge do to the larger batteries and motors. If you build a rammer make it fast and make sure it accelerates quickly, your arena isn't that large.
3. Plows/Scoops- Both effective, scoops start shallow the shoot almost straight up like on Breaker Box, you can make a nice 'spinner killer' with these.
Check out wikipedia for a more in depth list.
I would suggest a wedge to any newcomers. They are successful and simple, therefor easy to build. If you must incorporate an active weapon then go for a servo operated lifter.
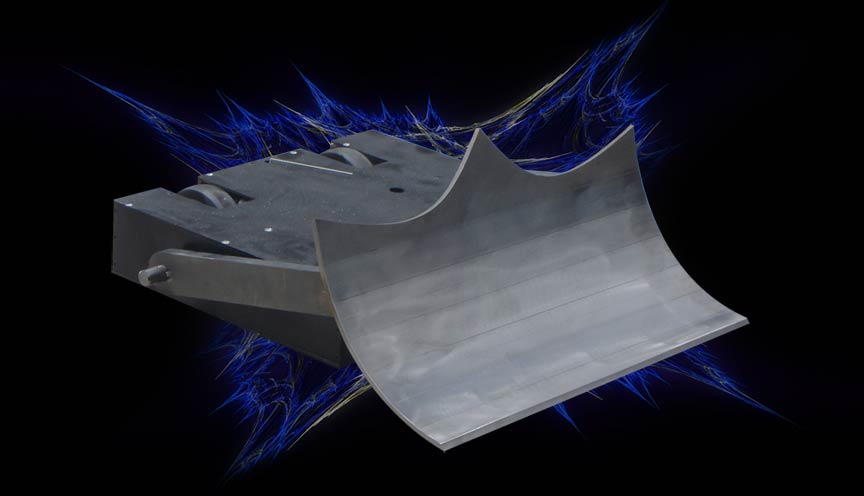
Step 3: Armor


A short introduction is here. A few things to remember.
1. Make your armor as thick as possible. Just be sure not to go over the weight limit in doing so.
2. Wood can be a good armor when used appropriately. Robotica's first season's champion Run Amok used wooden top armor.
3. There is good enough and over doing it. Small robots top armor hardly ever gets scratched, don't use a titanium top cover when UHMW will do.
4. Do not mess up miracle materials like lexan by bolting them tightly to you chassis, give it room to flex so that it can absorb the impact of other weapons.
Step 4: Chassis

I like aluminum for my chassis. It is inexpensive, strong and lightweight. I can easily bolt pieces together. That's why I use aluminum. However there are many suitable options. Whatever you do kiss as hard as you can and don't leave your comfort zone.
Welding is the preferable way to hold together a chassis, however this requires, a weld!Most people don't have a weld, including myself so I stick to drilling through bars of aluminum and bolting them together. Once I do this I can place sheet metal over my frame for armor. Remember, that is just one way to make a chassis. There are many more ways to build a chassis. I can't say one way is better than another. Just be sure to check out all your options before deciding.
Step 5: Motors


There are many different motors designed for different purposes. To decide on a motor always make sure other people use it. if it's popular there is a good reason it is picked over other brands. An example of popular motors are Copal's and the 'Beetle' series. The popular motors generaly come in series where there are different gear reductions for certain motors. Her's a list of popular drive train gear ratios.
4:1- Very fast, low torque though. Thes motors are ideal for fast wedges.
20:1- Pretty speedy, nice motors for a more aggresive wedge.
60:1- Good all around motors, stick them on a wedge, stick them on a spinner, stick them on a rammer if you overvolt them.
120:1 and above- For the pushy 'bot, not violent but powerful. I'd say you can push about anything with them.
As a note bigger wheels will increase your speed but also cut down on your acceleration, check on your event's arena size to find out what battery, wheels, and motors to use.
When mounting motors do not use glue, tape, or zipties. Do use screws and mounts made specifically for that motor.
Step 6: Electronic Speed Controllers


The name pretty much gives it away ESC's (Electronic Speed Controllers) controll the speed of the motor. There are a couple of things to keep in mind while choosing an ESC.
1. Peak amperage- Your motor should have a stall amperage rating, this is how much power the motors need if stalled. An ESC also has an amperage rating, your ESC's rating shows how much power it can supply your motors with at a time. Be sure to make sure your ESC's rating is higher than your motors stall amperage so even if you get in a pushing match your ESC's wont give out.
2. Weight- As a rule of thumb, when in doubt increase your ESC's Amperage. But there is a catch, ESC's with higher amperage ratings are heavier! Pick an ESC that is well above your stall amperage and is light and compact enough to fit in your robot.
3. Simplicity- There are two ways to set up an ESC, choose the one that you think you can do best.
The two ways to set up an ESC for differential steering (I.E tank steering) , the preffered method of combat robotics, are:
1. Two one channel ESC's: Two set this up you need two ESC's! The ESC's need to be one channel like this. You have to run them parerell from a single battery and then plug them in to the reciever and motors like how you would normally. (Shown in the picture), You may also need a V-tail mixer if your transmitter dosn't have an elevon mixing option.
2. One two-channel ESC- I would recomend this for a first time builder. They are very simple to install and only require one. the diagram below will show you how to install one.
Step 7: Transmitter and Reciever


Your radio is they most important part of your combat robot, without it your robot is a 100 or 200 dollar thing of garbage. As I repeat do not cheap out.
I would strongly suggest getting a 2.4 Ghz transmitter, with this there are no crystals to mess with. Also there can't be interference with other transmitters. If you do choose to go with another transmitter other than a 2.4Ghz be warned that:
1. You need crystals, these are inexpensive but you will need multiple because
2. You can't operate against an opponet with the same frequency and crystal color as you.
Step 8: Where to Get All This Stuff


I do not buy HobbyKing, you should not buy HobbyKing. Once I bought something from HobbyKing and the box it came in was half destroyed along with the componets. Several others have also complained about this others. I repeat DO NOT BUY HOBBYKING!!!
HobbyKing is good for getting cheap componets, not good componets.
The only online source I use reguraly is the RobotMarketplace, they provide quality products for a small price. What, what is that I hear? 60 dollars for a nice two channel ESC is not cheap? Well let me remind you that cheap and combat robots don't go together,
Besides the RobotMarketplace I also go to my local hobby shop and RadioShack. Although RadioShack dosn't carry hobby-grade transmitters and recievers they still carry a number of other electronics, heat-shrink tubing, solder, and soldering irons.
Step 9: Finding an Event


Check the Builder Data Base. If nothing pops up then your probably out of luck. If you live in Californa you may consider going to RoboGames, a regular robotic event that includes combat robots. However if there are no events near you, which isn't out of the question, you may have to start your own event. Just keep these in mind when hosting your own event.
1) Advertise- contact a locall news station and set up fliers all around town.
2) Safety- Have fire extinguishers, keep a first-aid kit, have some sort of protection for the builders and audience. Protection can be as simple as watching from inside a house as two robots duke it out on a table outside.
3) Have fun- you may want to follow all the regulations but don't be a drag about it. You may even consider changing up the game a bit.
4) Organization- Make sure the builders know what is going on, an uninformed builder is an unhappy builder.
Step 10: Naming Your Robot

You just finished constructing your really cool robot and right before you register for your event at the Buider Data Base you realize you havn't named your 'bot.
Name your robot according to what it is. The Spinna Killa is not an appropiate name for a wedge. Instead the Wedgster may prove to be a better name.
Now that you have your name picked out you better check the unique name database to see if someone else already has that name.
Or you can just forget trying to be cool and name your robot something funny like, Bannanna Slug Smoothy or Electric Lettuce. Just always be sure your name is original.
A name, although the least important aspect of your robot, is still important. Choose it well.
Step 11: T.O.D- My Robot


T.O.D stands for Thing of Destruction. I think it's a rather clever name that will scare the opposition away. I used a dicarded tin for the chassis and bolted everything else on. In order to save weight I drilled holes in the top armor.
TOD was fairly cheap to make
Transmitter and reciever- 50 dollars
Motors- 20 dollars
Bolts and Screws- 10 dollars
Armor- 20 dollars
Chassis- Free
Wheels- Free
Battery- Free
ESC- 60 dollars
Overall about 110 dollars.
So do you like my Instructable? Just be sure to rate and give constructive comments. Also keep in mind that this instructable is in the robot contest, the wheels contest, and the remote control contest.

Participated in the
Remote Control Challenge

Participated in the
Wheels Challenge

Participated in the
Robot Challenge


