

Introduction: Control AC Dimmer Lamp Using Arduino


For Many projects, you want to control some application works on AC Voltage ,Like AC Lamps , but working with High voltage is very dangerous if you connect any thing wrong or touch any AC component / naked wire which cause electrical shock
but today in this tutorial we will see how to control AC dimmer lamp using arduino in simple way and simple connection and simple programming code.
also you can integrate this code and hardware connection easily in your project , like Home automation , IOT, develop smart phone application and more.
Let's start with Component we need
Step 1: Components

The components we need to do this experiment are:
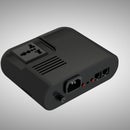
- Sugar device (Sugar300 or Sugar1000).
- C14 Power cable
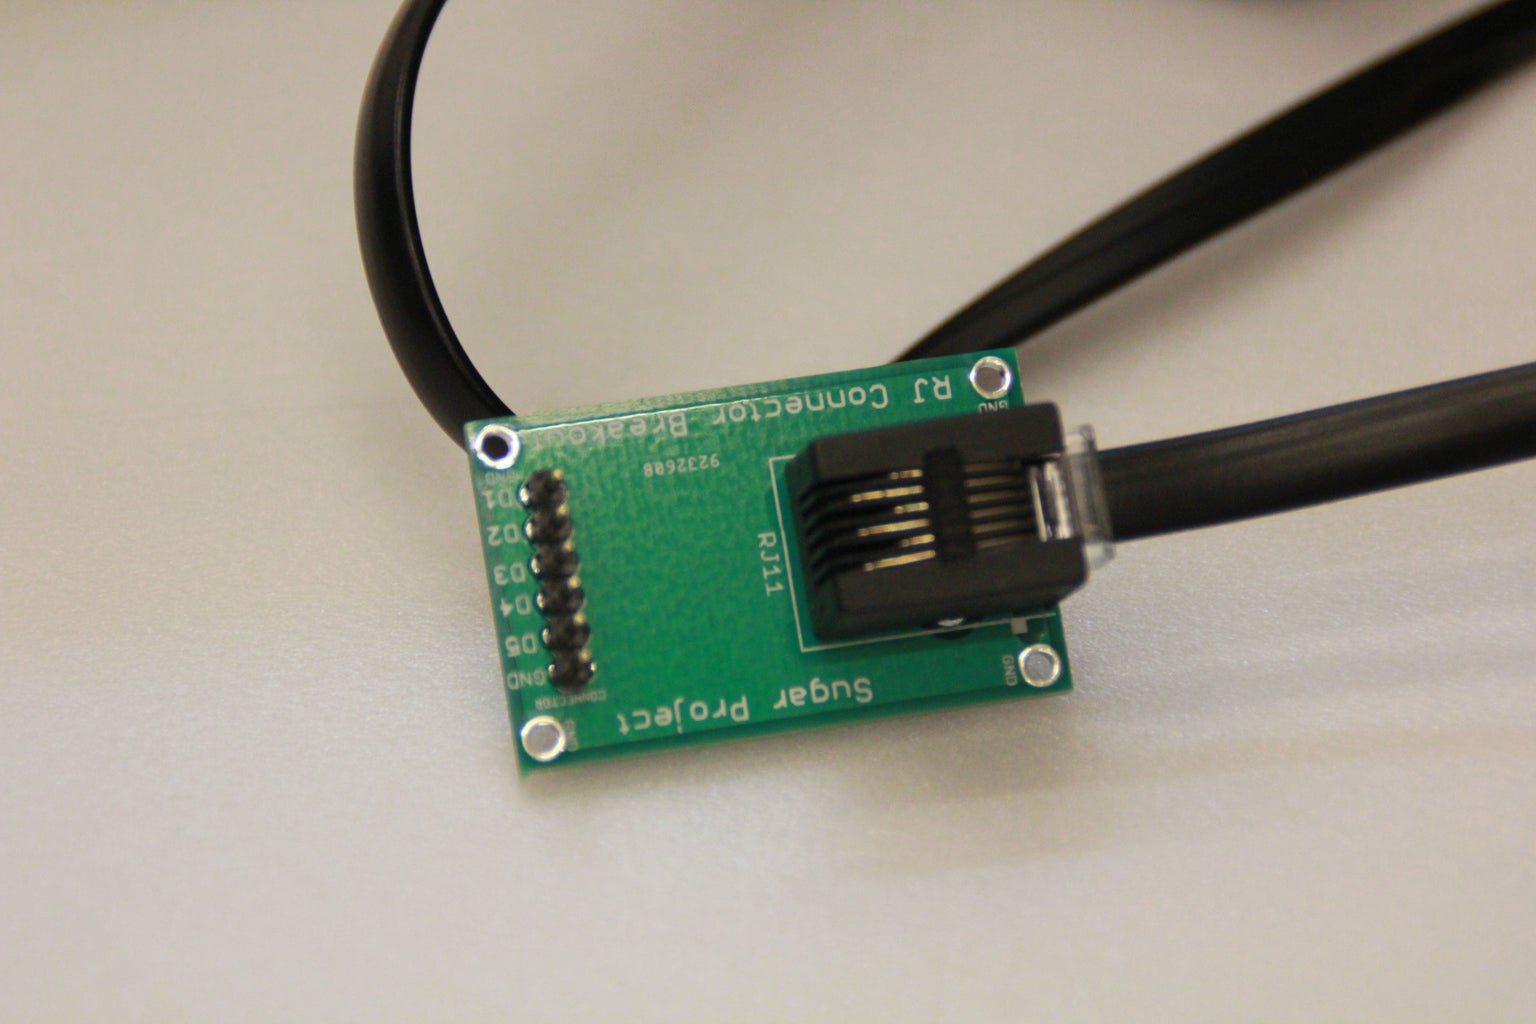
- RJ12 Cable
- Sugar RJ breakout
- Dimmable AC Light Bulb.
- Light bulb socket
- Arduino Board"I will use Uno here"
- Potentiometer 10K
- Braedboard
- Solderless Jumper
Now you ask your self:But what is Sugar device ? how it works and how to connect and program it ?
Now we will answer these questions
Step 2: What Is Sugar ?


Sugar is revolutionary device designed to control AC Loads working on 110V/220V ,Designed especially For Students , teachers , Engineers and Makers How are looking for a tool to Control AC Voltage and to be easy to connect and easy to program.
With Protect cover case sugar offers a high level of safety,No electrical shock could happen and allow to anyone want to learn , design and innovate any AC power project.
Sugar can be controlled through RJ12 Connector , and control The AC Output voltage using PWM , so just send PWM signal to sugar , and you will be able to control the device connected to Sugar in this way.
Sugar can control AC voltage in 2 different Way:
- Control AC voltage as a Switch ON - OFF
- Control Output voltage which is suitable or many Application like AC Lamp dimmer , AC Motor speed control , AC heater temperature control.
Sugar with this features and be controlled from any Electronics platforms , Like MCU (AVR , PIC, STM ,Ti ) or Development Board (Arduino , Raspberry Pi , Beagle bone , teensy , ARM ) all you need is PWM Signal to control Sugar device.
You can Read more About the features of sugar inour official website
Step 3: How to Connect Sugar Device ? Is It Complicated ?!


the answer is simple , No ,All you need is
- connect C14 power cable to power supply ,
- connect RJ12 Cable to sugar and then you will be ready to use Sugar device
With Sugar RJ breakout you can connect the Male header to any type of controller you have.
Attention: Sugar device offers a high protection from High voltages for the users, but also it's worth to remind you the AC voltage is very dangerous so be safe.
Now we can move to schematic
Step 4: Schematic


schematic for controlling circuit is very simple
all you need now is send PWM Signal from Arduino D9 to sugar to control the brightness of the lamp
Step 5: You Love Sugar Device ? We Need Your Help


Sugar is a startup project , designed and Manufactured the Prototypes in Taipei - Taiwan and Now sugar need your help to become a real product in the market and bring a simple tools to control AC voltage.
Sugar comes in 2 different type :
Sugar300 : can Handle Up to 300 W
Sugar1000 : can Handle Up to 1000 W
and both type support AC output voltage control "For Dimmer applications"
Hope you support us and become our backer Now on IndiegogoCampaign in 28th December 2016, we updated the artical ,you can visit our campaign page Here
Keep in touch with us onFacebook ,Twitter, Google+ , Instagram , Youtube official accounts
Visit Our websiteto see all featuresand tutorial and see the story behind sugar
Step 6: Code and Demo Video


Well we will write a code to control The brightness of the lamp
Let's take a look to the code :
//.......................................................................
/*
Simple code to demonstrate how to control Sugar Board using Arduino Uno to CONTROL DIMMABLE LAMP using push Potentiometer attached to pin A0 pin A0 >>> POT to control the the brightness this code is valid for D3,D9,D10,D11 pin only written by Mohannad Rawashdeh (Raw) */
const int SugarPin =9;
const int Sugar_Tog =A0; /* the brightness value between 12 to 64 12 means 0% 64 means 100% */
int brightness=12;
const int delayTime=2000;
void setup()
{ // define arduino PWM as an output
pinMode(SugarPin,OUTPUT);
//define Pot as an input
pinMode(Sugar_Tog ,INPUT);
analogWrite(SugarPin,brightness);
delay(50);
}
void loop() {
// read Pot
int PotTog =analogRead(Sugar_Tog);
//delay between each reading
delay(50);
int PWM_value=map(PotTog,0,1023,12,64);
brightness=constrain(PWM_value,12,64);
analogWrite(SugarPin,brightness);
delay(delayTime);
}
//.......................................................................
as an instruction for the code , to turn on light we wrote :
analogWrite(SugarPin,64);
To turn off light we wrote :
analogWrite(SugarPin,12);
To turn light on with 50% brightness we wrote :
analogWrite(SugarPin,38);
To turn light on with 75% brightness we wrote :
analogWrite(SugarPin,50);
for more information about the code , you can refer to our artical abouthow to control Sugar device using Arduino uno to see how to get these values.
And you can see the video for the same code
Thank you so much , hope you share the project for your friends and tell us your opinion about it


